The shift delete function is an extremely powerful function of Windows. It can accidentally delete files that are not easily recoverable.
This can be highly stressful and cause you a lot of headaches.
Don’t panic if you deleted data using the shift delete function! We have provided you with the four best procedures for recovering your data.
What Does Shift Delete Do
The shift delete function tells your operating system to bypass the recycle bin and mark the space available on your hard drive by marking it free using its file table.
The deleted data is not accessible through standard methods in this state, but your data is not lost forever!
Your operating system will delete your data forever once it writes new data to the same sectors as the shift deleted data.
Is It Possible To Recover Shift Deleted Files?
Yes, it is possible to recover data after it was shift deleted by a user if the operating system hasn’t overwritten the hard drive’s sectors containing this data.
It is crucial to recover this data immediately so there is no chance of permanent data loss or the need to spend money on advanced recovery services.
How to Recover Shift Deleted Files
If you accidentally deleted files, you may scour the internet for the best solution to recover your data. Look no further! We have provided you with the four best ways to recover shift deleted files.
Procedure #1: Data Recovery Software
The most recommended way to recover shift deleted files is using data recovery software like StarzSoft Data Recovery.
This software can recover over 1,000 file types from most modern storage devices.
You can use this recovery software on Windows 7, 8, 10, and 11, so you can always recover data no matter how old, or new your computer is.
Steps to recover shift deleted files using StarzSoft Data Recovery:
Step 1. Purchase and download the software
Free DownloadSecure Download
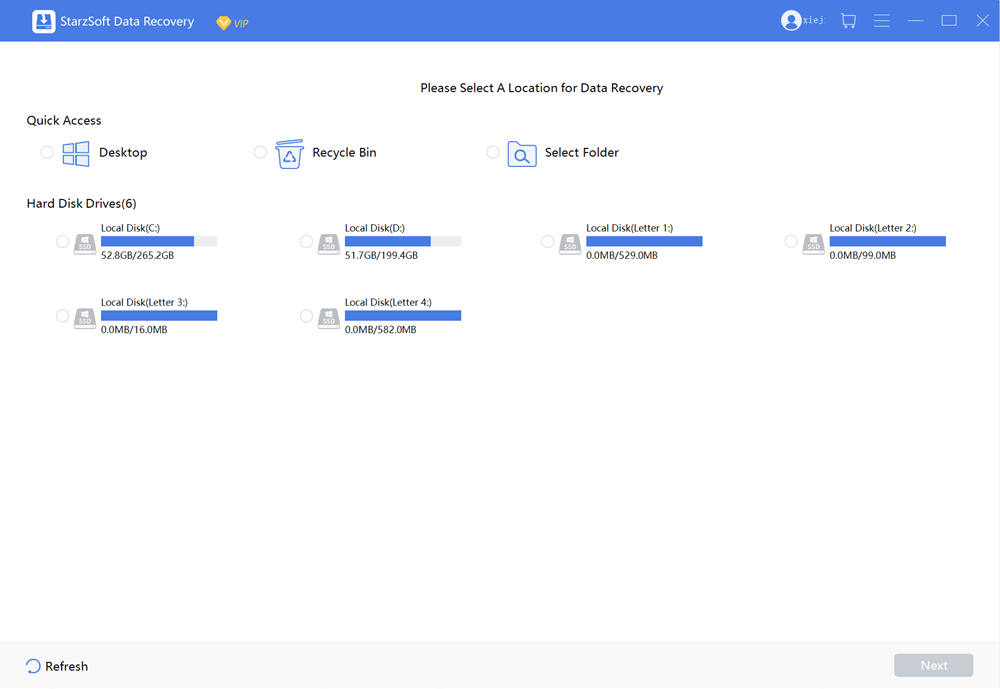
Step 2. Open the software and select the drive where your deleted files are located

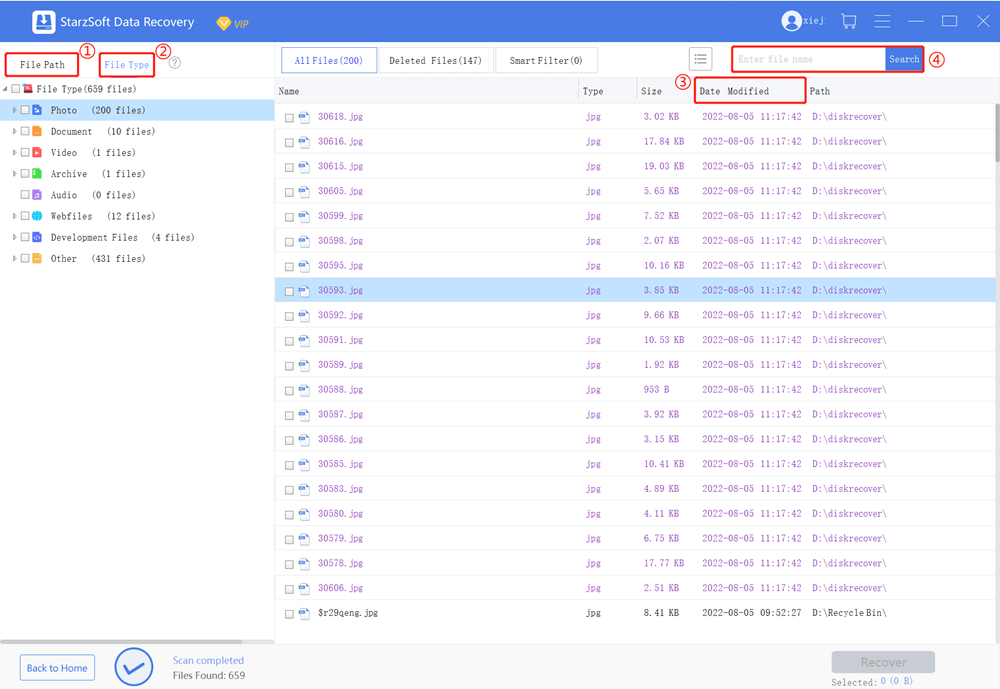
Step 3. Let the software run a scan on the selected drive until your data is found

Step 4. Select a location to save your restored data
It is as easy as that! You don’t need to be a computer wizard to take advantage of this powerful software. You don’t need to worry if complicated Windows backups will have the data you need 100% of the time.
You can trust StarzSoft Data Recovery, it will recover your data across any device whenever you need it.
Procedure #2: Windows Backup And Restore
Windows Backup and Restore is a powerful Windows tool that allows you to create backups of files and folders for later use.
You can also use this function to create system images of your operating system that you can use in the event your hard drive or operating system gets corrupted.
The Windows Backup And Restore function is available on Windows 7, 8, 8.1, 10, and 11.
You must first enable Backup and Restore before this function can recover shift deleted data.
Steps to enable Backup and Restore:
Step 1. Use the built-in Windows search bar for Control Panel
Step 2. Select the Backup and Restore (Windows 7) option

Step 3. Select the ‘Set up backup’ option
Step 4. If you already have a backup from another computer, select the ‘Select another backup to restore files from’ option
Step 5. Select a location to save your backup
Steps to recover shift deleted files using Backup and Restore:
Step 1. Use the built-in Windows search bar for Control Panel
Step 2. Select the Backup and Restore (Windows 7) option
Step 3. Click the ‘Restore my files’ button
Step 4. Find your data by selecting the ‘Search,’ ‘Browse for files,’ or ‘Browse for folders’ button
Step 5. Select a location to save your restored data
Procedure #3: Windows File History
Windows File History takes regular snapshots of your files in chosen directories. These snapshots form a library of dated files you can reference at a later date. Keep in mind that Windows File History cannot back up the entire operating system or restore an entire operating system. You can use Windows File History with Windows 8, 8.1, 10, and 11.
You must first enable Windows File History before this function can recover shifted deleted data.
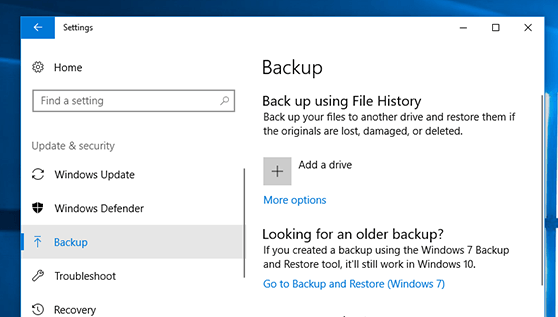
Steps to enable Windows File History
Step 1. Use the built-in Windows search bar for Restore your files with File History
Step 2. Click the ‘Configure File History settings’ hyperlink
Step 3. Click the ‘Select drive’ hyperlink to select a backup location
Step 4. Select the ‘Advanced settings’ hyperlink to configure how File History saves your data
Step 5. Select the Exclude folders’ hyperlink if you don’t want File History to back up specific folders
Step 6. Select the ‘Turn on’ button
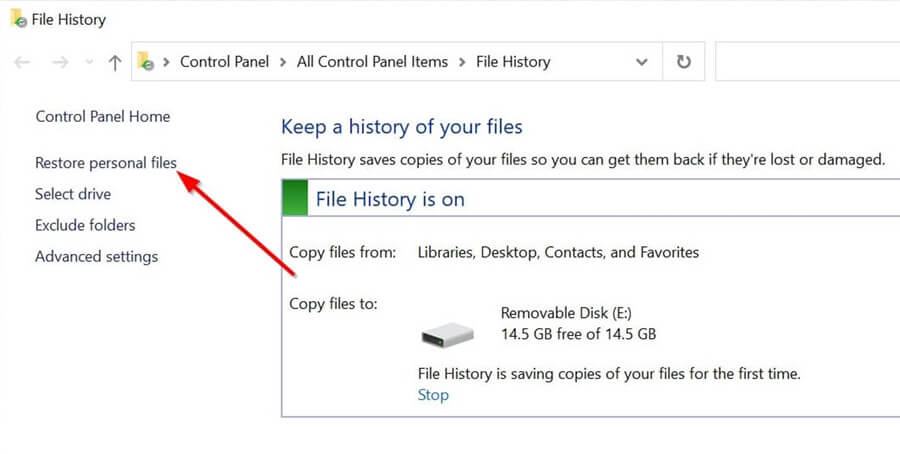
Steps to recover shift deleted files using Windows File History:
Step 1. Use the built-in Windows search bar for Restore your files with File History
Step 1. You have two options to restore data
Step 2. Enter the filename or folder you would like to restore

Step 3. Browse through the history of your data until you find what you need
Step 4. Click the ‘Restore’ button once you have located your data to restore
Step 5. You can also restore data to a different location by right-clicking the ‘Restore’ button and selecting the ‘Restore To’ option
Step 6. Select a location to save your restored data
Procedure #4: Professional Data Recovery Services
If all else fails, you can bring your hard drive to a professional data recovery company.
Unfortunately, their services cost a lot of money, and your data is no longer private. These companies cannot guarantee their success either, which can be highly frustrating.
We recommend using data recovery software like StarzSoft Data Recovery because the costs are minimal, and you have complete control of your data!
Conclusion
It is still possible for you to recover shift deleted files using one of our four provided methods, but you must act fast! StarzSoft Data Recovery is the best solution for recovering your data quickly and painlessly in four easy steps.
Free DownloadSecure Download
You will never have to worry about setting up complicated backup systems or losing your data again!
