Windows is a great operating system that’s used by countless people across the globe but, every time a new version needs to be installed, you run the risk of losing your valuable all your valuable files.
So you installed/reinstalled Windows and lost all your data-what do you do now?
This is a surprisingly common problem that many Windows users encounter whenever they upgrade their systems. Though somewhat stressful and maybe a little anxiety-inducing at first, you should know that your data is not lost forever.
With just a few easy steps, you can recover your data and use your computer as if nothing happened!
In this article, we’ll tackle 3 easy ways you can recover your files after installing windows:
How to Recover Files After Installing Windows
Losing your data when installing or reinstalling Windows usually happens when elected the wrong partition or have formatted the entire hard disk.
Even though you cannot seem to find any of the data that we stored before, it’s not actually lost or deleted.
Provided that the data is not overwritten by new data, it can easily be recovered with a few easy techniques.
1st Method: Use StarzSoft Data Recovery
The first and easiest thing you can do to recover your data is to use recovery software like StarzSoft Data Recovery, one of the most common file recovery software for windows PC.
On top of that, the software can also recover losses from a large number of social storage devices.
From photo and video files to documents and everything in between, StarzSoft Data Recovery can reclaim files from partitions, flash drives and hard drives, and even recover deleted or formatted data.
You can also always count on their ever-present technical support team to guide you should you need a little help.
How to do it:
Step 1. Download the software. Luckily, the file is free for windows so you don’t have to spend anything to get it.
Free DownloadSecure Download
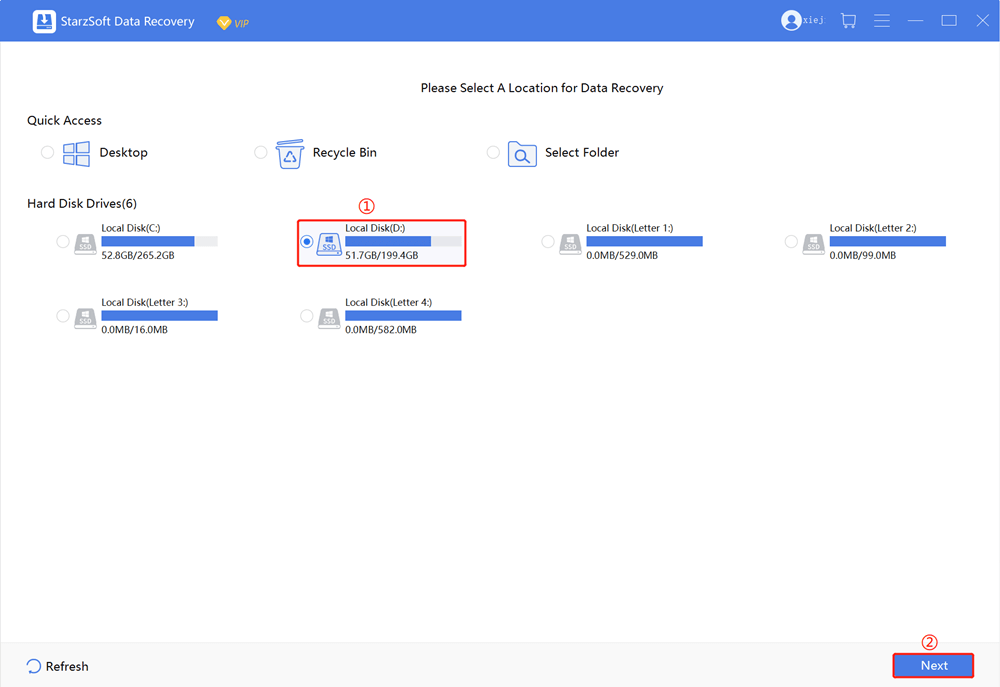
Step 2. Launch the software and select what type of scanning mode you’d like the software to do. You can also select which disk you specifically wish to recover data from.
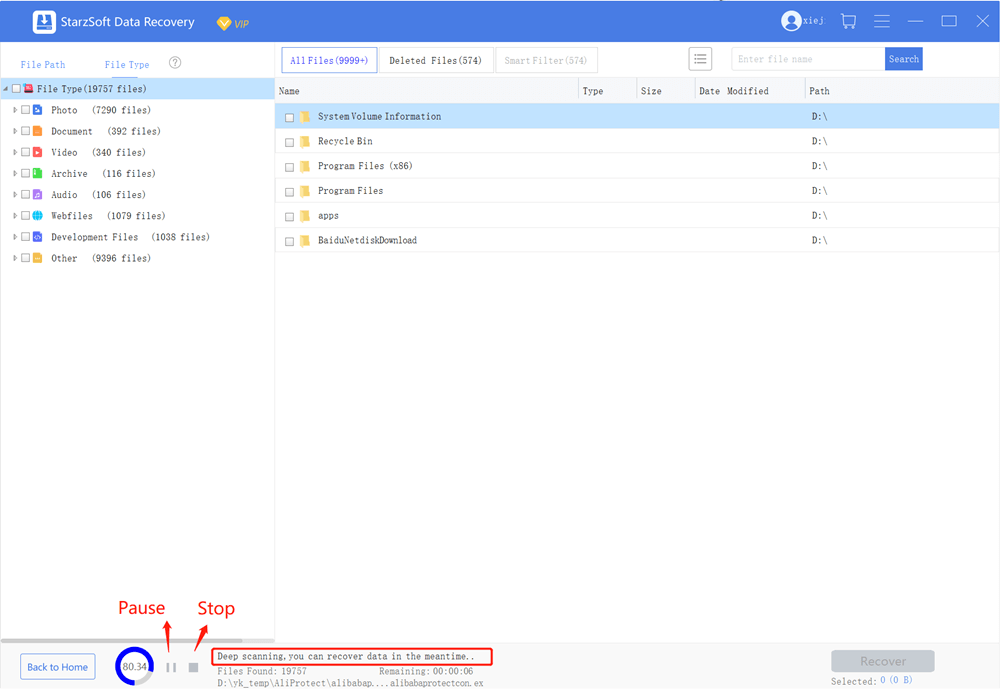
Step 3. You should wait for the scanning process to complete. If you have a lot of files that you need to recover, it could take a few minutes to complete. Try not to use the computer too much during the scanning process so as to not disrupt it.
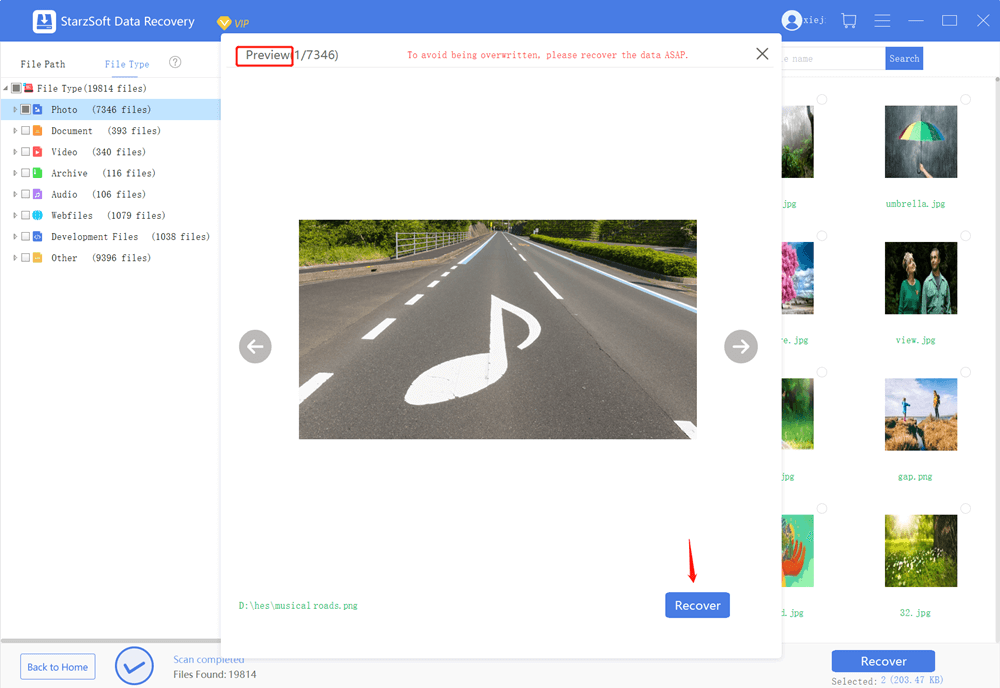
Step 4. When all the files have been found. You have to option to recover only a select number of them or recover all of them. After, click the “recover” button.
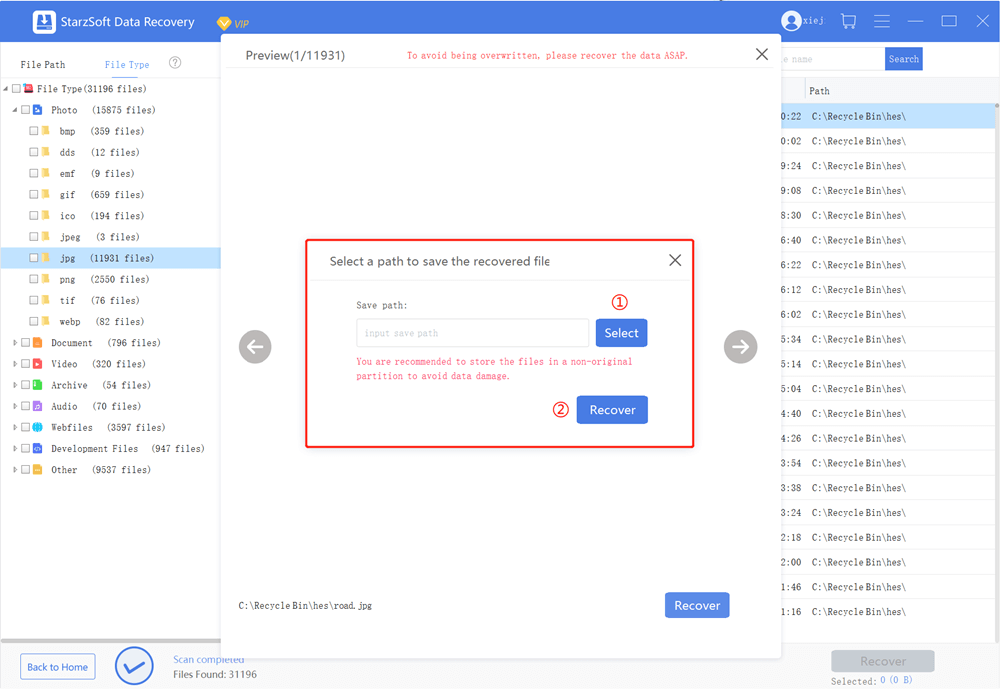
Step 5. Select a location on your computer that the data will be saved to then click “OK”.
Step 6. Again, you want to wait for all the files to be transferred completely. Refrain from clicking any other button until a window appears telling you that the recovery has been successful.
2nd Method: Recover with Windows Backup File History
Unbeknownst to many Windows users, there is a feature called File History that automatically makes a backup of your files from the background. This feature needs to have been priorly enabled though.
Another downside is that it only makes a backup of photos, videos, documents, and any file that is offline and part of the OneDrive on your system. That being said, you can elect to have certain important files saved from other places on the PC.
Once Windows has been installed or reinstalled, you can simply open this feature on the settings and restore your data.
How to do it:
Step 1. On your PC, open the settings and click on the “Update and recovery” tab towards the lower part of the options.
Step 2. A panel should extend from the left with the options of “File History” or “Recovery”. Select “File History”.
Step 3. Look for the “Backup” option. Once selecting that, you’ll have the option to either “Backup from File History” or look for “an Older Backup”.
Step 4. After a few moments, you should be faced with a list of the data the feature has saved. You can either select the specific ones you’d like to restore or simply restore all of them.
Step 5. Wait for the prompt that tells you the restoration was successful then click “OK”.
3rd Method: Recover with System Restore Point
Another recovery feature that is innate to your computer is the System Restore Point. Usually, this system acts automatically when it notices changes occurring to the computer.
Unlike the other methods though, you should use this feature before ever installing/reinstalling windows.
Having the System Restore Point on before upgrading Windows helps you avoid any major file loss since the system will restore the data itself after installation. In many cases, you’ll find that after installing Windows all your files are as you left them.
Turn System Restore Point on to save yourself much of the trouble.
How to do it:
Step 1. Before anything else, you need to make sure that your computer’s system protection is turned ON. To do this, select the “Configure System Restore” option on your computer’s settings.
Step 2. Click on the “Configure” option and then select the “Turn on system protection” option.
Step 3. After this, you can click on “Apply” and then click “OK”. After that, you should be good to go!
Step 4. Open the Control Panel of your computer and select the “Recovery” icon.
Step 5. Select the point you want to restore then wait a few minutes. When completed, click “Finished”.
Bottom Line
It is important to say that, for your benefit, never backup your files on the same drive where Windows is installed. This always leads to the deletion of your data and is near impossible to recover afterward.
Store your data on other hard drives and flash drives as much as possible.
And those were all the ways that you can recover all your data after installing/reinstalling Windows on your PC. None of these methods are difficult and you can even use all three of them should you want to be extra safe with your files.
At any rate, now you know how to recover files after installing windows!