Many windows users find themself in the same problem ¨the scanning and repairing drive stuck at 100¨ and is unable to use the device normally. Scanning and repairing drive is a feature in Windows that checks for errors on your hard drive and attempts to fix them. This process is usually triggered automatically by the system.
However, sometimes the scanning and repairing drive is stuck at 100%, leaving the user with a frozen system and no way to access their files. This can be particularly frustrating if you have important data on the drive as you have no way to access them unless the scanning and repairing process is completed. But do note that the scanning and repairing drive can be stuck at any percentage and it does not necessarily have to be at 100%.
In this article, we will take a look at 9 fixes for Scanning And Repairing Drive Stuck At 100. We also have a bonus tip to recover any data you may have lost during the process. So, hold on tight and make sure to read through.
How to Fix Scanning And Repairing Drive C Stuck At 100?
To fix the scanning and repairing drive c stuck at 100%, you must circumvent the continuous loop that the computer has fallen into. There are several ways you can do it but it is important to note that some of these files might lead to a loss of data.
Wait for The Process to Finish
The first thing you must try is to be patient and wait for the process to be finished. Depending on the storage of your drive, the scanning and repairing process can take up to several hours to be completed.
It is also important to note that some older drives are significantly slower and can have issues connecting to the computer resulting in scanning and repairing drives stuck at 100%. It is therefore possible that the process is working correctly (although not at a brisk pace) and if you give it some time the process will eventually finish normally. So wait at least a couple of hours before you try the other fixes from the list.
Force Restart Your Computer
If the scanning and repairing gets stuck at 100% without any sign of completion, perhaps you can fix the issue with a force restart. To force restart your computer, follow the steps below:
- Step 1: Press and hold the power button on your computer until it shuts off.
- Step 2: Wait a few seconds, then press the power button again to turn it back on.
If the scanning and repairing start again, press any key on the keyboard and see if the computer boots up correctly.
Disable the Disk Checking
The scanning and repairing of your C drive is an automated process to ensure your system is fully optimized. However, there is a workaround to disable the disk-checking option so that the computer boots up normally without having to check the disk first. Follow the steps below to bypass scanning and repairing the drive.
- Step 1: Force restart your computer by pressing and holding the power button until the computer shuts off. Repeat this process 3 times and your computer will automatically enter automatic repair mode.
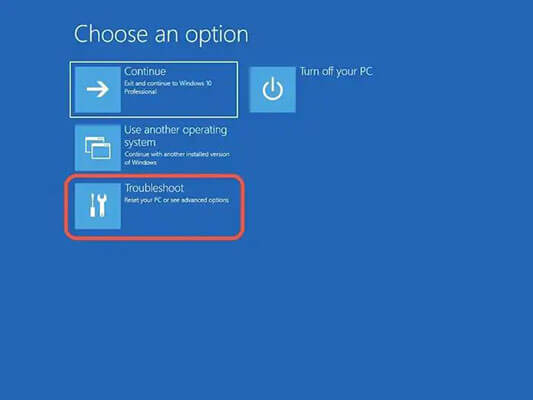
- Step 2: Now tap on Troubleshoot > Advanced Options
- Step 3: Next, click on “More Recovery Options”
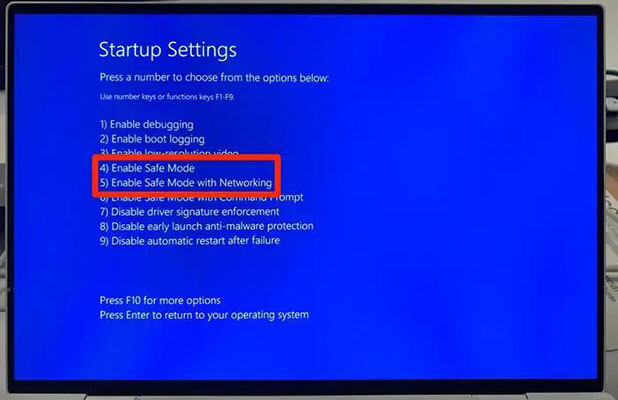
- Step 4: And finally, tap on “Start-Up Settings” and then click on Restart. Now a list of options will come up on the screen, select safe mode by tapping on (F4). You can also enter (F5) as “Safe Mode with Networking” offers a similar option.
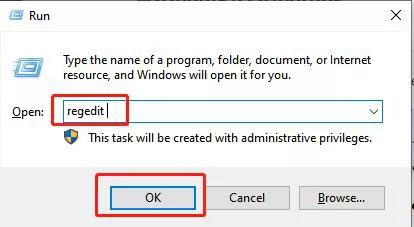
- Step 5: Now restart your computer and press Windows + R to bring up the “Run” box. Type “regedit” in the box and hit enter.
- Step 6: A new screen will pop up, go to Session Manager > BootExecute and change the value data to autocheck autochk /k:c* and click OK.
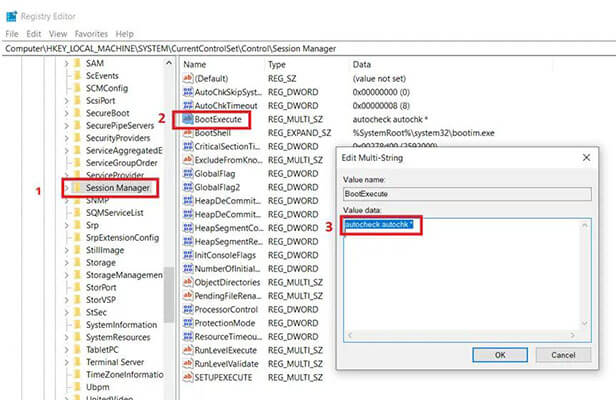
This should remove the “scanning and repairing drive stuck” issue you are facing.
Reconnect All Devices and Cables
One main reason for Windows 10 scanning and repairing drives stuck at 100% is because the drive is not able to retrieve data from the drive. One reason for this can be a faulty or loose connection that is hampering data transfer.
So, it is always a good idea to check on all connections and reconnect all cables to ensure there is no dust buildup and the connections are well secured.
Remove all cables of your computer and clean any dust that might have buildup in the ports over time. Now, reinsert all cables so that they are held firmly in place.
Run BCDEDIT Command
Windows has a bad reputation for its automatic updates and scanning and repairing features because they do not always work properly. Microsoft acknowledges this and does include workarounds that you can use to disable automatic repair of C drive thus stopping the “scanning and repairing drive stuck” error.
However, Windows makes it quite tricky to turn off the automatic update and you need to access “Windows Recovery Environment” to turn this feature off. Here is a detailed step-by-step guide on how to turn automatic repair off in windows.
- Step 1: Force restart your computer by pressing and holding the power button until the computer shuts off. Repeat this process 3 times and your computer will automatically enter automatic repair mode.
- Step 2: Next select the “Choose an option” screen, then head over to “Troubleshoot” > “Advanced options” > “Command Prompt”.
- Step 4: Now type “bcdedit /set {current} recoveryenabled no” on the command prompt and press enter.
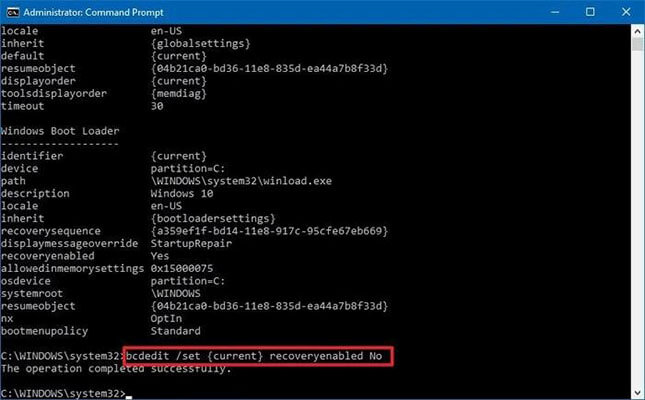
This code should disable auto-update, allowing you to bypass the dreaded “scanning and repairing drive stuck” error.
Run Startup Repair
Another way to fix the scanning and repairing error in windows is using startup repair. Startup Repair is a tool in Windows that is used to fix problems that prevent the operating system from booting properly. It can automatically detect and fix issues with the Windows startup process, including missing or corrupt system files, incorrect system configuration, and issues with hardware or drivers.
When you run Startup Repair, it will check your computer for any issues that may be preventing it from starting up and will try to fix them. This can include repairing or replacing missing or corrupt system files, restoring the Windows Registry, and configuring system settings.
To run startup repair, follow the steps below:
- Step 1: Insert your Windows installation disc or USB and restart your computer.
- Step 2: Press any key when prompted to boot from the disc or USB.
- Step 3: Select your language preferences and then click “Next.”
- Step 4: Click “Repair your computer” on the next screen.
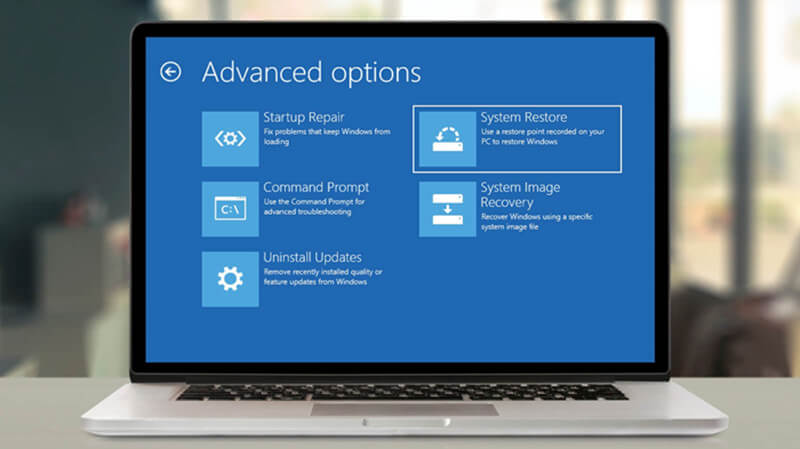
- Step 5: Select “Startup Repair” from the list of options presented.
Once the process is successfully completed, a fresh installation of windows will remove any scanning and repairing errors the computer may have.
Run SFC/SCANNOW Command
Manually scanning the drive may sometimes remove the scanning and repairing errors. Here is a detailed guide.
- Step 1: Enter automatic repair mode by force restarting your computer 3 times by holding the power button. For a detailed overview, please check the “Disable the Disk Checking” section.
- Step 2: Now tap on Troubleshoot > Advanced Options, followed by “More Recovery Options”.
- Step 3: Restart your computer and press F4 or F5 to enter safe mode.
-
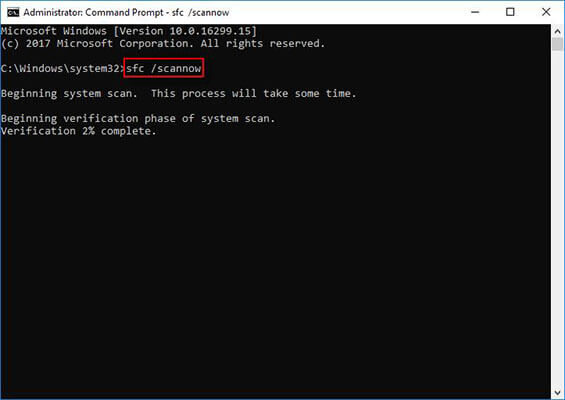
Step 4: Once you are in safe mode, type “cmd” in the search box.
Note: You have to give it administrator access so, right-click on the Command Prompt and select the Run as Administrator option.
- Step 5: Now type “sfc/scannow” to start the manual scanning. This process may take a while.
Run CHKDSK in Safe Mode
Another way to fix the “scanning and repairing drive stuck” error is by using the CHKDSK command in safe mode. So if the problem still persists after all the workarounds shown above, try running the CHKDSK in Safe Mode.
For this to work, follow the command below:
- Step 1: Open Windows in Safe Mode and run the Command Prompt with Administrator privilege as shown above.
- Step 2: In the command prompt, type “chkdsk c:/f” and hot enter.
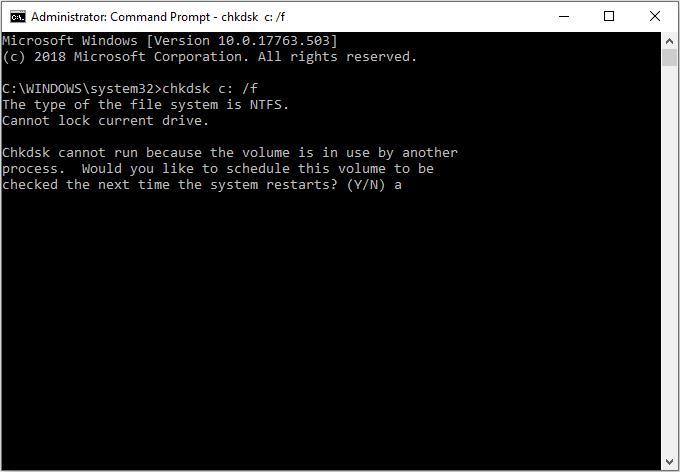
Let the process continue for some time until you are prompted to type “Y” to allow the process to run every time the system boots.
Use System Restore
If all the above fixes fail to address the “scanning and repairing drive stuck at 100” error, your last option is to restore the system completely which will wipe all data currently present in the computer.
But do not be afraid, as promised we have one last trick up our sleeves which will allow you to restore all data even after a system restore.
To restore your system, follow the guide below:
- Step 1: Enter automatic repair mode by force restarting your computer 3 times by holding the power button. Please check the “Disable the Disk Checking” section at the top for a detailed overview.
- Step 2: Navigate to “Troubleshoot” and then tap on “Advanced Options.”
- Step 3: Now choose the “ System Restore” option.
- Step 4: Tap on the finish button and wait for the system restore to be completed.
How to Recover Lost Data After Fixing Windows 10/11 Scanning and Repairing Drive Stuck At 100?
We understand the importance of your personal data and as promised here is a bonus tip to help you recover any lost data.
There are several data restore tools on the market, but StarzSoft Data Recovery happens to be one of the most reliable and fastest tools on the market. You do not need any prior knowledge as navigating through the app is quite straightforward.
To help you out, here is a detailed step-by-step guide on using Starzsoft Data Recovery tool on any Windows device.
Free DownloadSecure Download
- Step 1: Navigate to Starzsoft Data Recovery’s official website and download the tool for free.
- Step 2: Next, install and launch the app.

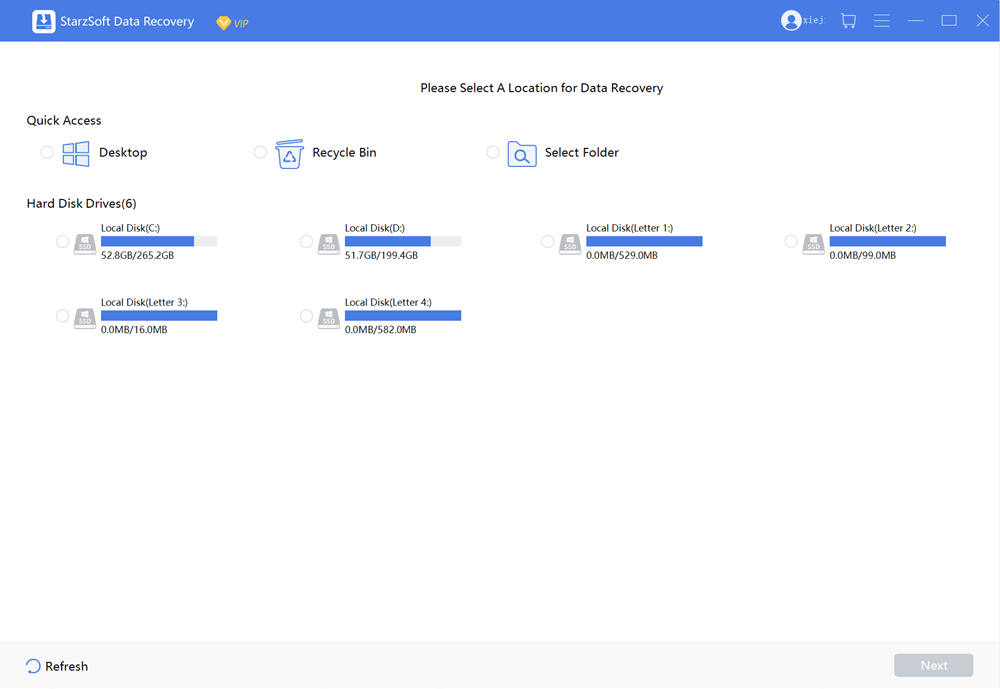
- Step 3: Now select the drive form from which you want to recover your lost data. Once selected, tap on next.
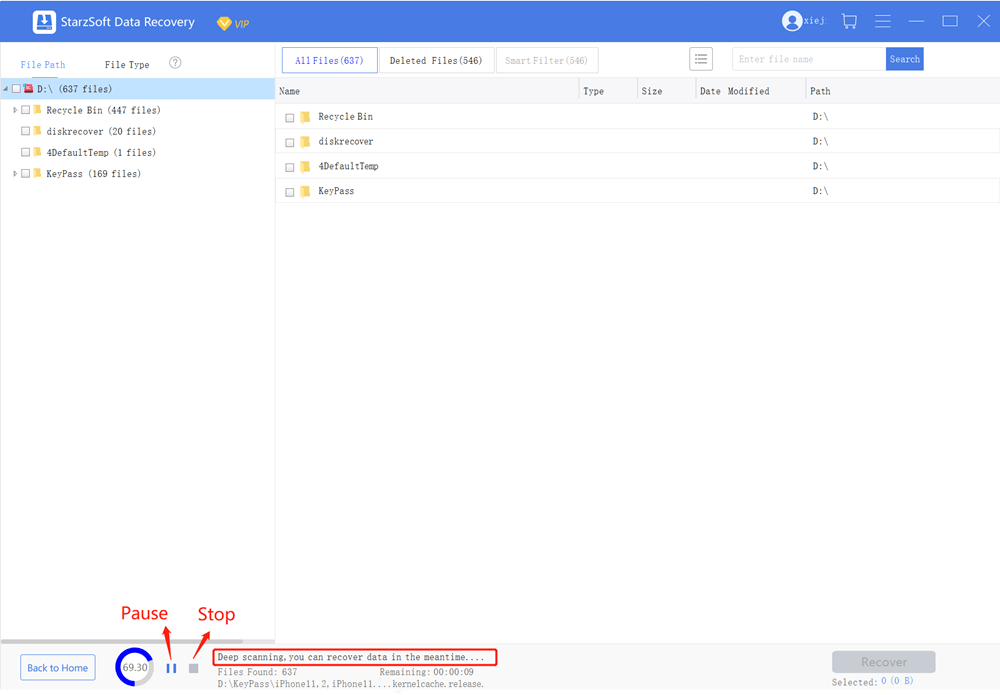
- Step 4: Next, the Starzsoft Data Recovery tool will scan your drive to retrieve all deleted data. You can see all the data it has found, so if you just need a specific file, you can tap on the pause button at the bottom.
- Step 5: The final step is to select and preview all the files you want to retrieve and once you are happy, tap on the recovery button on the bottom right.
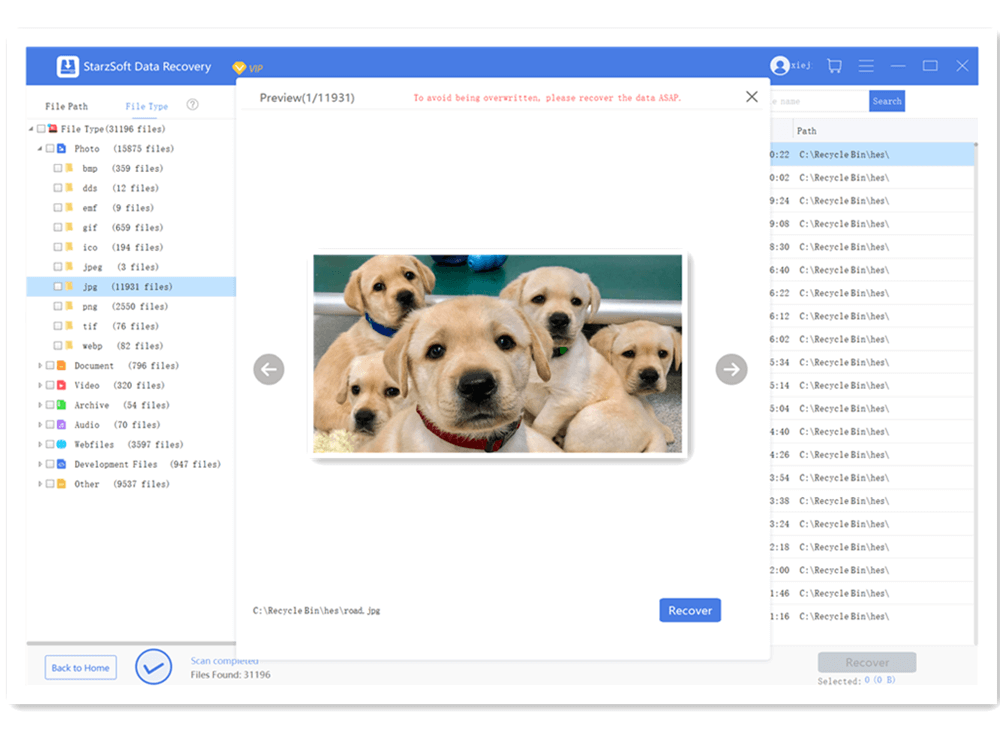
That’s it, Starzsoft Data Recovery tool will recover all detected data from your computer.
Conclusion
We hope our guide will help you recover from the “scanning and repairing drive stuck at 100%” error. But if all of the solutions fail, you can always wipe your hard disk clean and recover all data using the StarzSoft Data Recovery app.
Free DownloadSecure Download