AirPods are designed to connect with your device quickly; however, sometimes, they might not get connected. There is no doubt that AirPods are the best earpieces available today in the market, but many users have a complaint about AirPods disconnecting from Mac. Taking this complaint into account, this blog has been written. Find out why AirPods won’t connect to Mac.
Why my AirPods won’t connect to Mac?
If you want to pair AirPods with Mac and you aren’t able to do that, it is important to know why you see the notification “AirPods connections failed” on the screen.
- The Airpod might not be connecting to Mac if the battery has completely drained from the AirPods;
- the second reason could be you have not selected AirPods as the output device on your Mac;
- Sometimes when there is a compatibility issue, the AirPods may fail to connect to Mac as well.
These three are the typical reasons why you see the AirPods connection rejected notification. We will explain this in detail in the next part.
Check the following before you fix your unpaired AirPods with Mac
Check AirPods battery (AirPods and cases)
If your Airpod has run out of battery, you won’t be able to connect it. If you want to listen to music seamlessly on your AirPods, the first thing that you should do is keep them charged. Since you are trying to get it connected to a Mac, here’s what you need to do to check the battery both on your AirPods and case.
On your Mac, you will see the Bluetooth symbol. Hover your mouse on the Bluetooth option and click on that. You should see your AirPod name on the menu. On the menu, you will be able to check the battery status of your AirPods and the case.
Another way to check the battery status is by bringing the case with the AirPods inside close to the device. Wait for a few seconds, and you will see your case’s charge status and the AirPods on your iOS device.
Check if AirPods is the output device of your Mac
If you have already set up your AirPods with your Mac, which is signed in to iCloud, it should work normally after getting it connected to the Mac. But if it doesn’t, and your AirPods have sufficient battery, you need to check the output device on your Mac.
Open your Macbook, and turn it on. Now, click on System Preferences from the menu. From the menu, you need to click on the Bluetooth option.
Make sure that Bluetooth is turned on.
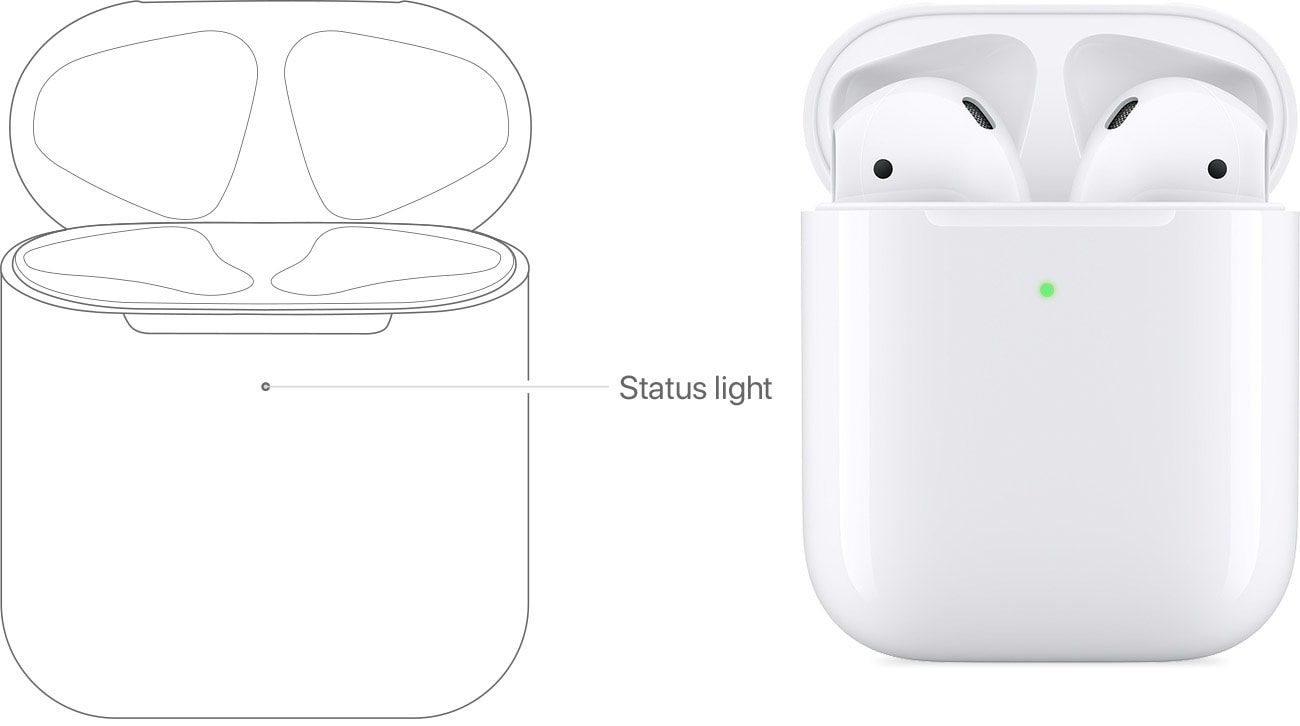
Now, get the AirPods along with the case. Keep the lid open.
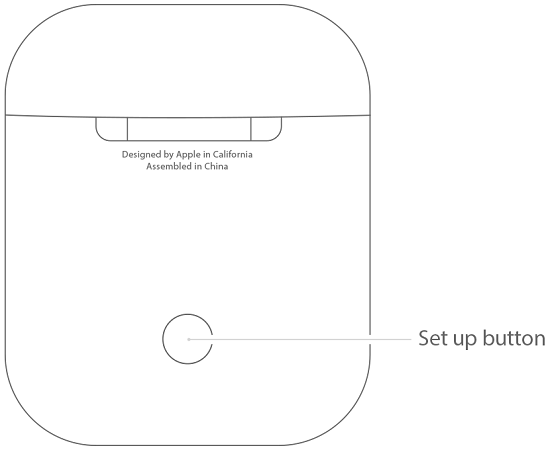
The back of your case will have the setup button, press and hold it until the status light flashes white.
From the device list, you need to select your AirPods and click on the connect option. This will connect your AirPods.
Now that your AirPods are connected, go to the sound output devices option. Click on the Apple menu followed by System Preferences. Now click on the Sound option, and then Output.
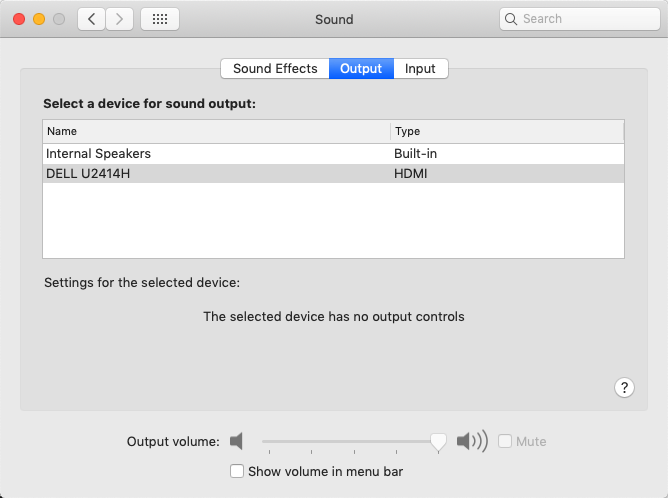
The Output option will show all the sound output devices that are connected to your Mac. To be able to listen to sounds coming out of your MacBook, click on your AirPods.
Check system compatibility & update
Sometimes your AirPods might not be compatible with your Mac. To check whether your MacBook supports your AirPods, go to the Apple menu. Click on the System Preferences and then hit the Bluetooth device. If it doesn’t support your Mac, you will see the notification.
If you see an update option, you need to click on that to update the setting. Try this option, and you should be able to connect your AirPods with your Mac.
Fix AirPods connection failure issue on Macbook
Forget AirPods as a Bluetooth device
When your AirPods or Macbook gets updated, this may affect the way your AirPods connection with the Macbook. The AirPods might not get connected, or you might face the AirPods connected but no sound issue.
When this happens, you need to click on forget Aripods option on your Mac completely. Connect your device once again. This will let your Macbook make a clean and new connection with the AirPods.
To forget AirPods, follow these steps:
Step 1: Go to System Preferences from the Apple Menu.
Step 2: Click on the Bluetooth option.
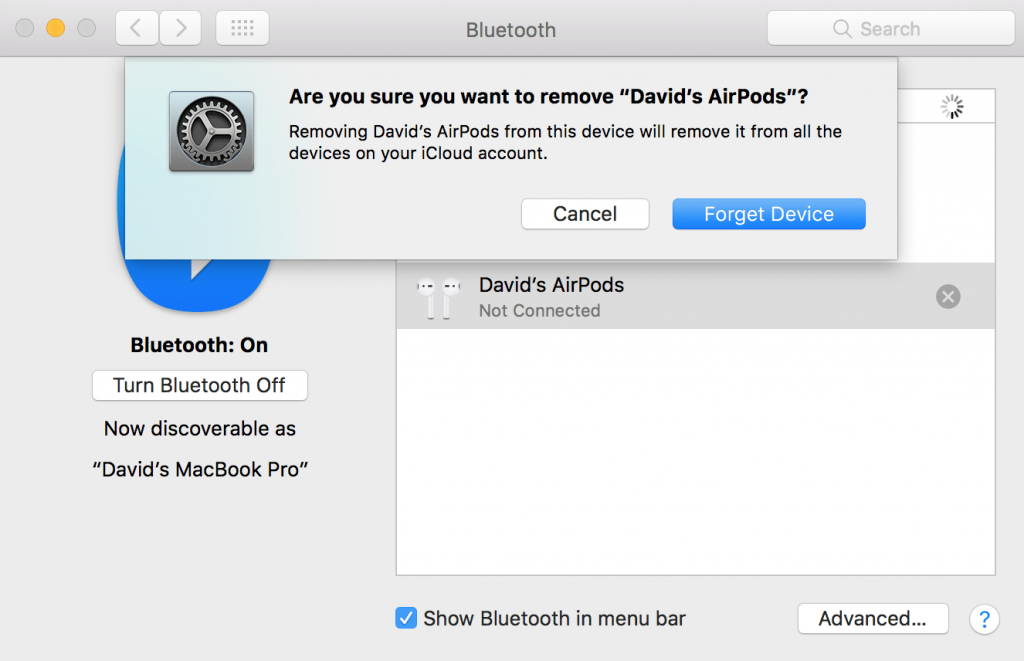
Step 3: Under devices in the Bluetooth menu, you need to click on the AirPods.
Step 4: Scroll over your AirPods, and you will see the “X” mark. Click on that.
Step 5: After clicking on the “X” mark, you will see the “Forget Device” option. Select it, and wait for some time.
Remove AirPods from the connected device list
Removing AirPods from the connected device list on your Macbook should also fix the connection issue. To do this, follow the steps below:
Step 1: Turn on your MacBook, and click on the Apple icon. After that, choose System Preferences.
Step 2: Once you click on the System Preferences, you need to click on the Bluetooth icon.
Step 3: You will see your AirPods in the device list—right-click on that.
Step 4: Click on the remove option, and when you see the contextual menu, click on remove once again.
These are the ways to remove AirPods from the connected device list. After everything is done, connect your device, which is your AirPods, once again. Your device should work normally.
Reset AirPods
If you want to know how to reset AirPods, follow the steps that we have mentioned below. Resetting the AirPods will fix issues like minor software bugs. And connectivity issue comes under software bugs.
Step 1: You need to press the setup button and then hold it for some time. To find the setup button, take a look at the back of your AirPods case.
Step 2: Once the status light flashes white, release the setup button.
Step 3: This means that your AirPods have been reset successfully.
Step 4: Now that your AirPods have been rest, try connecting it to MacBook just like you did earlier, and set it up.
Reset MacBook
Another thing that you can do is resetting your MacBook. However, please keep in mind that if you reset your MacBook, everything you have in your MacBook will be removed. Hence, create a backup before you try this method.
Step 1: Hold the power button and then click on the restart option.
Step 2: While the restarting function is going on, click on the Command and R keys together.
Step 3: You need to release the Command and R keys once you see the Apple logo.
Step 4: Once you see the Recovery Mode menu, click on the Disk Utility option from the selections.
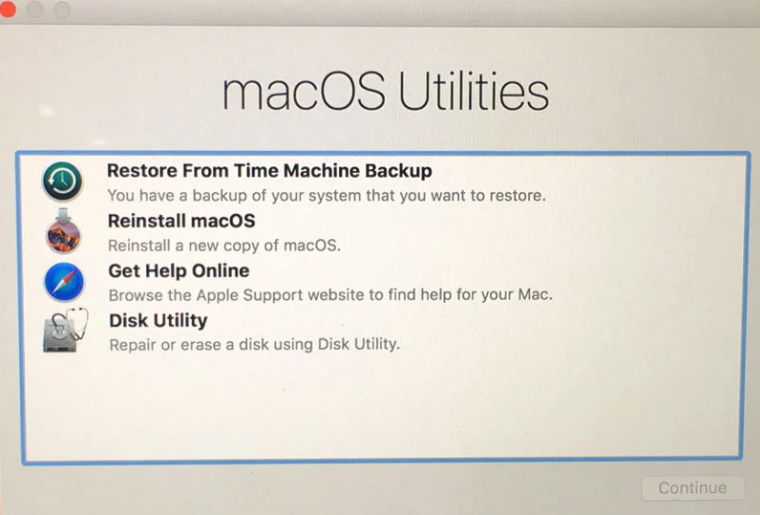
Step 5: You need to ensure that you see the ‘Macintosh HD’ startup disk option. If you do, click on the Erase option.
Step 6: You should see a pop-up window. Format needs to be changed to macOS Extended (Journaled). After that, click on the Erase option again.
Step 7: From the Disk utility menu, click on Quit Disk Utility.
Step 8: Now select Install macOS.
Step 9: After you install the new macOS, your Macbook will be reset.
Now pair AirPods with Mac
After trying any of the repairs, you will have to pair AirPods with Mac once again. Here’s what you need to do.
Step 1: Bring the AirPods along with the case. Keep the lid open.
Step 2: The setup button will be in the back of the case; you need to press and hold it for some time. Wait till you see the status light turning white.
Step 3: Go to your MacBook, and click on the Apply Menu. Now, choose System Preference; after this, click on the Bluetooth option.
Step 4: From the Device list, you need to select your AirPods.
Conclusion
Seeing a connection error while trying to connect your AirPods to your MacBook isn’t that uncommon. Get to know why your AirPods may not be getting connected, and try the ways that we have shared. The ways mentioned above should be enough to get your AirPods connected to your MacBook.