Managing your computer’s storage is incredibly tedious if you don’t keep on top of it.
Over time, you’ll have a lot of downloads, system files, and generally files you just don’t need to have filling up your hard drive. Assuming you don’t have any important files saved to that hard drive then you need to format the disk in drive safely.
By safely, we mean you also need to consider taking a backup of anything you don’t want to lose as this will turn into a disastrous situation.
We’ll be covering all of this, and more, in the rest of the blog post.
Common Reasons to Format the Disk in Drive
The situation that we described above is just one of the many reasons that you might find yourself needing to format the disk in drive. Here are a few others:
Reinstalling the Operating System
Users who are more skilled with computers usually want to reinstall Windows every so often. They do this to keep their PC running as fast and as smoothly as possible.
Part of this process involves formatting the primary disk that the operating system is installed on.
Fixing Performance Issues
After a year of having your computer and numerous Windows updates, your file storage system will start getting cluttered.
On top of that, there may be outdated drivers and needless program files lingering too. This will reduce your computer’s performance and formatting the disk, then reinstalling Windows, can greatly help.
Removing Malware
The most unfortunate reason is that some users have no other way of getting rid of the malware on their computers.
All it takes is one wrong click or a mistaken download and you could find yourself with a virus. If your antivirus doesn’t catch it in time, the malware will create problems.
What you should take away from this list is that there are plenty of scenarios where you need to format the disk in drive.
The information we’re about to provide you with can be applied to any of these.
IMPORTANT: Back Up Your Data Before Formatting
This can’t be emphasised enough. Before you even begin a process, if you need to format the disk in drive then you need to take a backup of all your key files.
Any files that you require for work, school, or family photos – these are all things that you need to back up before doing anything else.
Why? Because formatting a hard drive isn’t the same as deleting files. After you format the hard drive, you won’t find the deleted files nicely organised in your Recycle Bin. That’s not how it works. Formatting is a method that wipes everything from the storage device and resets it to the default state.
That’s not to say you can’t get any files lost as a result of formatting though. We’ll be showing you how to do this later, but it’s crucial that you don’t rely on this since data isn’t always recoverable.
Best Ways to Format the Disk in Drive
Now we can get to the methods. Below you’ll find some of the most efficient ways to format the disk in the drive of your computer that are, mostly, beginner friendly.
Solution #1 – Using the Disk Management Tool
A quick way of formatting the disk in drive is using Windows’ built-in Disk Management Tool.
This is only a suitable method if you are formatting any disk that isn’t the primary (the one that Windows is installed on).
Step #1 – Search Disk Management in the Windows search bar and choose the top result.
Step #2 – Click on the Volume that you want to format, then right-click it and select the Format… option.
Step #3 – Enter a name (Volume label) for the storage device as well as a suitable file system. If you aren’t sure which file system to select, choose NTFS as this is the most commonly used system.
Step #4 – Check the box next to Perform a quick format and leave the rest of the settings as they are, then click OK.
Step #5 – Wait for the disk to be formatted. This may take a while if there are a lot of files stored on the disk, but if you selected the quick format option then it shouldn’t take too long.
Remember to be careful and choose the correct disk. If you accidentally format the wrong disk then you’ll lose all the files on it, and while data recovery is possible you shouldn’t rely on that. Double-check the Drive Letter of the drive before clicking the format button!
Solution #2 – Format Hard Disk with Command Prompt
Alternatively, you can use the Windows Command Prompt if you need to format the disk in drive. Just like before, take care when using these commands to avoid accidentally wiping the wrong disk!
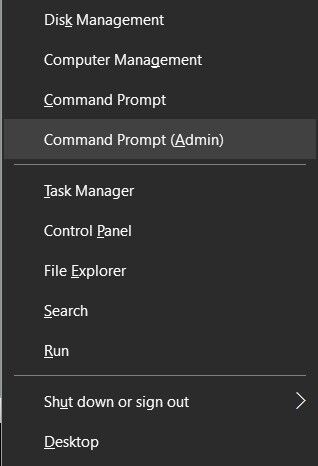
Step #1 – Search for Command Prompt in the Windows search bar, right-click the top app, and click Run as Administrator.
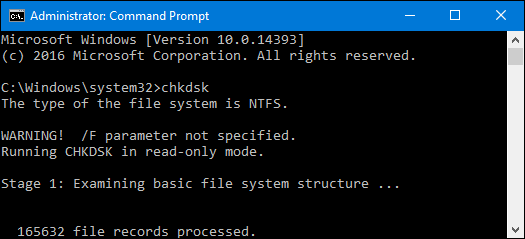
Step #2 – Type the command diskpart and press the Enter key, then enter list disk.
Step #3 – A list of the connected storage devices will be shown. Take a note of the number next to the disk that you want to format, then enter select disk [number] (replacing the final phrase with the appropriate number.
Step #4 – Enter the command clean and this will wipe all of the files from the disk.
Step #5 – Once this command is complete, enter create partition primary.
Step #6 – Lastly, enter format fs=ntfs and then assign.
Using the Command Prompt application to perform tasks like this can be scary for inexperienced users, but as long as you follow these steps accordingly you should have any issues.
Accidentally Formatted a Disk with Important Data?
Hopefully, you took our advice and backed up important files before you formatted your hard drive. Even if you did, you might find out later that there were some files you forgot about which should’ve been backed up.
You may still be able to get those back using StarzSoft Data Recovery. Some key features that this software provides are:
- Swiftly recover files from any formatted storage device
- Compatible with the recovery of over 1000 data types
- Deleted, corrupted, and lost files can all be recovered
- AnyRecover has a high recovery rate so it’s almost guaranteed that you can retrieve your files
- All files that are found from scanning your hard disk drive can be previewed before recovery
- All of your data is securely transferred back to your computer
That’s just the tip of the iceberg. One of the greatest selling points of StarzSoft Data Recovery are that you can use the free trial meaning you don’t have to commit to a full license before finding out if it works or not.
How to Use StarzSoft Data Recovery
So, if you find yourself in this predicament, our advice would be to attempt data recovery using StarzSoft Data Recovery. Follow these steps to use the software.
Step #1 – Start by downloading and installing the StarzSoft Data Recovery tool on your PC.
Free DownloadSecure Download
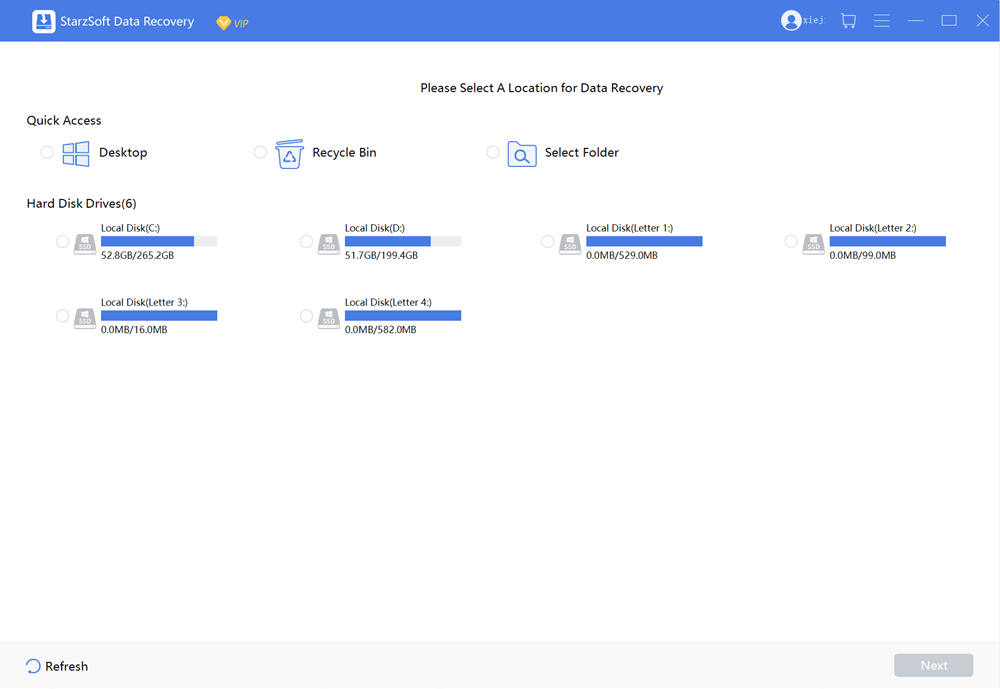
Step #2 – Launch the program and choose the disk that your lost files were stored on.
Step #3 – StarzSoft Data Recovery will now proceed to scan the chosen storage device. The length of this scan depends on the storage capacity of the device, so be patient while it scans.
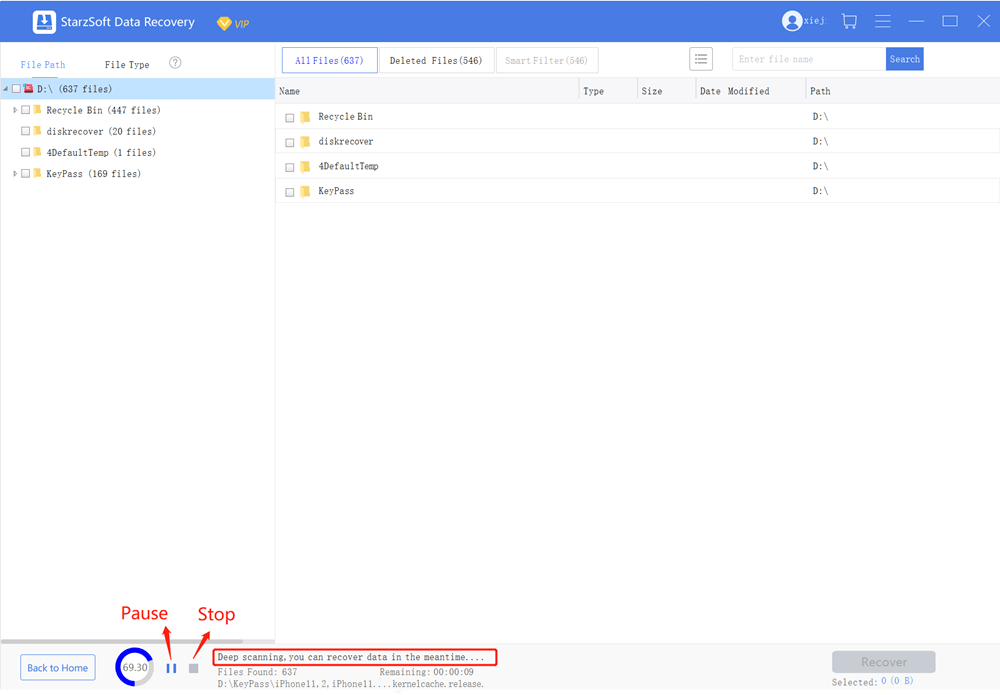
Note: during the scan, you will be able to actively see the files that have been found. If you see the file you want to recover, you can click Stop to end the scan and recover your file.
Step #4 – After the scan concludes, use the tree menu on the left sidebar to browse everything that has been detected. Select all of the files you want to have recovered.
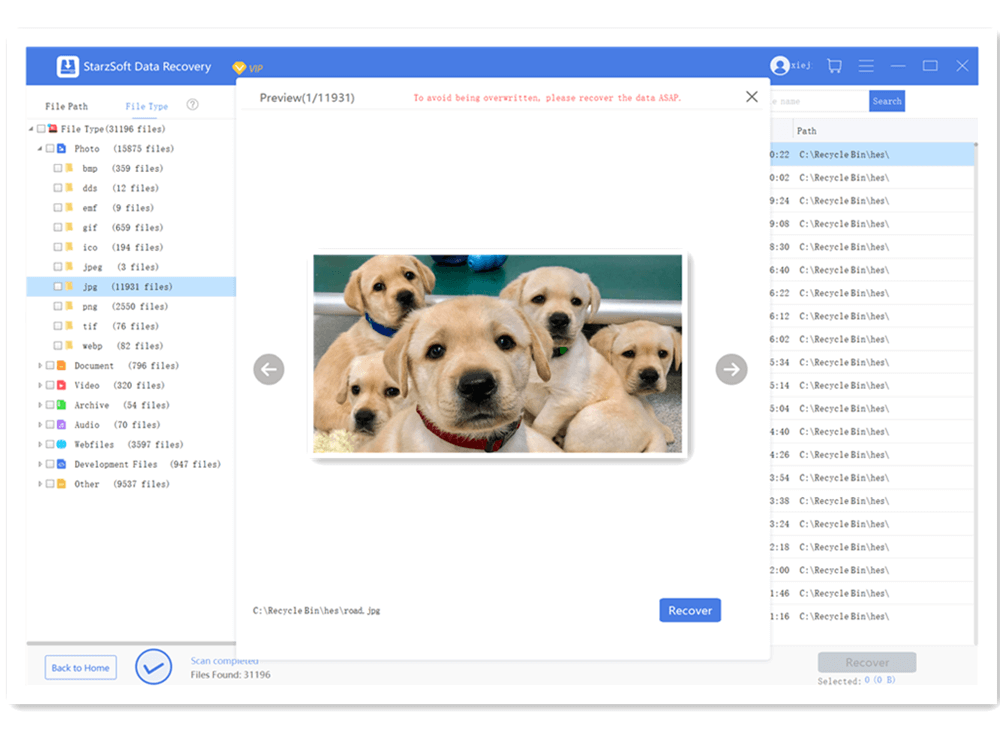
Step #5 – Finally, click on the Recover button and choose where to save the recovered files. It’s important that you don’t save these files in their original location as this increases the risk of them corrupting beyond recovery.
As you can see from these steps, it’s not a complicated program to use. Data recovery is generally seen as an expert-level task but thanks to StarzSoft, it has been made incredibly simple.
Conclusion
Anyone who frequently uses a computer will realise, at some point, that they need to format the disk in drive.
Whether it’s to improve performance or to simply clean up their storage system, it’s something that needs to be done.
However, even the most skilled users may find themselves losing data and this is when StarzSoft Data Recovery proves to be the most useful tool.
Free DownloadSecure Download
Using this data recovery too gives you an opportunity to get your files back and it’ll be like data loss never occurred!