Unlike external drives, connecting the new internal SSD and starting using it straightaway isn’t possible. To connect the new internal SSD, you’ll need to watch out for the initial setup process courtesy of Disk Management.
Do you know about Disk Management? If you’re a newcomer and are done learning Disk Management, we’ll reveal the brilliant ways to help you learn how to open Disk management.
Part 1. What is Disk Management
Disk Management is a brilliant system utility that empowers you to perform advanced storage-related tasks, including formatting or creating the hard disk partition, resizing the partition by shrinking or extending the volume, and initializing the volume.
Upon physically connecting the new internal drive to the PC, Windows tends to see it as a blank disk with no allocated space. Hence, you won’t see the new internal drive in the File Explore. You can rely upon Disk Management to establish the partition, making the new drive usable in your operating system.
Part 2. How to Open Disk Management with Official Steps
With the Disk Management system on Windows, you can initialize a new drive, shrink an essential volume, extend an essential volume, troubleshoot disk management, etc. Launching the Disk management is relatively simple courtesy of the official method.
Here’s the step-by-step guide to learning how to open Disk Management Windows 11.
- 1. To begin with, you’ll need to double press the Disk Management and hit the Start icon.
- 2. Choose Disk Management to launch it before performing the necessary editing operations.
Part 3. How to Open Disk Management With Other Common Ways
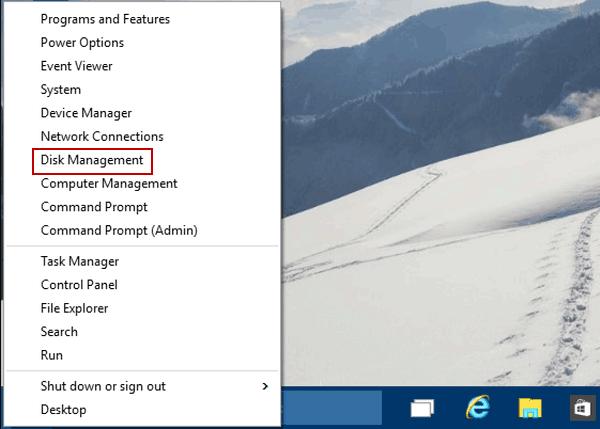
1. Access Disk Management through the Quick Access Menu
One of the simplest ways to access Disk Management is through the Quick Access Menu. Here’s how to open Disk Management via the Quick Access Menu.
- 1. Press the bottom left corner of your desktop to start the Quick Access Menu. Click on the Disk Management button to start the proceedings.
- 2. You can access Disk Management in one go and explore all its features.
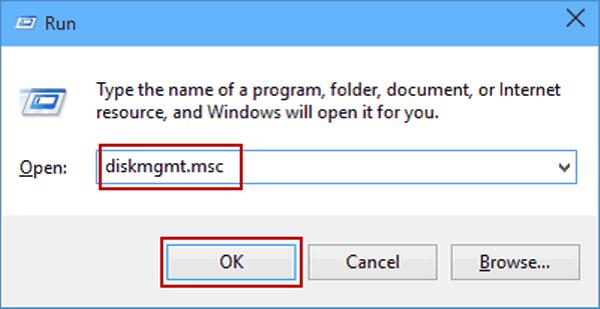
2. Access Disk Management through Run
Despite following a couple of methods, if you need help to know how to open Disk Manager, you can get it done through Run. Here is how to open Disk Management Windows 11 via Run.
- 1. To begin with, you’ll need to launch Windows 11 on the computer and start the Run.
- 2. Type the diskmgmt.msc in your empty box before hitting the OK icon. Now, you can access all the features of Disk Management.
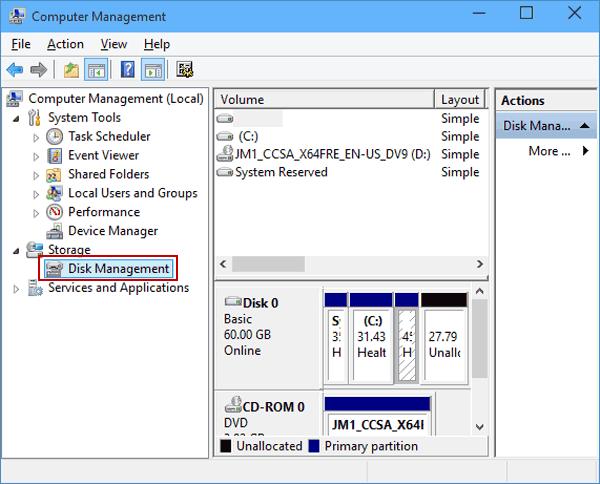
3. Launch Disk Management through Computer Management
Another excellent and breathtaking way to launch Disk Management is through the Computer. This method doesn’t ask you to do much to launch the Disk management. Here’s how to open Disk Management via Computer Management.
- 1. Right-click the “This PC” button and select the Manage button.
- 2. Press the Disk Management button on the left side of the screen to put things in order. That’s all you’ve had to do to start Disk Management.
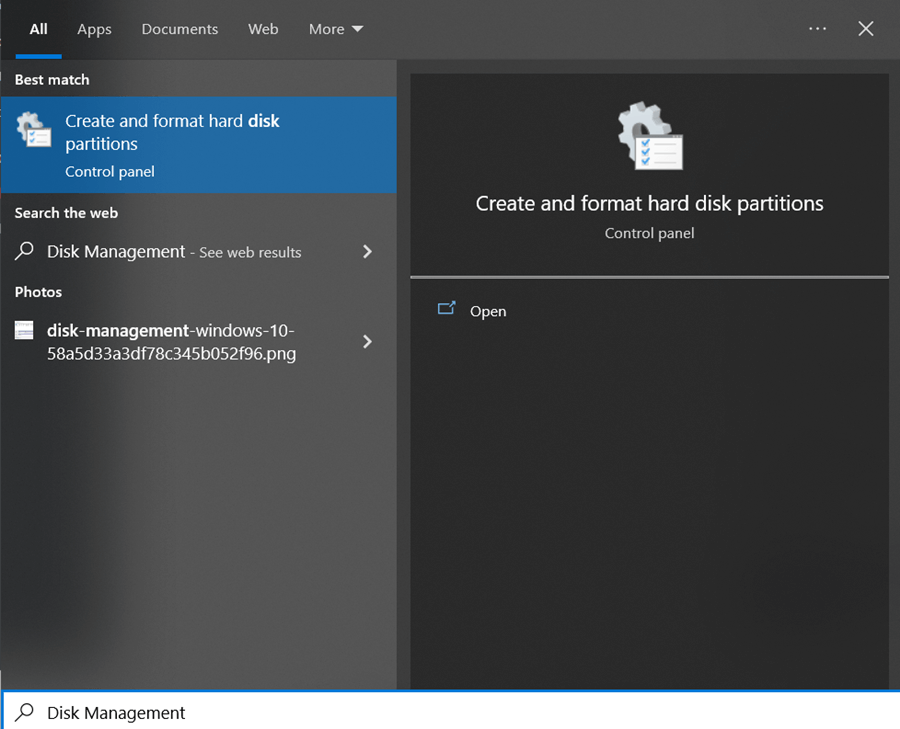
4. Launch Disk Management through Direct Search
You can also rely on the Direct search to learn how to open Disk Management in Windows 10.
- 1. Navigate to the search box and type in the disk manage icon.
- 2. Select the Create and Format hard disk partitions button for the desired results.
5. Open Disk Management via Command Prompt
Command prompt is another brilliant way to help you to access the Disk Management.
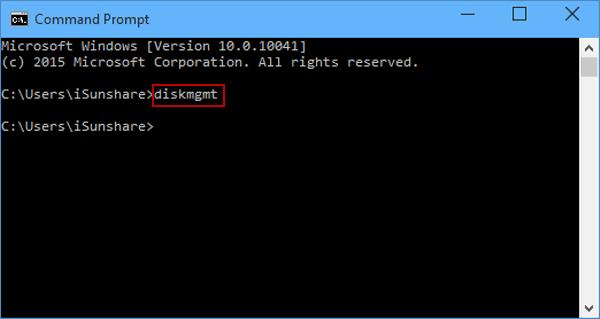
- 1. Launch the Command Prompt and type in the diskmgmt before hitting the Enter button.
- 2. This way you’ll be able to run the command through command prompt.
6. Turn on the Disk Management through Windows PowerShell
Despite having tried all the options, if you haven’t found the appropriate way to start the Disk Management, you can open the Disk Management via PowerShell.
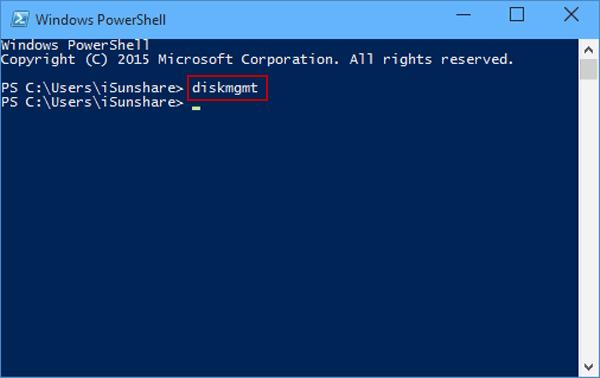
- 1. Launch the Windows PowerShell by searching.
- 2. Press on the Enter button after hitting the diskmgmt.
Part 4. How to Use Disk Management on Windows
We’ll discuss how to use Windows Disk Management to initialize a new disk, create a new volume, and shrink or extend the volume.
1. Initializing a new Disk
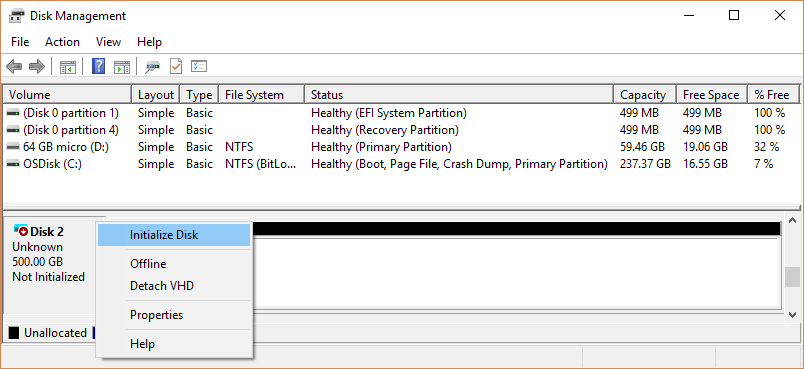
- 1. Connect or install the new hard drive to your PC and launch the Disk Management with your former options.
- 2. After locating the hard drive, press the Initialize Disk button from the main menu.
- 3. Select the correct Disk to start initializing the Disk in the Initialize Disk dialog box. Now, you can set the partition style according to your preferences.
2. Create a New Volume through Disk Management
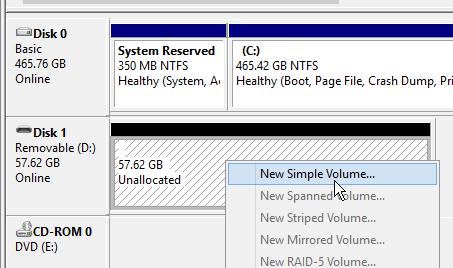
- 1. Start the Disk Management, and you can see the space marked as Unallocated. Right-click on your Unallocated space and press the New Simple Volume.
- 2. Set the allocation unit size, doke system, and volume label before hitting the Next button.
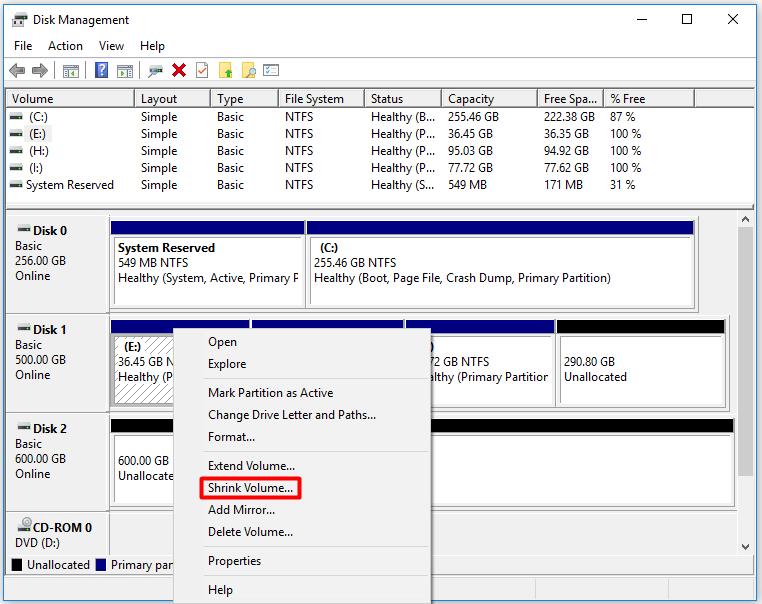
3. Extend or Shrink Volume through Windows Disk Management
- 1. Start the Disk Management and press the volume you want to shrink or extend. Press the Shrink Volume or Extend Volume button before adjusting the size MB.
- 2. On your Extend Volume Wizard, you must change the space size before going to the Next icon and selecting the Finish button. After going into the shrink dialog box, you’ll need to enter the amount of space to drink in your MB and hit the Shrink button.
Part 5. How to Recover Lost Data on Windows Due to Disk Manager Error
If the disk management error occurs, it could cause significant data loss on the computer. Fortunately, you don’t need to worry about it as you can retrieve the lost data on Windows 10 or 11 courtesy of the StarzSoft Data Recovery software.
With Starzsoft Data Recovery, you’ve got the leverage to retrieve the 2000+ data types without affecting the quality of data, offering the highest recovery rate. Regardless of where you’ve lost the data, the Starzsoft Data Recovery tool lets you retrieve the lost data effortlessly.
Free DownloadSecure Download
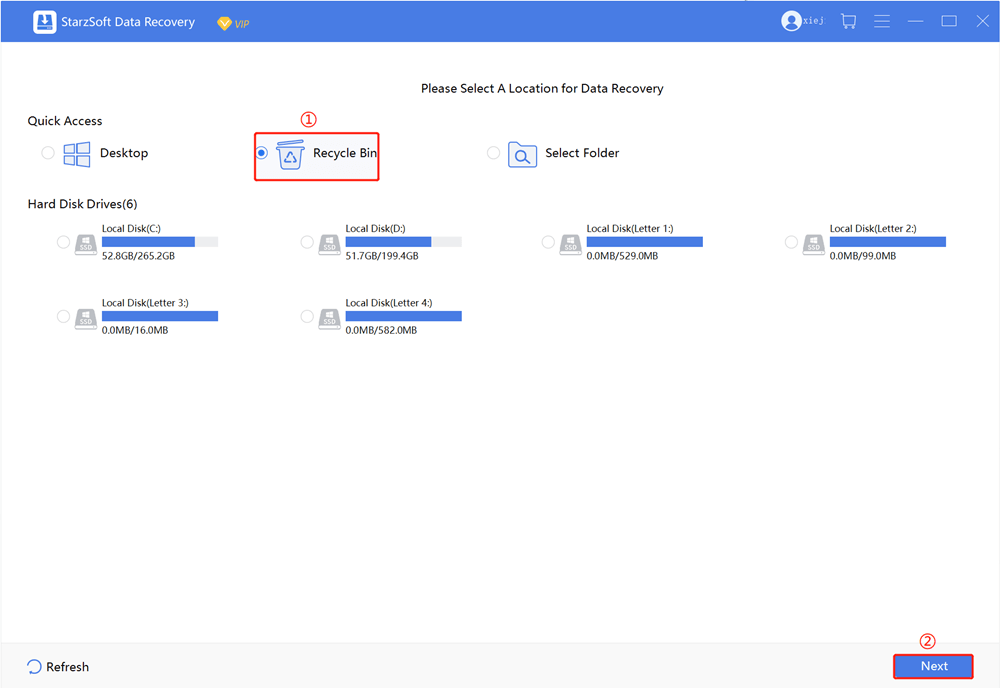
- 1. Start the Starzsoft Data Recovery after getting it installed from the computer. Next, you’ll need to visit the folder or file you’ve lost the files from.
- 2. Start the scanning process by hitting the Next icon, which will take a few moments before getting the job done.
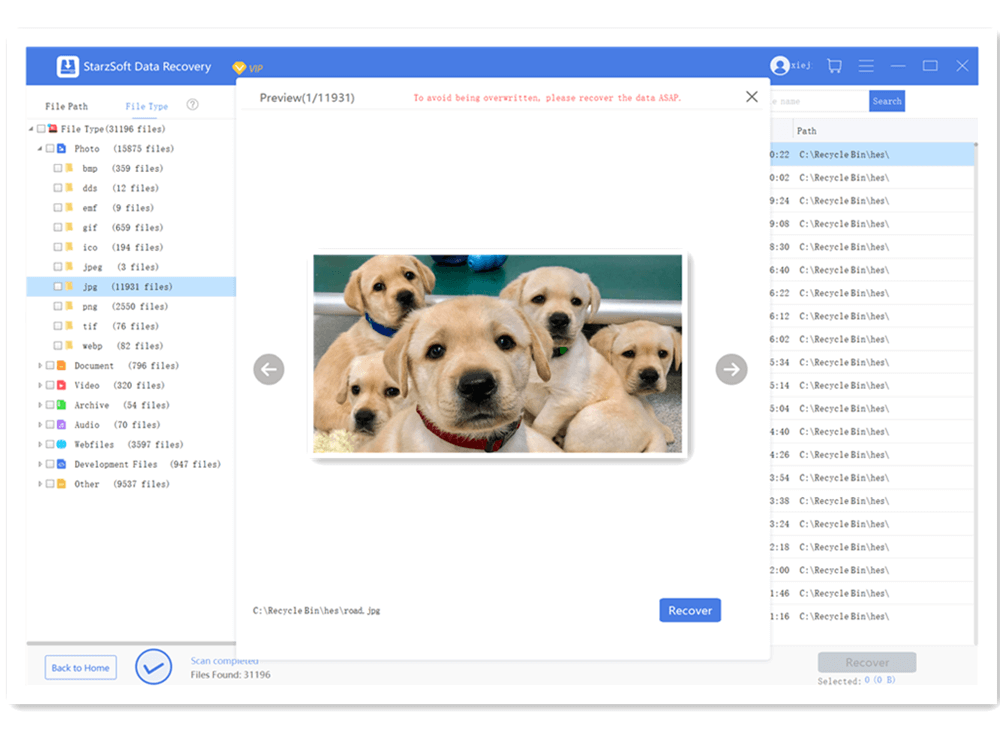
- 3. Once you’re done scanning the data, you must click the Preview icon to review all the changes and then hit the Recover icon to restore the lost data.
Conclusion
Since you’ll have to perform several outstanding tasks on disk management, learning how to open Disk management is crucial. We have listed some reliable ways to help you know how to open Disk management in Windows 10.
You can also learn about using Disk Management to perform several tasks. We have recommended StarzSoft Data Recovery as the best tool to retrieve the data loss caused by the disk manager error. It enables you to return the lost data without asking, affecting the data quality.
Free DownloadSecure Download