An iPhone without a cellular connection is like a ship parked on dry land, it won’t go anywhere! So what do you do if your iPhone gives you a “Cellular Update failed” message when you restart it? And even when you remove your sim card to fix the issue, it doesn’t give the expected “No Sim” error message.
If you have this issue, do not fret, we would give you the best tips and solutions to this issue. Let’s get started.
Why Does My iPhone Keep Saying Cellular Update Failed
Before we fix an issue, we need to determine the cause, that way we can address it properly. These are a few reasons why your iPhone cellular update failed:
- 1. Hardware Defect: Some iPhone 7 models have a hardware defect that makes the “Cellular Update Failed” error message pop up. This is what also causes the error message “No Service” to pop in the upper left corner of your iPhone screen. Apple is aware of this malfunction, so they offer a free repair to iPhone 7 models that qualify. You can check the Apple website to determine if your iPhone qualifies.
- 2. Update Failed: An update to a device is always necessary to keep it running smoothly. In a situation where your iOS 14 or any other update fails to update your cellular connection features, it can lead to an inability to make or receive calls or access data.
- 3. Update Required: In an event where your cellular update fails, it might be that your device requires an update. So, when the issue of the cellular update fails, the first thing to do is check your iPhone if there are any updates available.
- 4. Carrier Settings: If your cellular carrier requires an update, you might see the “No service” error message. So check for a carrier update and update your settings accordingly. Also note that, if you insert a new sim card into your device you would have to download new carrier settings for that carrier.
Those are a few reasons why you might see the error message “Cellular Update Failed” on iPhone 7 or iOS 14 devices. Now that that is out of the way, how can this problem be solved? Let’s take a look.
How to Fix the Issue of iPhone Cellular Update Failed
This section would provide clear tips and guides on how to solve the issue of the “iPhone cellular update failed”. They are:
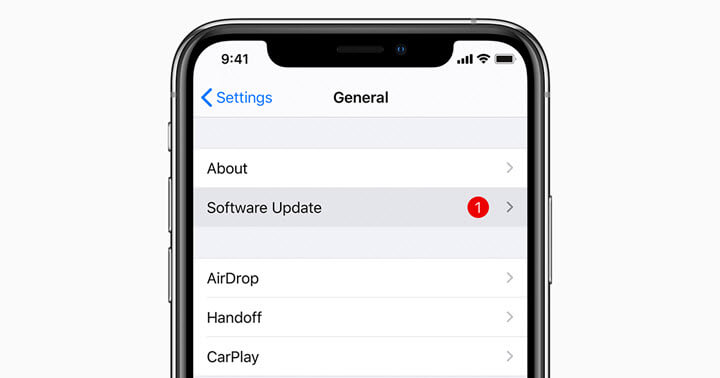
1. Update iOS System to the Latest Version
As mentioned earlier, iOS updates are necessary to fix malfunctions and bugs. Apple releases updates from time to time to fix issues like the one at hand now.
So to update your iOS go to Settings >> then tap on General >> navigate to Software Update to see if there is an available iOS update >> if there is tap on Download >> then Install after the update.
2. Turn Off WiFi Calling and Voice LTE
While this seems to work sometimes, it is important to note that it is an unrefined and sometimes temporary solution to fixing the issue of the “iPhone cellular update failed”. You would have to turn them back on after the update has been done. Follow these steps to turn off WiFi calling and Voice LTE:
- 1. Go to your Settings and tap on Cellular.
- 2. Navigate down to WiFi-calling.
- 3. Toggle the switch off, if done properly, it should go from green to clear.
- 4. After that, go to Cellular settings.
- 5. Tap Cellular Data Options.
- 6. Select the option Enable LTE, then select Data only. This would turn off Voice LTE. Check if your cellular update is working properly.
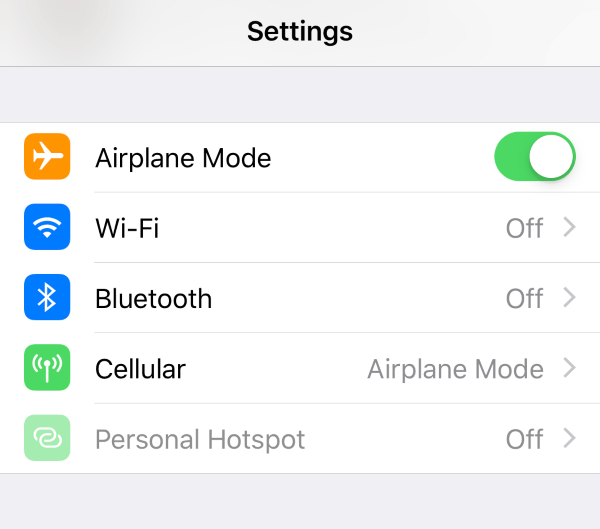
3. Turn Airplane Mode On and Off to Fix Cellular Update Failed
This method has been shown to fix minor connectivity issues. Do this:
- 1. Open Settings.
- 2. Navigate to Airplane Mode and toggle it on and off repeatedly for some time. Then check to see if the issue is fixed.
4. Turn Cellular Data On and Off to Solve Cellular Data Update Failed
This is another quick fix to minor cellular update failed issues, all you have to do is:
- 1. Go to Settings and tap Cellular.
- 2. Then, tap the switch beside Cellular Data at the top of your phone screen to turn it off.
- 3. Tap the switch again to turn on Cellular Data.
5. Check Your Carrier for Updates
These updates can be released from your cell phone carrier or Apple, whatever the case, they are meant to enhance your iPhone’s connectivity and fix cellular update failed iPhone 7.
To check for carrier updates go to Settings >> then tap on About (an available update would pop up without further prompt) >> tap Update if one is available. This could take some minutes.
6. Re-insert Sim Card for Cellular Update Failed iOS 15/14/13/12/11
This is a more drastic solution to the issue of the “iPhone Cellular Update Failed”. To eject and re-insert your sim card, follow these steps:
- 1. Insert a sim ejection tool (a straightened paper clip works fine too) into the sim tray hole on the side of your iPhone.
- 2. Gently push the tool in, this should pop the tray open.
- 3. Remove the sim card from the tray and then put it back in gently and well aligned (make sure not to damage any delicate parts).
- 4. After that, push the sim tray back into the side of your phone until you hear a click. Once that is done check to see that it’s working now.
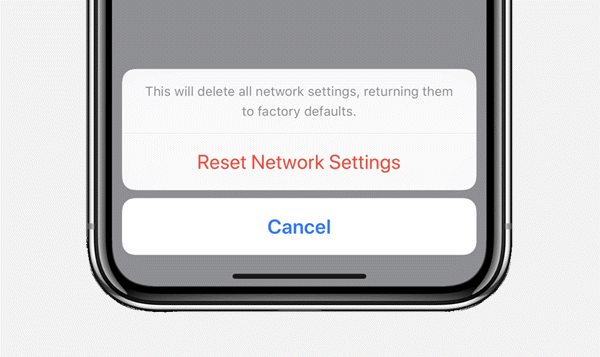
7. Reset Network Settings to Fix Apple Cellular Update Failed
This approach to fixing the issue of “cellular update fail” on iPhone would mean erasing all Bluetooth, Cellular, WiFi and VPN settings on your iPhone.
To reset your network, simply go to Settings >> then General >> tap Reset >> tap on Reset Network Settings. You have to confirm your decision by tapping reset network settings again. If asked for a password, please input.
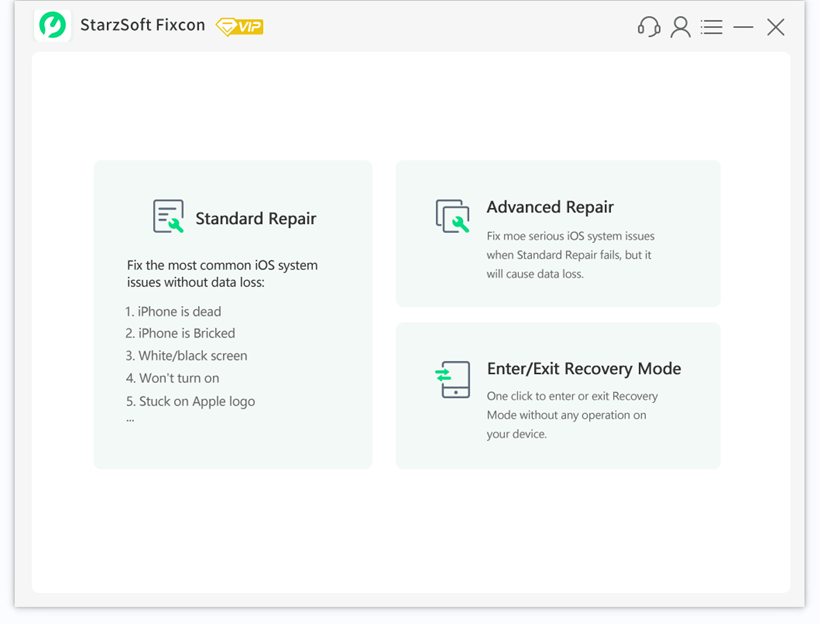
8. Use iOS System Recovery Tool to Solve iPhone Cellular Update Failed
StarzSoft Fixcon is an iOS tailored recovery tool. It’s built to fix iOS issues, upgrade or downgrade iOS without data loss. To fix the issue of iOS “cellular update fail”, it’s best to use the Standard Repair. The standard repair is meant to fix general iOS issues without data loss.
To use the Standard repair, follow these steps:
- 1. Download and Launch the StarzSoft software Fixcon. The, select Standard repair mode
- 2.Use a stable USB cable or Micro-USB to connect your iPhone to your PC. Fixcon will detect your device automatically, but if this doesn’t happen, manually click “Next”, follow the prompts and put your phone in Recovery mode.
- 3. Fixcon would show you available firmware packages for your iPhone model. Once the package is downloaded, click on Continue, this will kick off the repair process.
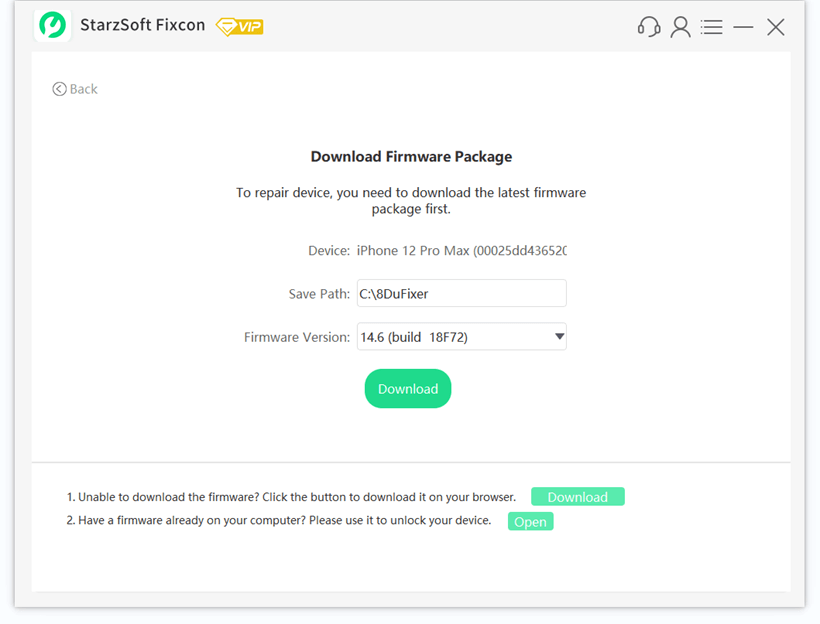
- 4. Wait for the repair process to complete, once it is, your device will restart. All your data would be intact and the issue of cellular update failure would be gone.
9. How to Fix Cellular Update Failed with iTunes
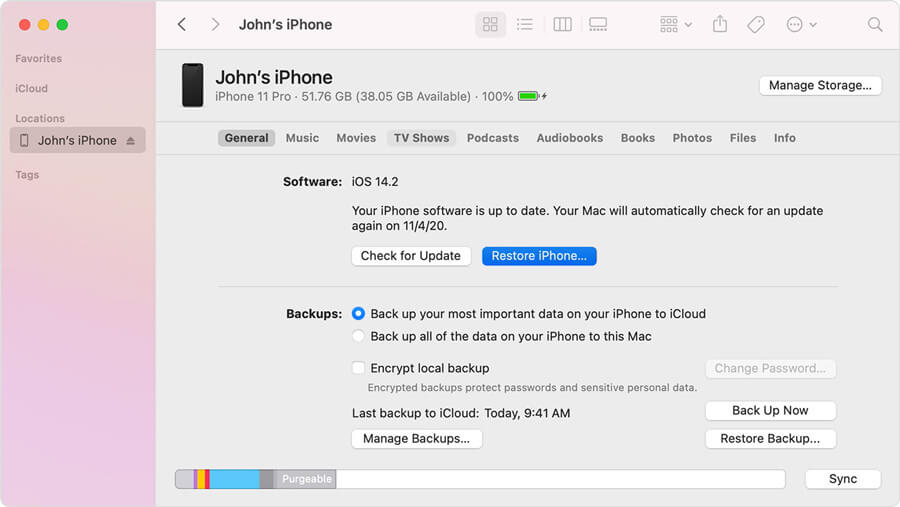
If you use an iPhone XS and the problem of “Apple cellular update failed” persists, you might want to restore iPhone with iTunes. Follow these steps:
- 1. On your computer, open iTunes. Ensure iTunes is updated to the latest version to prevent issues.
- 2. Connect your iPhone to your computer with a stable lightning or USB cable.
- 3. There might be a “Trust this computer” prompt or a password request, follow the instructions and continue the process.
- 4. Select your iPhone XS when it shows up on iTunes.
- 5. Go to Summary on the left panel and click on the Restore iPhone button.
- 6. Read and confirm the restore action if prompted. Once that is done, iTunes would go-ahead to initiate the iPhone restore and download the latest software version for your phone.
Conclusion
Communication is key in everyday life. So it can be frustrating when it’s hindered. To fix the issue of “iPhone cellular update failed”, check for updates, restore settings, re-insert sim card or use a highly recommended iOS repair tool StarzSoft Fixcon for all iOS-related problems.