Updating your iPhone or iPad shouldn’t cause any headache. Well, it’s just an update and your phone should be able to go through it without any hassle. However, you may sometimes encounter iPhone unable to check for update error. This error doesn’t occur frequently, but this simple OTA updating may become complicated due to some reasons.
Now that the iOS 15 public beta is here, it is evident that every iPhone and iPad user will want to have the latest version of their OS. If you cannot update your device to the newest beta version, this article is for you. Get to know why you are seeing this error and find out the solutions to fix the iPhone and iPad unable to check for update issue. Read on!
Part 1. What is it & Why Do You See it?
Both iPad and iPhone users see an error code on their respective devices when they try to update to the latest iOS 15 Public Beta 2. If you have signed up for the iOS 15 Beta Program, you will be able to update to the newest version. All you need to do is install the update by going to the Settings option on your device.

However, many users have reported iPhone unable to check for updates and iPad unable to check for updates error. This error means that there is an error related to the software update.
If you also see this error, your device is facing some issues while installing the iOS 15 Beta version.
The most common reason to see this error is when Apple’s update servers become busy when too many people try to go for the update at the same time. Another reason to see this error is when you have poor internet connectivity.
You May Like: How To Fix iPhone Won’t Update To iOS 15?
Part 2. Fix iPhone Unable to Check for Update
Before troubleshooting the problem, one essential thing that you should do is check the internet connection. In most cases, due to poor internet connection, users fail to update their OS.
If you have a fast and stable internet connection, you should easily install the latest iOS updates.
Let’s share the tips one by one and see if any one of them works for you.
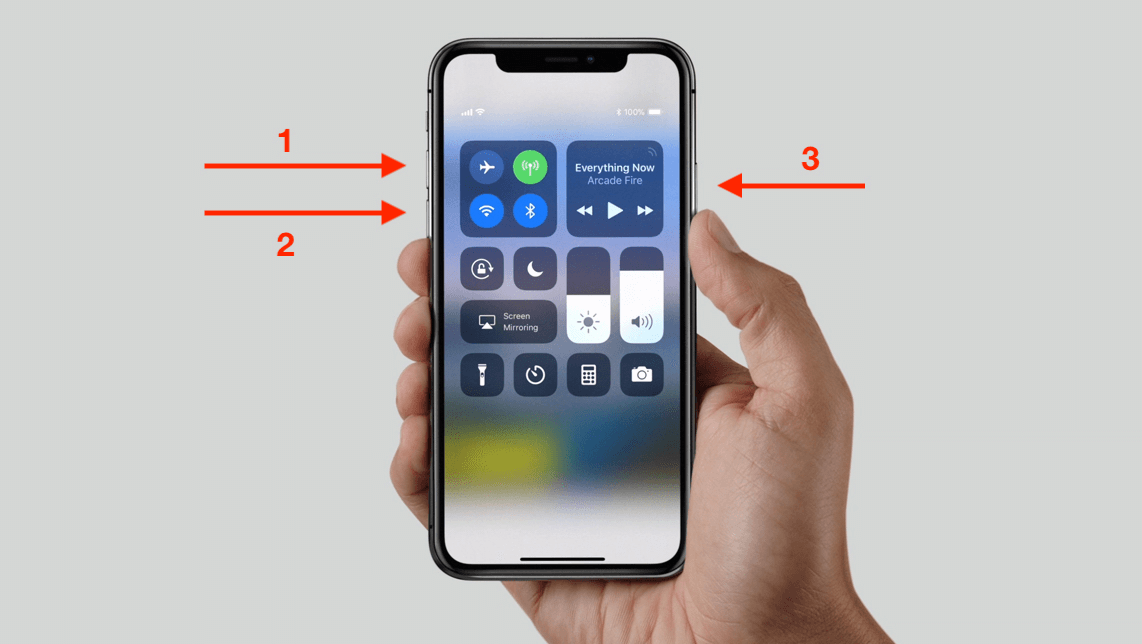
Solution 1: Turn off Wi-Fi and Turn on Again
If you are trying to update your iPhone using a Wi-Fi connection, first use a fast Wi-Fi connection. If you are receiving a slow internet connection, updating your iPhone or iPad will become complicated.
Just turn off your Wi-Fi and turn it on again after a few seconds. Now try to update the device. Your problem should be resolved.
The steps that you need to follow are:
Step 1: Go to the Settings option on your device.
Step 2: Go to the Wi-Fi menu and toggle it off.
Step 3: After a few seconds, toggle the Wi-Fi connection and switch it on.

There is another way to do that; you can try this method as well. Follow these steps:
Step 1: Turn on the Airplane Mode for a few seconds.
Step 2: This will disable the Wi-Fi connection. Now turn off the Airplane Mode.
Step 3: Finally, switch on the Wi-Fi connection.
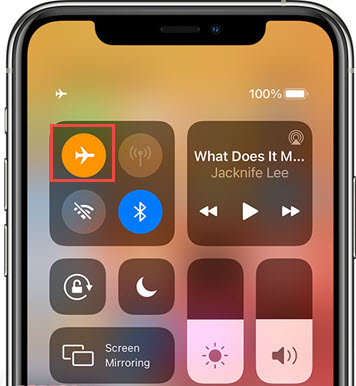
Give your device a few seconds to connect to Wi-Fi. Once done, try updating your iPad or iPhone. The reason why we shared the Airplane Mode is that it reboots your entire system. In case there are some minor bugs, Airplane Mode will fix them all.
Solution 2: Reboot your iPhone or iPad
If disabling and enabling the Wi-Fi tip fails, the next thing that you should be doing is rebooting your device. When you restart a device, it fixes a host of minor software glitches, including update errors.
Here’s what you need to do:
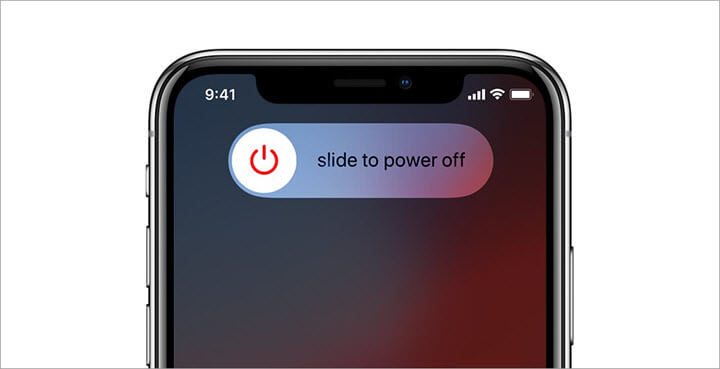
Step 1: Take a look at your phone. It has a Side/Power button and Volume buttons. You need to hold both for a few seconds.
Step 2: When you see the Slide to Power Off option, you need to release the buttons. Just do as your device says.
Step 3: Wait for 30 seconds, hold the Side/Power button and let the phone reboot.
If the soft reset doesn’t work, you should try to force restart your device. Here’s what you need to do:
Step 1: Press the Volume Up button and then quickly release it.
Step 2: Press the Volume Down button and release it quickly as well.
Step 3: Now hold the Power button, which will be on the side panel of your device, and release it.
When you reboot your iPhone or iPad, it will clear all the temporary data and cached files from the internal memory, allowing your device to perform better. If your phone has insufficient memory, then also you may come across the update error.
Solution 3: Change the Wi-Fi DNS Setting
Another thing that you can do is changing the DNS on Wi-Fi setting. To do that, follow these steps, and your problem should be resolved:
Step 1: Go to the Settings option. Then click on the Wi-Fi option.
Step 2: You will see a blue color icon next to the Wi-Fi network you are connected to.
Step 3: Click on that first, followed by the DNS field.
Step 4: You will see the DNS server. Change it to 8.8.8.8, 8.8.4.4, which is Google Public DNS.
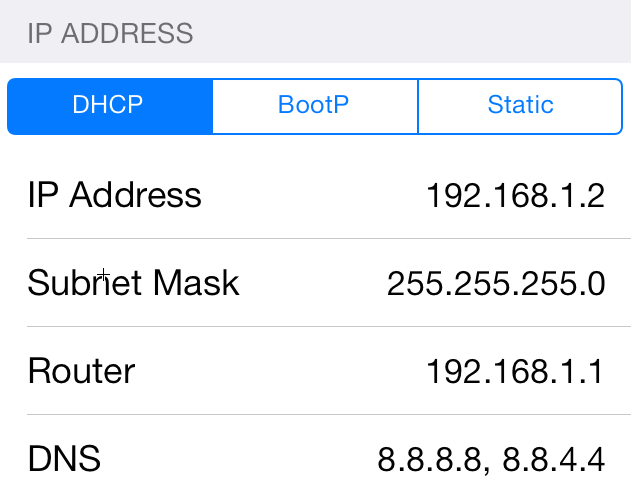
Step 5: Go to the Check Update page, and try updating your system.
Solution 4: Clear your Phone’s Space
We have already shared that you may encounter an update error when your device runs out of space. You need to know that the latest update will require around 1 to 3 GB. If your iPhone or iPad don’t have the require storage space, it’s time to free some space. You can do that by going to the Settings page.
To free up space, follow these steps:
Step 1: Open your iPhone or iPad.
Step 2: Go to the Settings option.
Step 3: Click on the General option.
Step 4: Click on the iPhone or iPad Storage option.
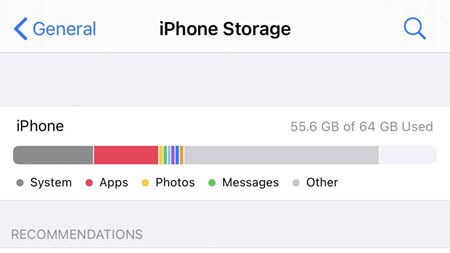
Step 5: Go through the apps, photos, and videos you no longer need, and delete them.
Once done, go to the update page, and try updating your device now. If the update issue is related to insufficient storage in your device, you will be able to update your device now.
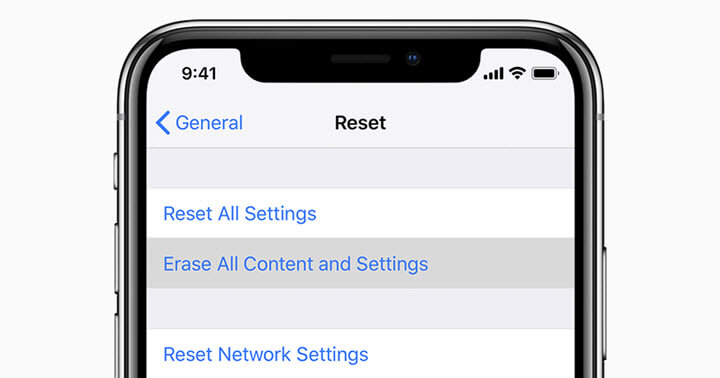
Solution 5: Reset your Network Setting
Another thing that you can do to deal with the network issue is resetting it. This solution can resolve server errors. Please note that by doing this step, you will delete all the saved networks. APNs and every server setting will be restored. Hence, it is advisable to note down the Wi-Fi passwords somewhere because you will have to enter them later. Here are the steps that you will have to follow.
Step 1: Go to the Settings option.
Step 2: Click on the General option.
Step 3: Scroll down a bit, and you will see the Reset option. Please click on that.
Step 4: From the list, you need to click on the Reset network settings option.
Step 5: You may be asked to enter the device passcode; please enter that to continue.
Step 6: Once done, click on the confirm option.
Once the network setting has been reset, your device will restart. The default network options will be shown. Give your device a few seconds to boot. Once done, reconnect to the Wi-Fi network that you use. Don’t forget to add your password for the Wi-Fi network. As we said, everything will be deleted.
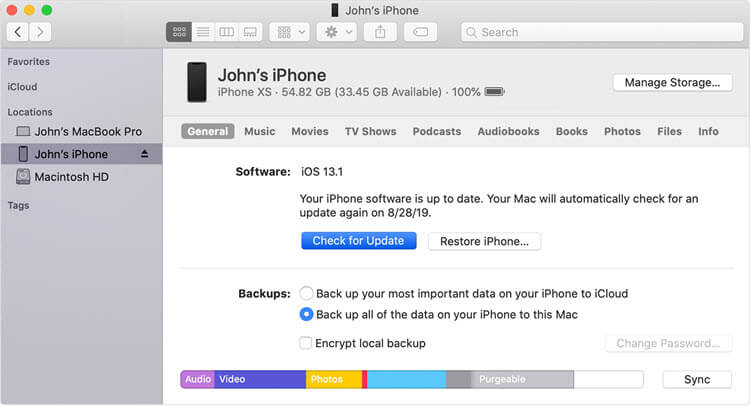
Solution 6: Use iTunes to Check for Update
If you are still not able to update your iPhone or iPad wirelessly even after trying all the steps that we have shared above, your best way to update your device will be to do it manually. To do that you will need to use your computer. Connect your computer to the internet before you access the Apple server. Now, follow the following steps:
Step 1: Get the USB cable to connect your device to the computer and connect it.
Step 2: On your computer, launch iTunes.
Step 3: On the screen, click on your device name.
Step 4: Go to Summary, and hit the Check for Update option.
Step 5: You will see an available update option; please click on the Download and Update option.
Step 6: You will be prompted to enter your device’s passcode; please enter that and proceed.
The screen will show you the instructions you need to follow to complete the rest of the process. Follow that, and the update will be completed.
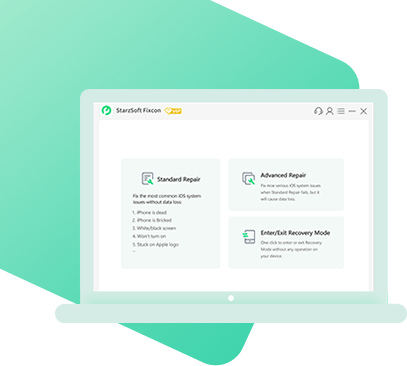
Solution 7: Fix with Fixcon – iOS System Recovery
StarzSoft Fixcon – iOS System Recovery is a recently released system repair software. If all the above solutions are failed to the problem, you can give Fixcon a try. Here are some important features of Fixcon you may be interested in:
StarzSoft Fixcon iOS System Repair
- Fix “unable to check for update” without data loss
- Two repair modes ensure a high success rate
- Support all iOS models and versions
- Help you to ungrade/downgrade iOS within a few clicks
The following steps will show you how to fix the unable to check for update issue:
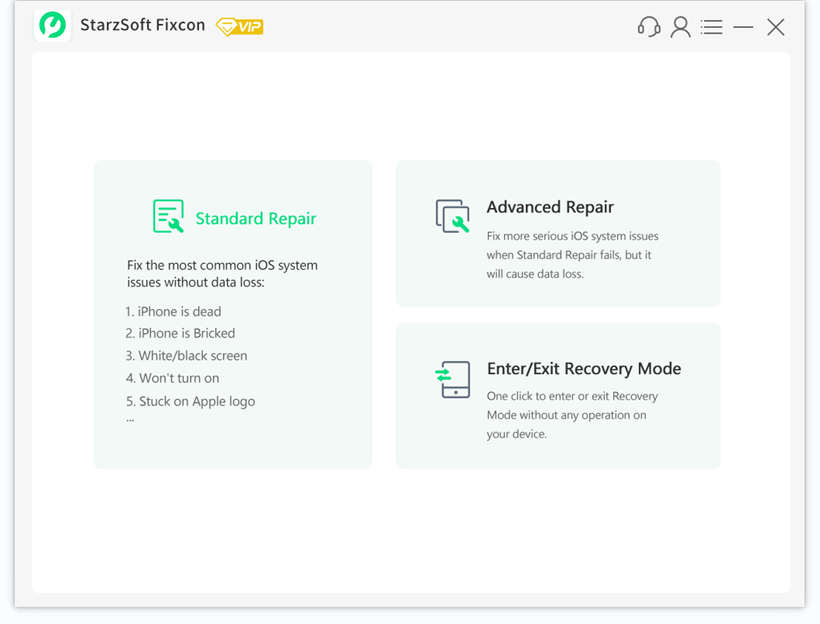
Step 1. Launch StarzSoft Fixcon on your computer and connect your iPhone.
Step 2. From the interface, choose the Standard Repair mode.
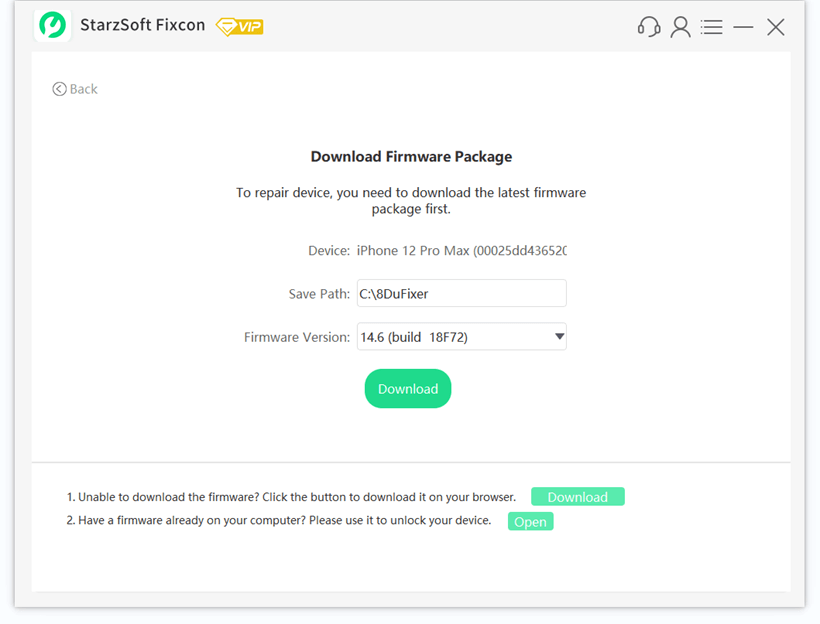
Step 3. The software will automatically detect your iPhone and show the device info on the next page. Confirm the info and click Download.
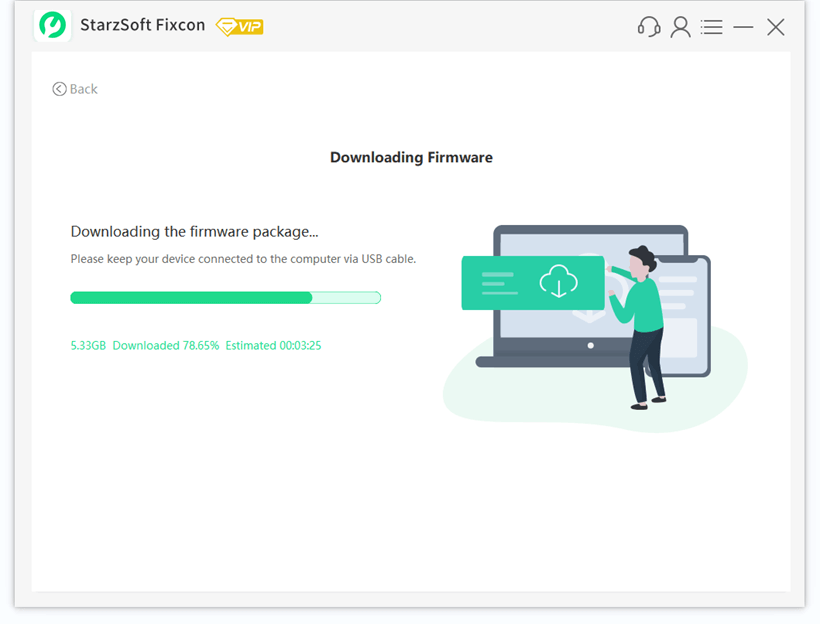
Step 4. Fixcon will start to download the firmware package which will be used to repair your iPhone issue.
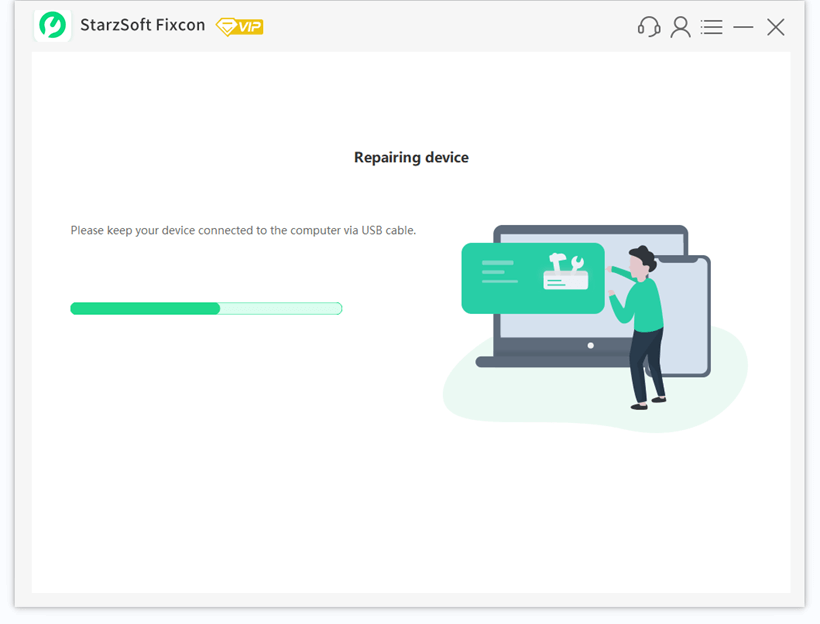
Step 5. After downloading, start to repair. The repair process usually takes 5 minutes.
Step 6. After repair, open the Settings app on your iPhone and update it to the latest iOS version now!
Conclusion
These are the six solutions that we have for you for the iPhone unable to check for update and iPad unable to check for update error. Try all the solutions, and even after doing everything, if you fail to update your device, do get in touch with Apple Support; there could be an issue with the device.