Struggling with the “attempted to write to readonly memory” issue is rare, but you can face that particular issue at some stage. If a Windows user struggles with the “stop code attempted write to readonly memory” issue, don’t stop reading this guide as you’ll explore the wonderful solution.
Part 1: When Will Attempted Write-to-readonly Memory Error Occur?
The attempted write to readonly memory error is always known as 0X000000BE. When this issue gets prompted, it will cause the Blue Screen of Death issue. This issue occurs when the device drivers intend to write something to a read-only memory part. You could also have this unwanted issue when your device drivers get corrupted.
Following are a few main reasons behind the “attempted write to readonly memory Windows 10” issue.
- The device driver is corrupt or faulty.
- Corrupted system services could end up causing the issue you’re having.
- You may face the “attempted_write_to_readonly_memory” issue due to discordant software bugs.
- A virus or malware attack could also cause the issue you’re having.
Part 2: How to Fix Attempted to Write to Readonly Memory Issue for Free
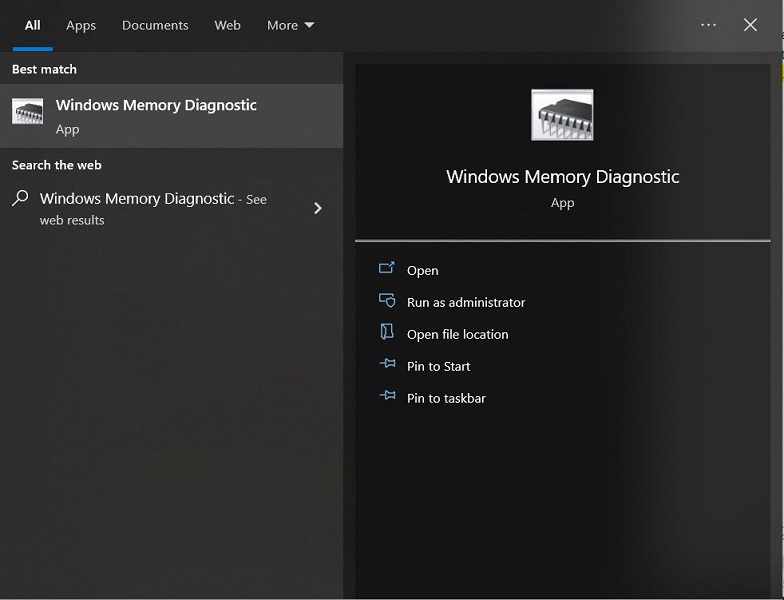
1. Run Windows Memory Diagnostic
The first thing you must aim at to fix the “attempted to write to readonly memory” issue is to run the Windows Memory Diagnostic tool. Here’s how to do it.
- 1. Press Win+R or launch the Run Utility. Proceed ahead by hitting the “mdsched.exe” icon.
- 2. Click the “Enter” icon to launch the Windows Memory Diagnostic Tool.
- 3. Now, you’ll need to select the “Restart now and check for problems” icon that appears. Doing so helps you diagnose the issue causing the whole chaos.
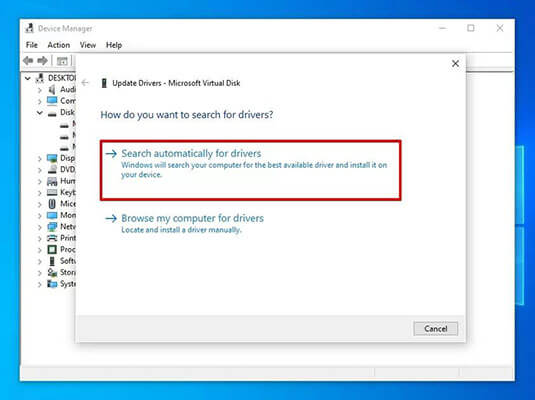
2. Update Drivers to Fix Attempted Write to Readonly Memory
Using outdated drivers could also be the main factor behind the “attempted write to readonly memory Windows 10” issue. Thus, you must update the drivers to avoid the scare. Here’s how to update the Windows drivers.
- 1. Select the Device Manager icon after pressing the Start icon. Next, right-click on each driver before selecting the “Update Driver” icon.
- 2. Press on the “Search automatically for updated driver software” icon, and doing so will allow you to install the drivers for the manufacturer’s website.
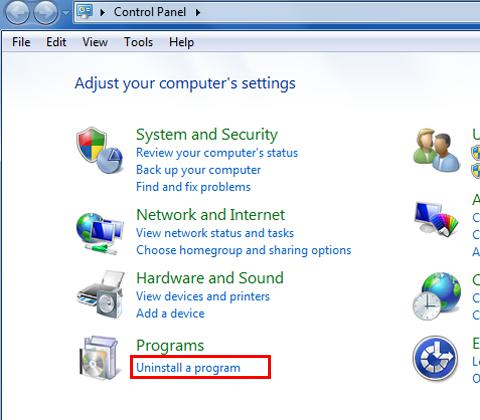
3. Uninstall Recently Installed Applications or Software
The software on your Windows can also be the main culprit behind the “attempted write to readonly memory Windows 10” issue. Thus, you’ll need to uninstall the problematic software as soon as possible to see how it goes.
Here’s how to uninstall software on a PC.
- 1. Click on the software you want to remove after launching the Control Panel.
- 2. Remove the program by tapping the “Uninstall a program” option.
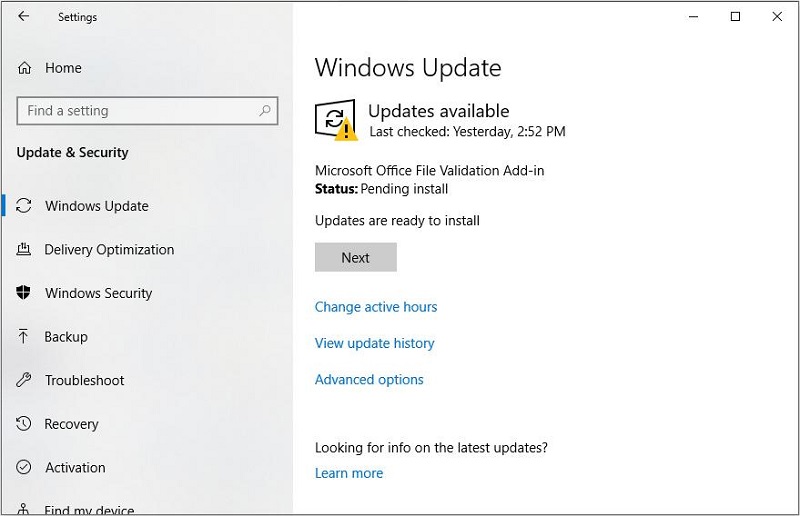
4. Update Windows for Stop Code Attempted Write to Readonly Memory Issue
You must install the new Windows update when it comes into the market. Outdated or corrupted Windows updates might cause several issues, and “attempted write to readonly memory” is also one of them.
- 1. Press on the “Start” icon and navigate to the Settings option.
- 2. Select the Windows Update icon after tapping the “Update & Security Settings”.
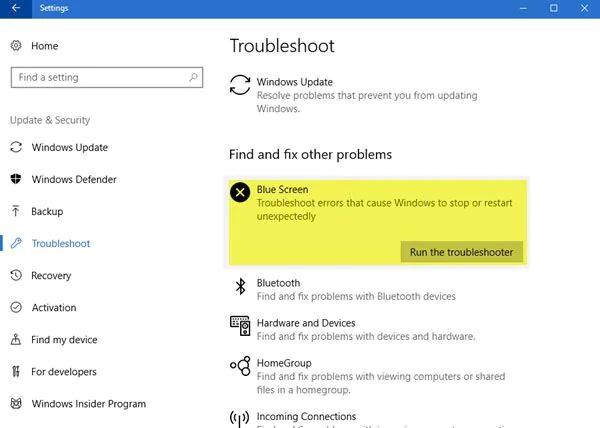
5. Blue Screen Troubleshooter
You can also rely upon the Blue Screen Troubleshooter to tackle the “attempted write to readonly memory Windows 10” issue. Before opting for this method, put the Windows in safe mode.
- 1. Click on the safe mode after navigating to the Advanced Startup Settings option.
- 2. Restart your PC and navigate to the PC Settings. Launch the Update & Security icon and choose the Troubleshoot icon.
- 3. Run the Troubleshooter after selecting the blue screen.
6. Perform System Restore
If nothing works in your favor, try performing the System Restore to overcome the BSOD error.
- 1. Tap on Repair your Computer after pressing the F8/Shift.
- 2. Tap the OK; Windows repair mode will ask you to select the account.
- 3. After selecting the account, press the “System Restore” to get things done.

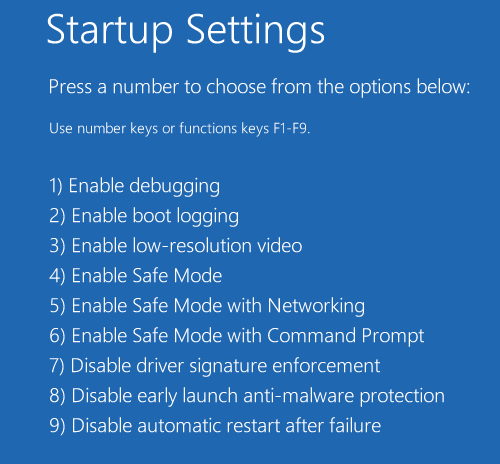
7. Enter into Safe Mode
Entering the Safe Mood is another excellent way to eliminate the “attempted to write to readonly memory” issue.
- 1. Press the Power button to restart the computer.
- 2. After finding the suitable options, press and hold the Shift and Restart Key.
- 3. Click on the Restart icon after pressing the Troubleshoot, Advanced Options, and Startup Settings. Once the PC starts, press F4 or 4 to start the computer in Safe mode.
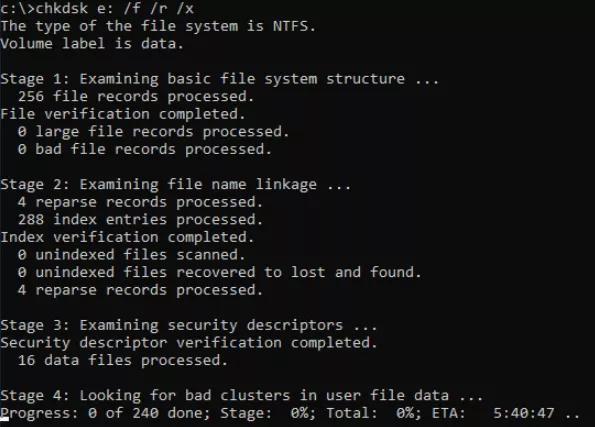
8. Run Command Prompt to Solve Attempted to Write to Readonly Memory Error
Since a bad sector or file error can also cause the “attempted to write to readonly memory” issue, running the command prompt will be useful. Doing so can help you to fix any type of Windows-related problem effortlessly.
- 1. Type cmd in the Windows search box and run it as admin.
- 2. Type in the command written below.
sfc /scannow - 3. After scanning for the errors, prompt the following command.
chkdsk E: /f /r /x (E is suggesting the drive letter of your partition. Restart the computer, and then the BSOD issue you were struggling with will be fixed.)
Part 3: How to Recover Lost Data from Windows that Says An Attempt Was Made to Write to Read-only Memory
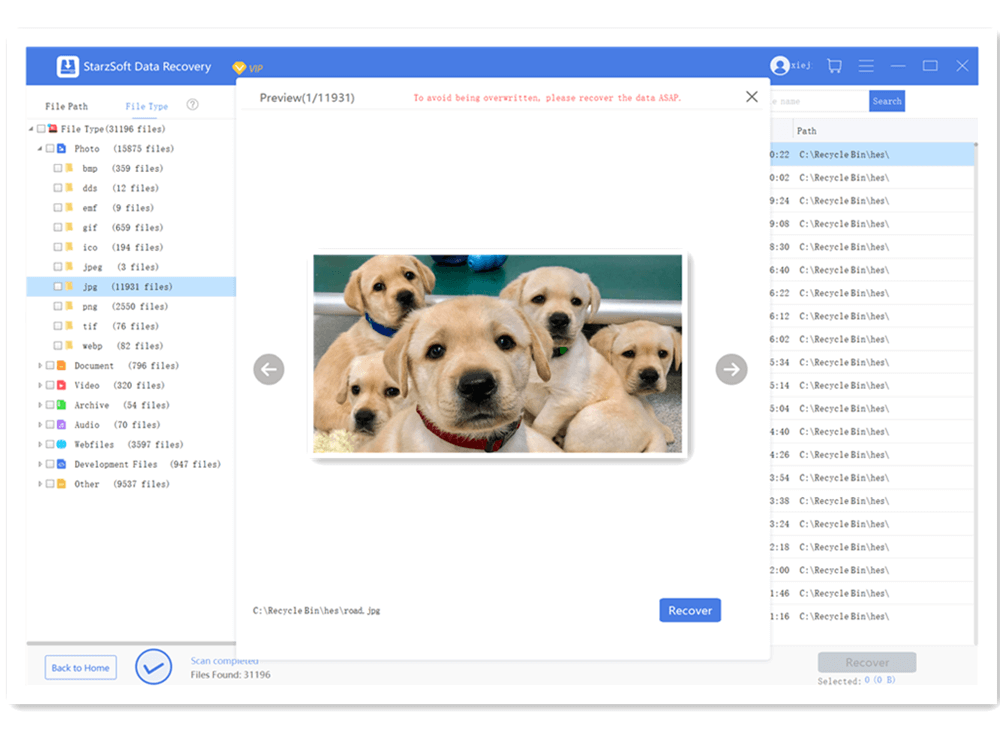
Unfortunately, when the “attempted to write to read-only memory” issue, it could easily cause the primary data on the Windows. Luckily, you can retrieve the lost data regardless of how you lost it, courtesy of the StarzSoft Data Recovery software.
Its brilliant third-party data recovery software stimulates data recovery from hundreds of storage devices. From offering the easy user interface and highest recovery rate to coming up with the ability to preview the data, Starzsoft Data Recovery software has become the top priority of most people.
Free DownloadSecure Download
- 1. After getting the Starzsoft Data Recovery download and installed on the Windows PC, start it afterward. Move into the folder of Windows 10 you’ve lost the files from.
- 2. Press the ”Next” icon to begin scanning for your important lost data, as this process will take some time.
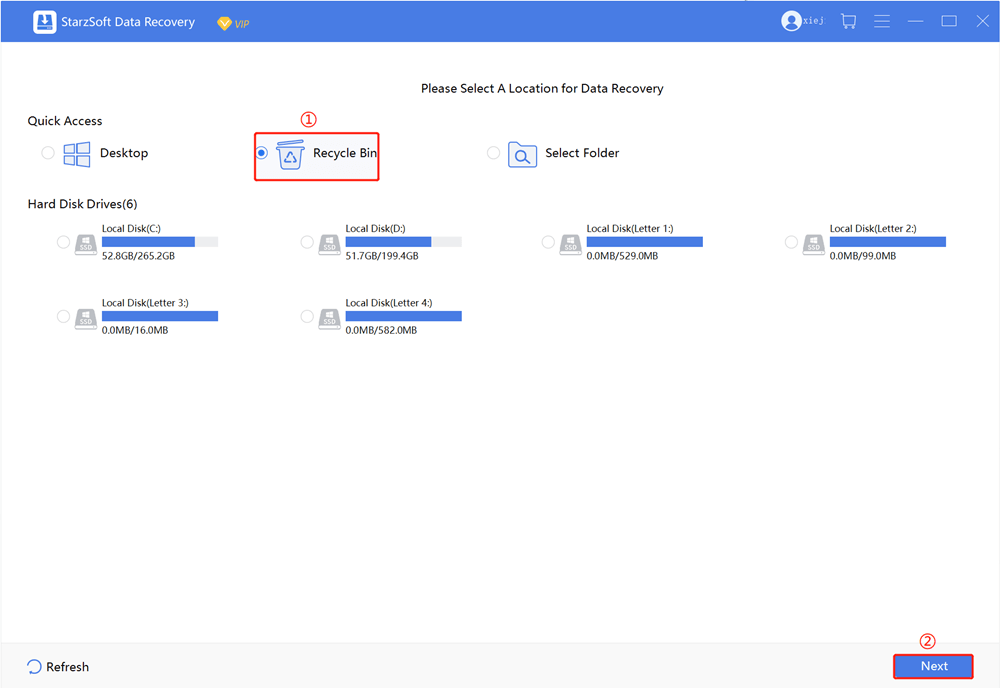
- 3. Once you have scanned the data, press the Preview icon and pick the files you’d like to retrieve. Hit the Recover icon to let the Starzsoft Data Recovery software start getting back the data.
Conclusion
Getting to see the functionality of a PC affected by the “attempted write to readonly memory” issue is a poor sight, nevertheless. Apart from mentioning the situations and reasons for this issue, we have been pretty kind in introducing spectacular methods to fix the BSOD issue.
StarzSoft Data Recovery software is the most recommended third-party software for retrieving the data lost due to an error.
Free DownloadSecure Download