Keeping your iPhone up to date with the most recent iOS version is a key part of keeping your privacy and device security intact.
If you fall several versions behind, then you’ll be putting your personal data (e.g., email addresses and passwords) at risk of behind hacked.
But even if you stay up to date, you might find yourself unable to update because of error 4000. Are you experiencing this problem?
We’re going to show you how to fix it.
What Does “iPhone Could Not Be Updated Error 4000” Mean?
You’re probably wondering what made this error appear in the first place.
Users will only see this if they are updating their iPhone using iTunes – it won’t happen with the built-in iOS updater.
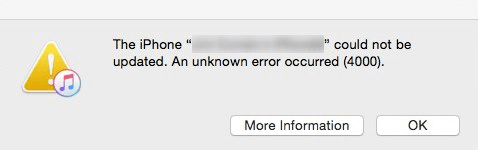
There are several reasons why users encounter “iPhone could not be updated Error 4000”, and these are the most common ones:
Low Available Storage
Most of the time it’s because the user’s iPhone doesn’t have enough storage space for the iOS firmware to be stored during the installation.
It’s a good idea to store as much of your iPhone data on your iCloud account storage to prevent this from happening (or uninstall any apps that you don’t use often!).
Current iOS is too Outdated
If the iOS version that you currently have installed on your iPhone is over a year old, sometimes iTunes won’t be able to update it.
Instead, you’ll have to use the Settings app to download and install the most recent iOS update.
iOS Has Already Been Updated
A different reason for error 4000 is that you already updated your iPhone’s iOS using the built-in updater.
Perhaps you didn’t realize it had been updated but if iTunes hasn’t detected the updated iOS and you try to update it again, you’ll receive this error.
Old iTunes Version
Another very common reason is simply that you’re using an outdated version of iTunes. Just like you should keep the iOS firmware up to date, you should also make sure iTunes is frequently updated.
This ensures you have minimal problems with the software and that you can access all the latest features.
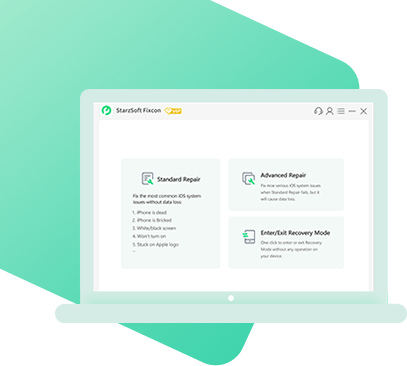
How to Fix Error 4000 with StarzSoft Fixcon
Now you’ve got a better understanding of why you’re seeing the “iPhone could not be updated error 4000” messages, let’s look at some fixes. To start with, we’ll be showcasing StarzSoft Fixcon.
StarzSoft Fixcon is a top-of-the-line software that can resolve any iOS-related issues within minutes and without causing your data to be lost.
In cases like this, it’s expected that the user’s data will be at risk – StarzSoft Fixcon eliminates that risk completely.
- Fix hundreds of common iOS issues
- Capable of resolving errors on any iOS device (iPhone, iPad, Apple Watch, etc)
- Very minimal risk of data being lost
- Includes 2 repair modes that adapt to the issues you have
- Easy-to-use for all users
This is an all-around great software to have on hand so that if any more errors crop up, you can fix them within minutes.
After you have the software installed on your computer you can go ahead and follow these steps to fix “iPhone could not be updated error 4000”.
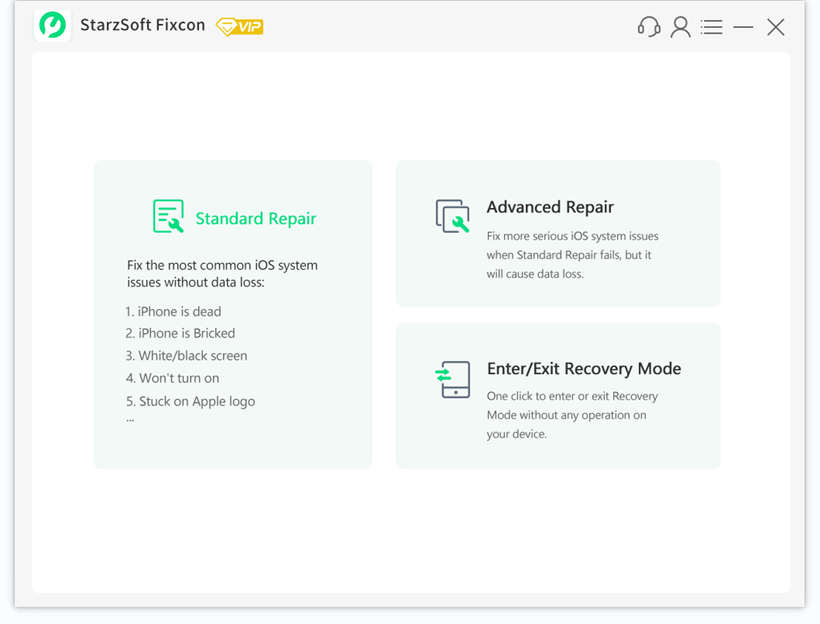
Step 1 – Launch StarzSoft Fixcon and when the program has opened, click on Standard Repair. Alternatively, you can select Advanced Repair, which we’ll discuss more later.
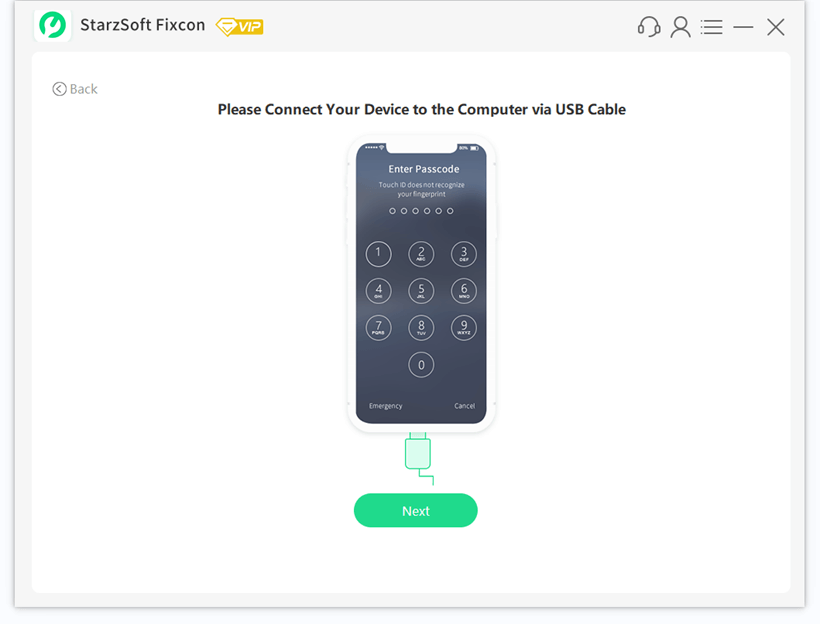
Step 2 – Use the appropriate USB lightning cable to connect your iPhone to the computer.
Step 3 – After the software has detected your iPhone’s connection you will be prompted to put the device into DFU Mode or Recovery Mode. Click on the correct tab and follow the instructions that are provided on your screen.
Step 4 – For this next step, you should select the iOS version that you want to install on your iPhone. Click Download after doing so.
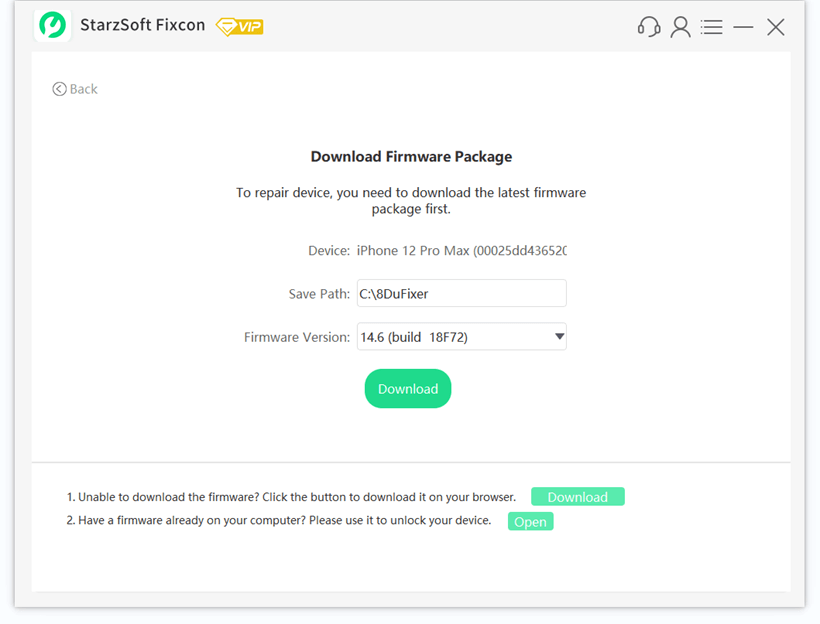
Note: depending on your situation you may also want to choose a different location to save the downloaded iOS firmware to on your computer. If so, change the Save Path before clicking Download.
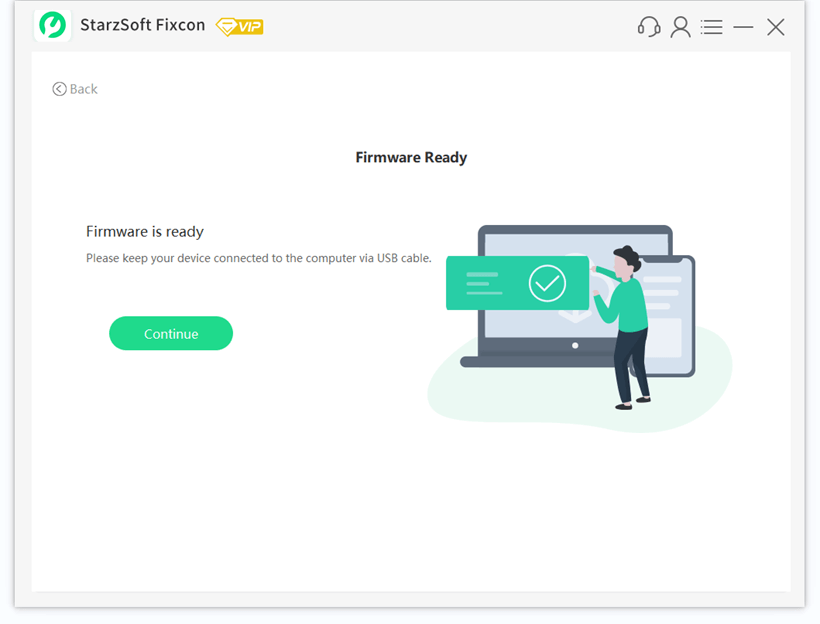
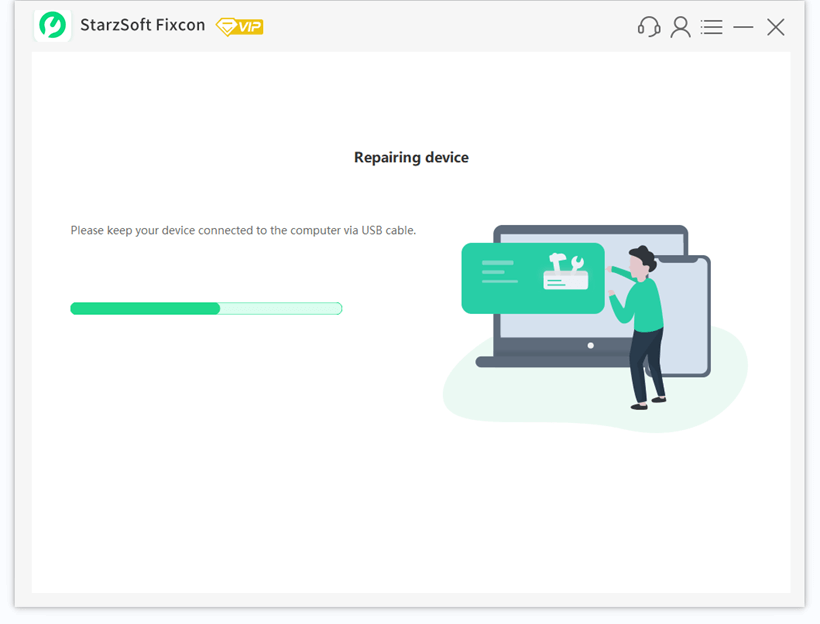
Step 5 – Wait a few moments while StarzSoft Fixcon downloads the new firmware and once the download is complete, click Continue. Within minutes, the new iOS will be installed on your iPhone.
This process is so fast that most of your time will be spent waiting on the firmware to download, and that is completely reliant on your internet connection (not the software).
If you aren’t able to fix “iPhone could not be updated error 4000” with Standard Mode, we suggest repeating these steps but instead using Advanced Mode.
Note that this repair mode will impact your personal data, so taking a full backup beforehand is essential.
Alternative Solutions to Error 4000
If for any reason you aren’t able to use StarzSoft Fixcon, there are other methods you can use to remedy the situation. While these aren’t as reliable as StarzSoft Fixcon, they may still be able to fix the error.
Method #1 – Update iTunes and Try Again
The first thing you should do when error 4000 is displayed is check if there is an iTunes update available.
It’s easy to dismiss the “new version available” notification each time you launch the program but falling too far behind leads to these problems.
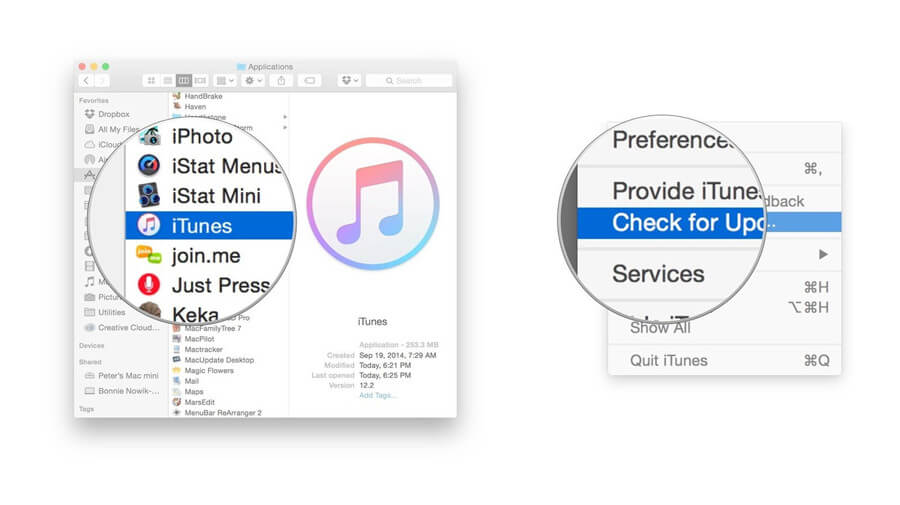
Step 1 – Open the iTunes program.
Step 2 – Click on the Help tab and select Check for Updates.
Step 3 – If an update is available, click Update Now.
Step 4 – Wait while iTunes is updated to the latest version.
Step 5 – Once the update is complete, connect your iPhone and attempt to update the iOS again.
Alternatively, you can go to the iTunes download page and install the latest version manually. But if the error continues to happen then you’ll need to keep going through our solutions.
Method #2 – Update with Recovery Mode
Recovery Mode is a tool that users can use to resolve iOS issues including “iPhone could not be updated error 4000”.
How you put your iPhone into Recovery Mode will depend entirely on the device model you have, so we’ve provided the different steps below.
![]()
iPhone 8 and newer.
Step 1 – Launch iTunes and connect your iPhone via USB.
Step 2 – Press the Volume Up button for a split second.
Step 3 – Press the Volume Down button for a split second.
Step 4 – Hold the Side/Lock button down and stop holding it once the Recovery Mode display appears.
Step 5 – On iTunes, a notification will appear. Click Update to complete this method.
iPhone 7/7 Plus.
Step 1 – Open iTunes and use a lightning cable to connect your iPhone.
Step 2 – Hold the Lock button as well as the Volume Down button at the same time.
Step 3 – Only stop holding these buttons down once the Recovery Mode page appears.
Step 4 – You will now see an iTunes notification and you should click Update on this.
iPhone 6S and older.
Step 1 – Launch iTunes and connect the iPhone with a USB cable.
Step 2 – Hold both the Lock and Home buttons simultaneously. Release after the Recovery Mode screen is shown.
Step 3 – On iTunes, click the Update button that has appeared.
Recovery Mode is very useful for these types of problems and can be used to ease other issues that come with updating iOS through iTunes.
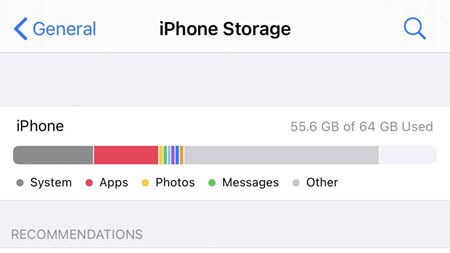
Method #3 – Tidy Up Your iPhone’s Storage
This is something most people forget to do and it can become a problem (as you can tell), resulting in iPhone could not be updated error 4000.
Managing your iPhone’s storage can take time but if you get in the habit of having as much free storage as possible, this isn’t something you have to do often.
There isn’t a single solution for this method, but we’ve compiled some tips to help you do this.
Upgrade Your iCloud Storage
For reducing the used storage space, upgrading to a higher capacity iCloud plan is the quickest option.
By default, Apple provides you with 5GB of storage space. Nowadays this is very little and taking 1 or 2 backups will fill that up quickly.
The 50GB plan is just $0.99/month and allows you to offload a lot of your photos, any files on your iPhone, and take more backups.
Delete Unused Apps
With so many apps on the App Store, it’s really easy to get carried away and download anything that you like the look of.
The issue is that over time all those apps start taking up a lot of storage. If there are any apps you rarely use, or never use, delete them. Don’t worry – you can keep the app data and reinstall them later.
Conclusion
As frustrated as you might be when experiencing iPhone could not be updated error 4000, it’s easily fixable and these solutions prove that.
Using StarzSoft Fixcon is your best bet as it’s straightforward and can even update the iOS version for you so that there’s no need to use iTunes.
Be sure to try the software out, otherwise, there are alternative solutions for you!