So you are thinking about deleting those old rusty or unwanted photos from your iPhone but are afraid to lose them from the iCloud account? You have to make sure that you do it right and do it with a known or easier method instead of trying a new one that could potentially cause troubles.
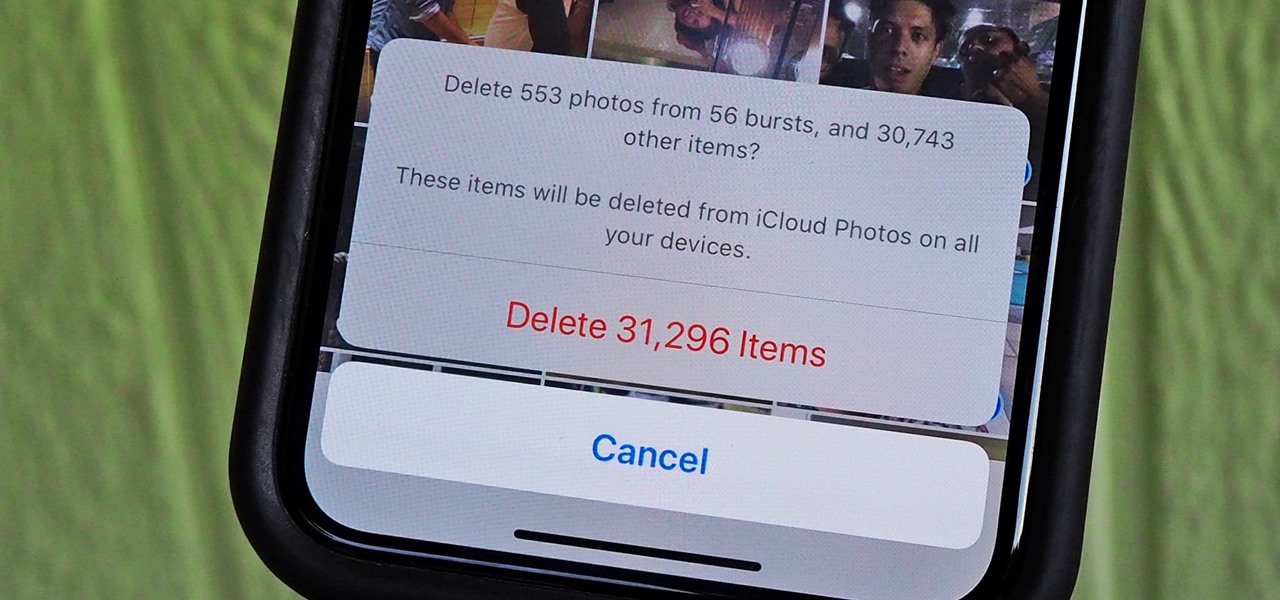
Deleting photos from iPhone can be a little tricky as you cannot recover them back once deleted. The reason of that the iPhone’s iCloud gallery is synced across multiple devices. Due to this, you cannot just delete some photos and expect that you can recover them back.
Either you want to empty your gallery because it looks so unattractive and jumbled up or you just want to transfer the unnecessary photos from your device to somewhere. In either case, you can save the images using various techniques. But if you do not want your precious photos to get deleted you must make sure you regularly back those photos up.
To delete the photos from your internal storage of your phone but not from your iCloud gallery or to keep them safer, you need to pay attention to the below points.
Back up your photos on Windows 10 with the Photos app
It may be the easiest way to save your photos!
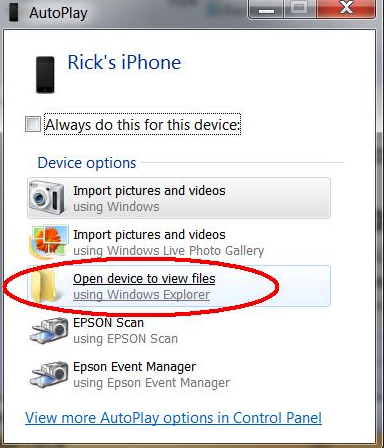
Just plug in your iPhone to your windows and it will show a message on a small window showing “Apple iPhone”.
You will have different options so select the one that says “Import Photos and Videos”. The photos app of Windows 10 will automatically detect all the photos and videos.
If you do not wish to import all the photos and videos from your iPhone, you just have to unselect all and only select those which you want to import.
You can play around with the photos like edit or crop the photos or check out other different functions.
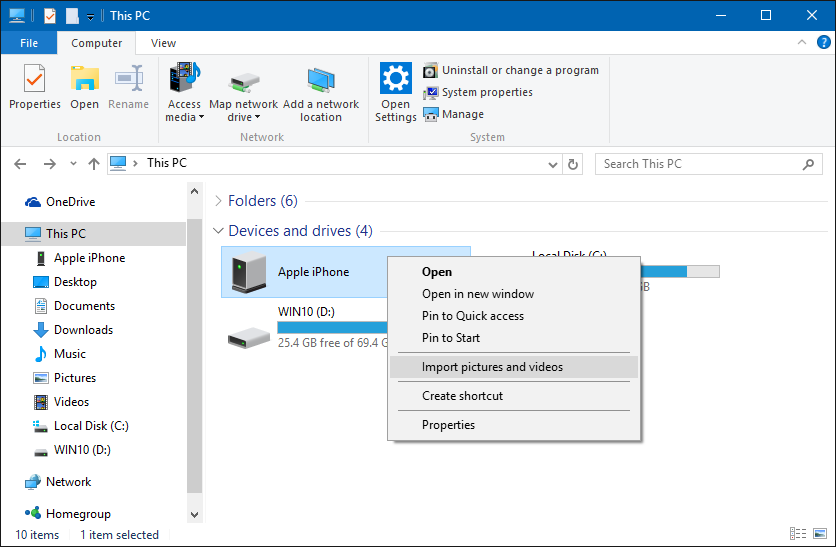
Back up your photos on Windows 10 with File Explorer
It is another method that is as simple as the previous one.
Just plug in your iPhone to your windows and select “Apple iPhone”.
Select the option “Open device to view files” option of File Explorer. It will open up the window showing your device’s storage.
Just click DCIM – then click the folder once again e.g. “108Apple”. Select all or manually select one by one the photos you want to copy or cut.
Simply paste those photos in the folder you want, simple as that!
Using Google Photos to Delete Photos from iPhone instead of iCloud
This method is also effective and easy to backup all your photos to a different app, as well as recover deleted photos.
Go to App Store and download Google Photos. After installation, open the app.
It will automatically upload all the photos and sync with your Google account. Now you can open Google Photos on your Laptop or PC.
You will see all the photos showing up so simply select the ones and click Download.
It will create a zip file and download all those photos on your Laptop or PC.
Signing in with another account
Make sure all your photos are uploaded on iCloud.
Just sign out with your current iCloud account.
Just sign in with a newer or different account
Now you can delete all the photos as they are safe in the previous ID.
Turn off iCloud Photo from your phone
In your setting option, click on your icon, find iCloud, tap on it, and choose the Photo option in the next screen.
Now just turn off the iCloud Photo.
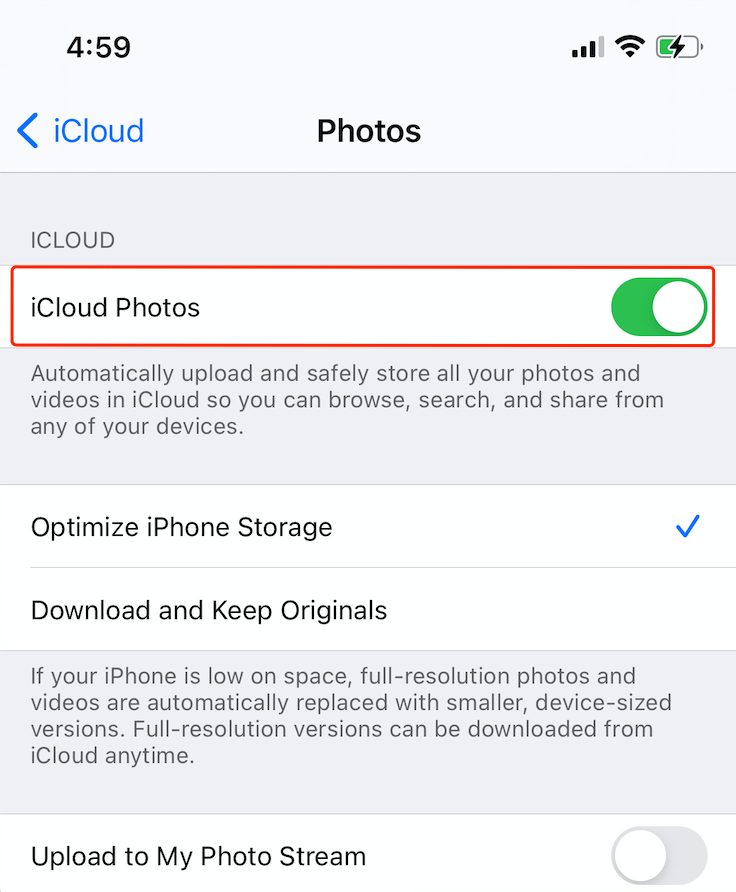
Now you can delete the photos as it will not sync them.
Wireless and WiFi Photo Transfer apps
These apps are easily useful to transfer various photos from one device to another with the use of WiFi. Not only this is a safe method but it’s hassle-free. There are some apps available that let you transfer the photos and which are free but there are others that require you to purchase them or use them till the trial is over.
Syncing all the photos to computer and re-uploading them
The photos that are in your iPhone are synced across multiple devices having the same iCloud account. So if you want to delete the photos from your iPhone, then those photos will also be deleted from all the other devices like your PC, Laptop or Tablet. So below are the steps you can follow:
First, you need to open iCloud to your PC. Make sure you are sign-in your account.
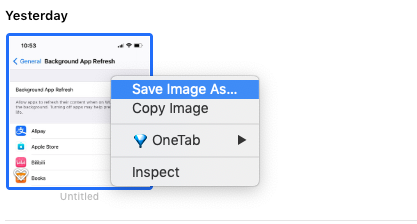
Now send all the photos to the computer through export. To do this, you need to select all of the photos on iCloud photos, and right-click a random photo, and choose the Save Image As option.
Now you can delete those photos from your iPhone. This will delete all the photos from across devices.
Once your account is empty you can start re-uploading them to the computer.
This will keep those photos on iCloud as safe.
Other methods
Installing third-party software that detects your device and helps you delete your photos, edit them or let you import them. Such software may help you out with a lot of work but it is up to you to select the best one.
- Wondershare TunesGo
- Any Trans
- iTunes
- Xillsoft iPhone Transfer
- CopyTrans Photo
- amazing
- Dr. Fone
- PhotoSync
All of the above methods are useful for transferring your photos for sure but make sure you do not skip any step otherwise you can lose your precious memories with those photos. Make sure you are deleting the photos in the right way so that you do not regret thinking about taking the wrong steps.
Conclusion
Transferring photos from iPhone to other devices or deleting them without permanently losing them is a tricky thing so you have to make sure that you focus on the right method suitable for you which you know and can perform. If you may only rely on the best method that does not involve any third-party apps.