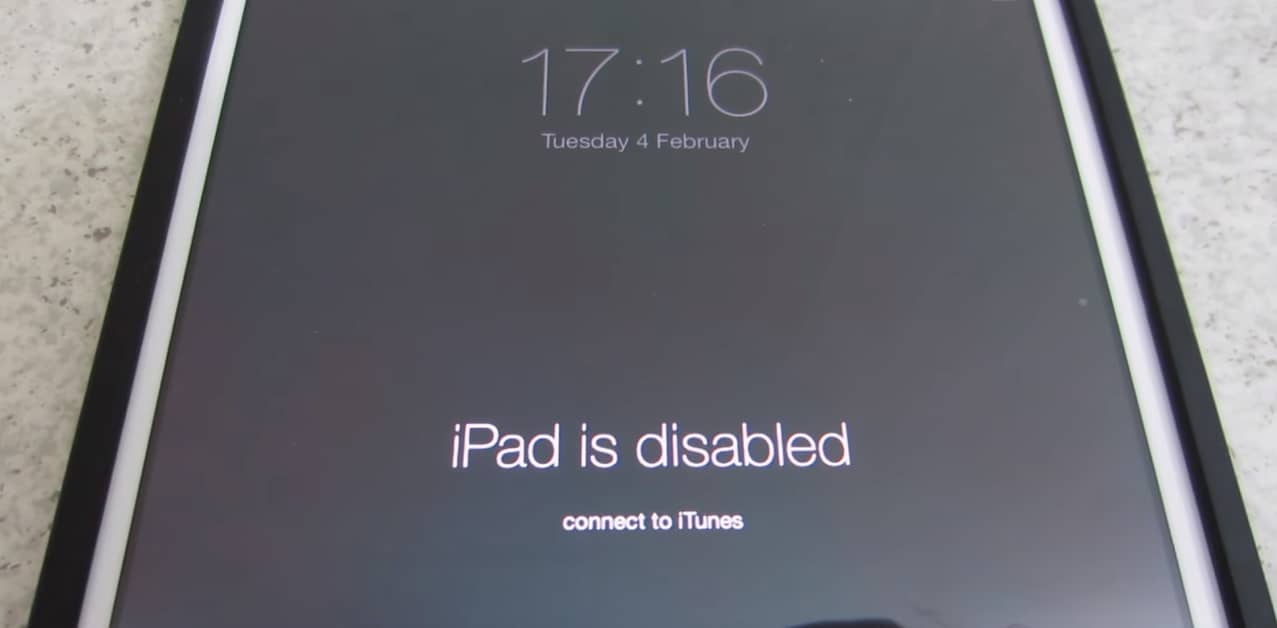
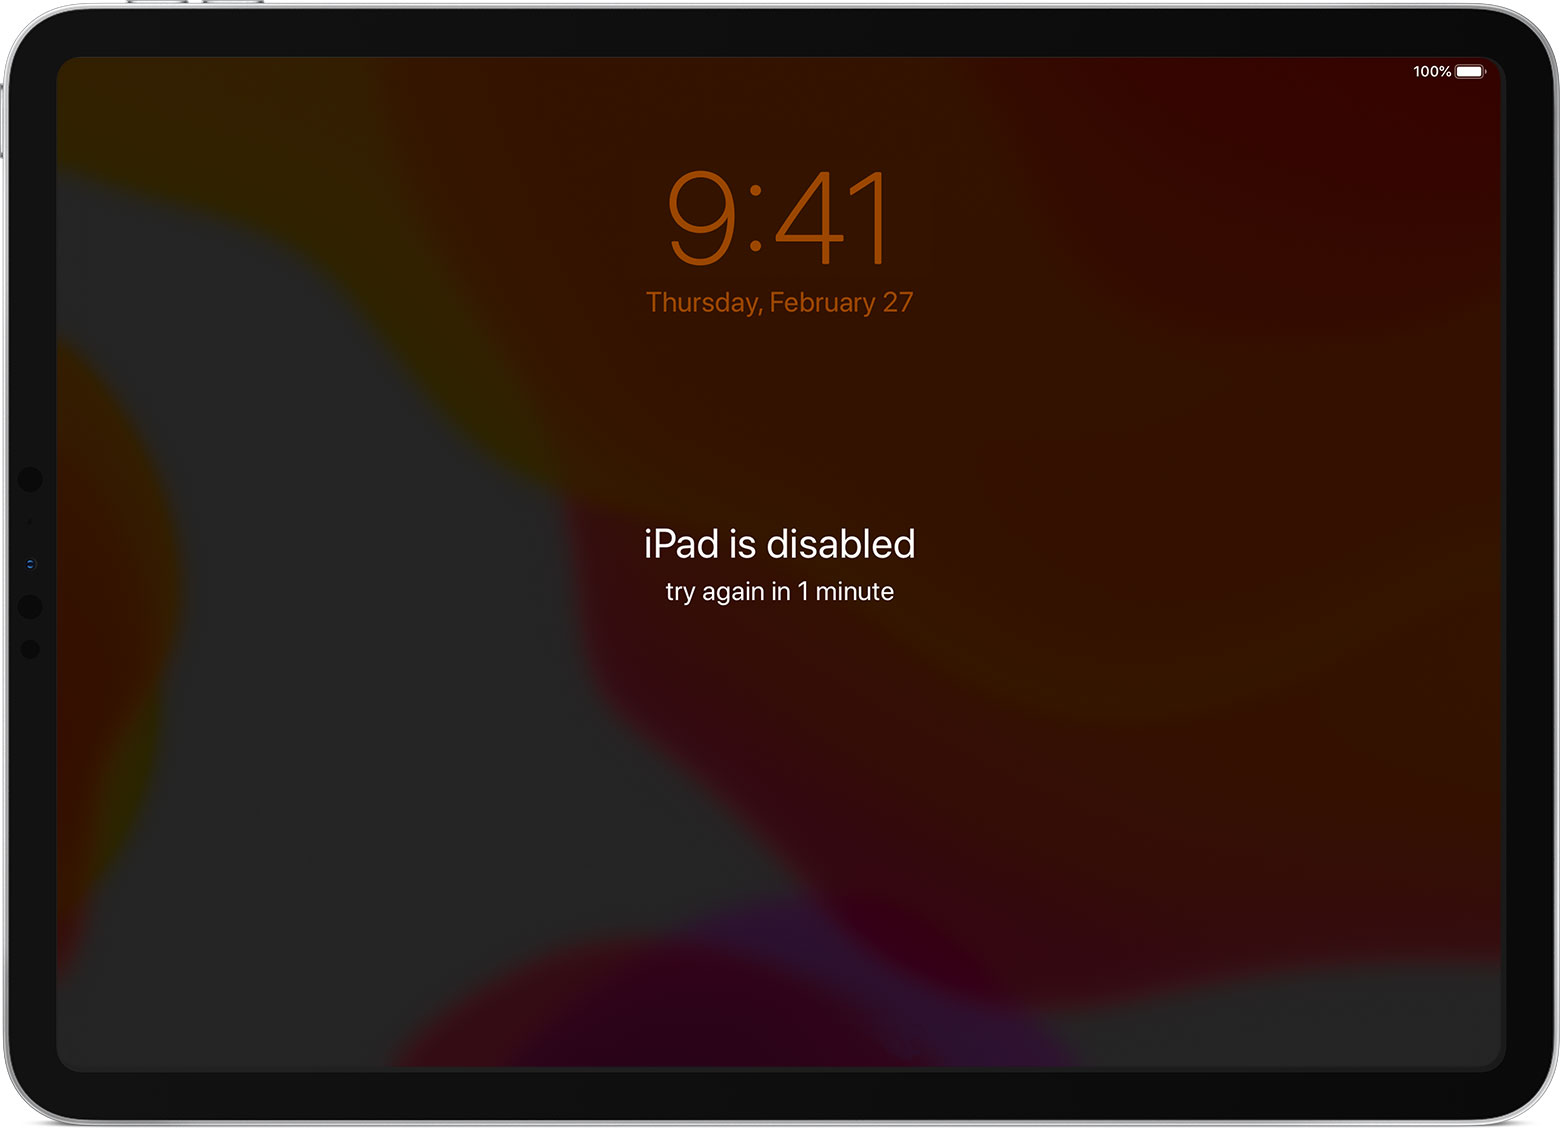
Being stuck with the “iPad is disabled connect to iTunes” screen can be frustrating. If you use your iPad to handle work-related tasks, this issue can interrupt your workday. Knowing how to get rid of the “iPad is disabled connect to iTunes” screen can help you avoid both frustration and stress.
If you are wondering what to do when iPad is disabled, this article is for you. We will be showing you how to unlock disabled iPad. Before we show you how to connect to iTunes when iPad is disabled, we will answer the question “why is my iPad disabled?”.
Reasons Why Your iPad is Disabled and Stuck on Connect to iTunes Screen
There are 3 main reasons why you might be dealing with the “my iPad is disabled” problem. These reasons include:
1. Entering the Wrong Passcode Numerous Times
This is the major reason why the “iPad is disabled connect to iTunes” screen appears. Maybe your kid took your iPad and entered the wrong passcode numerous times. Maybe you forgot your iPad password and entered the wrong password numerous times thinking that you may get it right at some point. Maybe someone at work was trying to access your private data.
Irrespective of why the wrong passcode was entered on your iPad, the iDevice will end up figuring out that whoever is entering the wrong passcodes might not be the owner. The iPad will disable itself until you connect it to iTunes to unlock it.
2. Error When Connecting to iTunes
In some cases, the “iPad is disabled connect to iTunes” screen may appear on your device when you are connecting it to iTunes. While this might appear ironic, it does happen to a large number of iPad owners. While this error is common, the major reason behind the error is yet to be established.
3. Bugs
If your iPad is running an older operating system, there is a likelihood that the older operating system may have bugs. Bugs usually cause the iDevices to misbehave. The bugs could cause your iPad to display the “iPad is disabled connect to iTunes” Error.
Now that you know the answer to the question “why is my iPad disabled?” we will go ahead and show you the solutions you can use whenever you are dealing with the “my iPad is disabled connect to iTunes” issue. While some of the solutions outlined below may not work for you, you should find a solution that helps you if your iPad is disabled and won’t connect to iTunes.
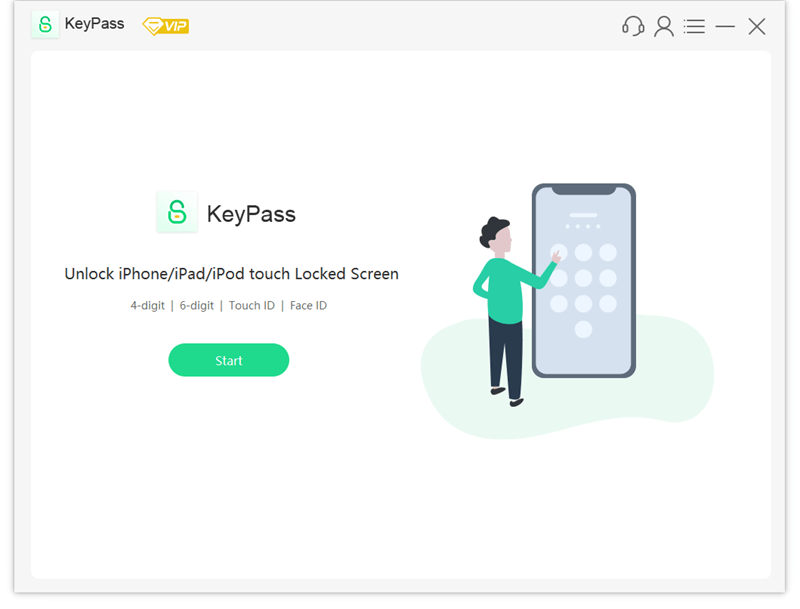
Solution 1: Best Software to Unlock Disabled iPad Saying Connect to iTunes
The best solution comes first. This method frees you from reading guides or trying different methods that won’t always work. It’s simple and fast when it comes to iPhone or iPad unlock.
Yes, we are talking about Starzsoft KeyPass. It’s a newly developed pc-based software that is used to bypass iPhone passcode or unlock disabled iPad, especially when you enter your passcode wrong for too many times that it is locked on screen and says that you have to connect iPad to iTunes to solve it.
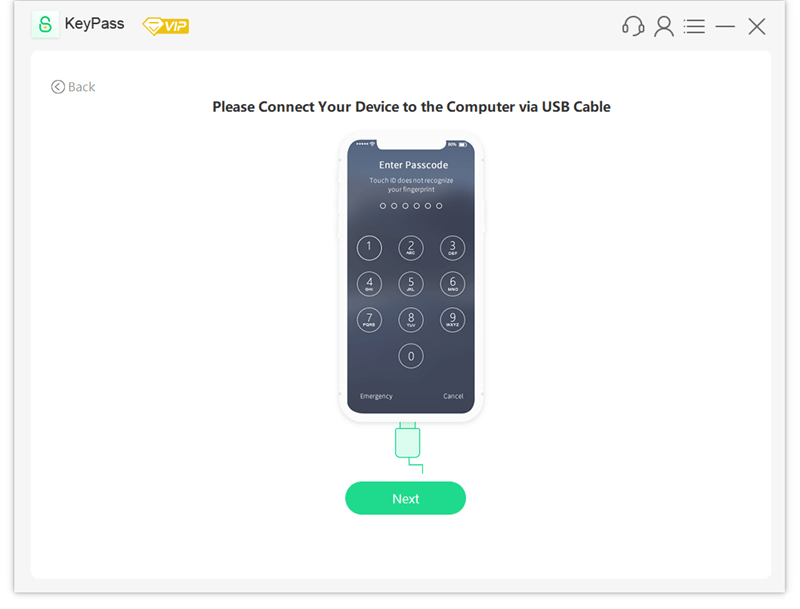
Now let’s see how to use it to unlock your disabled iPad:
Step 1: Download KeyPass and launch it on your computer.
Step 2: Connect your iDevice (iPhone/iPad/iPod Touch) to your computer via a USB cable. Then click on the “Next” button, KeyPass will start to detect and load your device information.
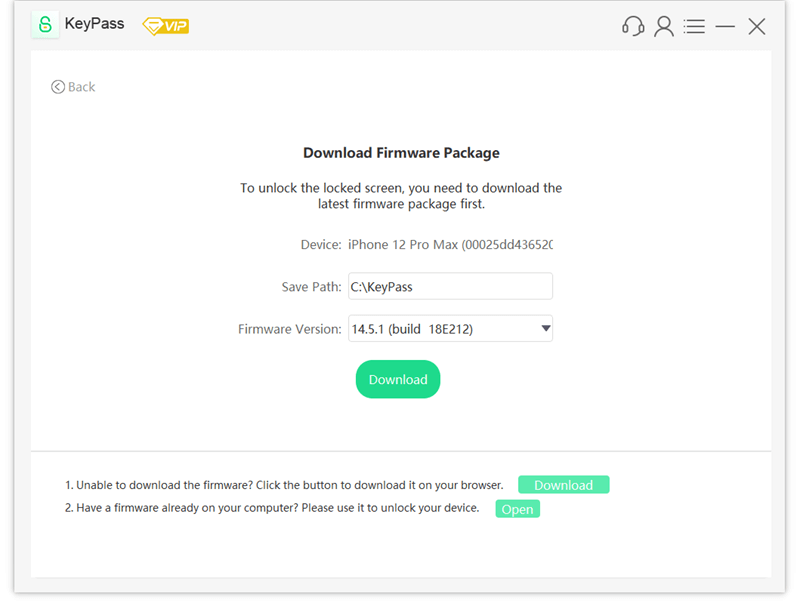
Step 3: Verify your device info and select the firmware version provided, then click “Download” to proceed.
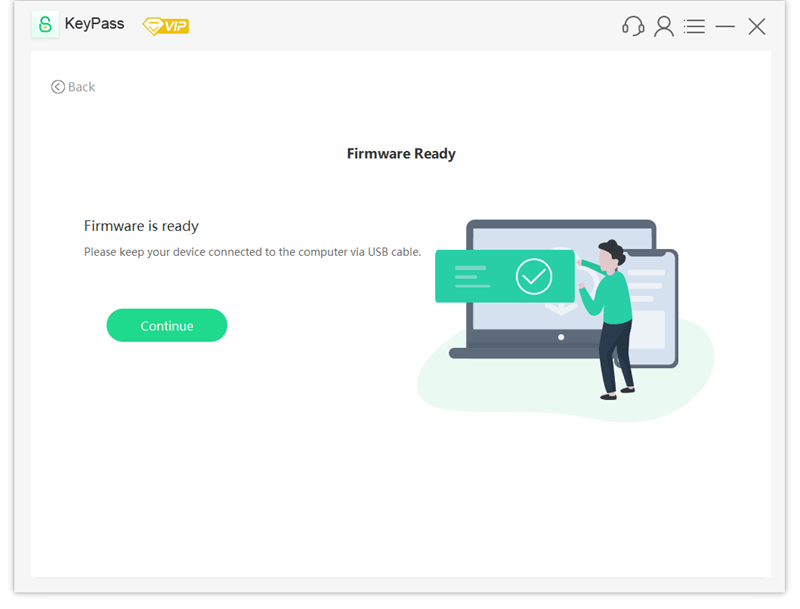
Step 4: after downloading is completed, you will see the notification below. click the “Continue“.
Step 5: KeyPass will start to unlock your device. Please keep your device connected to your computer via USB cable. Just in a few minutes, the passcode/Touch ID/Face ID will be removed from your disabled device.

Solution 2: Unlock Disabled Disabled iPad Using Siri
This is an ideal solution considering that it won’t require you to have access to a computer. Also, it won’t erase your iDevice. It is worth noting that this solution is considered to be a loophole on older iOS versions. Hence, it may not work on your iPad. The solution generally works on devices running iOS 10.1 and iOS 8.0.
To learn how to fix the “iPad is disabled connect to iTunes” issue using Siri, follow the steps below:
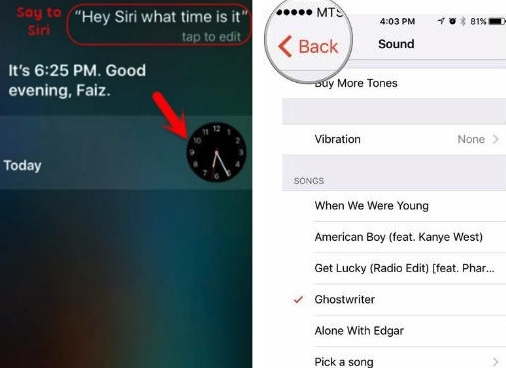
Step 1: Activate Siri by tapping and holding the Home button. After launching Siri, ask the present time. You can give a command like “Hey Sir, what is the time?”. Siri should let you know the time by displaying a clock showing the current time. Tap on the clock.
Step 2: After tapping on the clock, the clock interface should open. Click on the world icon on the bottom-left corner. Next, click the Plus (+) icon on the top-right corner.
Step 3: Start typing on the search bar. Tap the search bar after typing a few characters and then choose Select All.
Step 4: Tap the Share button on the floating, horizontal menu that appears on your screen. This should open a pop-up containing share options. Click the Message icon.
Step 5: The step above should launch the message window. Wait for a couple of seconds and then type something in the “To” field. Next, tap the Return button on your iPad’s keyboard. This should highlight what you typed in the “To” field.
Step 6: Click the add icon. Tap on Create New Contact from the interface that appears.
Step 7: Instead of adding information on the text fields available, tap on Add Photo and then select Choose Photo.
Step 8: This should open the iPad Photos gallery. On the Photos gallery, do not select a picture, instead, wait for a couple of seconds and then tap the Home button. If this trick works on your iPad, the iPad should be unlocked.
Solution 3: How to Fix the “iPad is Disabled and Won’t Connect to iTunes” Problem Using Find My iPad
If the above solution fails to work for your iPad, you can use Find My iPhone to restore your iDevice remotely. When using Find My iPhone to unlock a disabled iPad, you won’t need to learn how to connect to iTunes when iPad is disabled.
If you can log into iCloud.com using the credentials used on the disabled iPad, follow the steps outlined below to learn what to do when iPad is disabled:
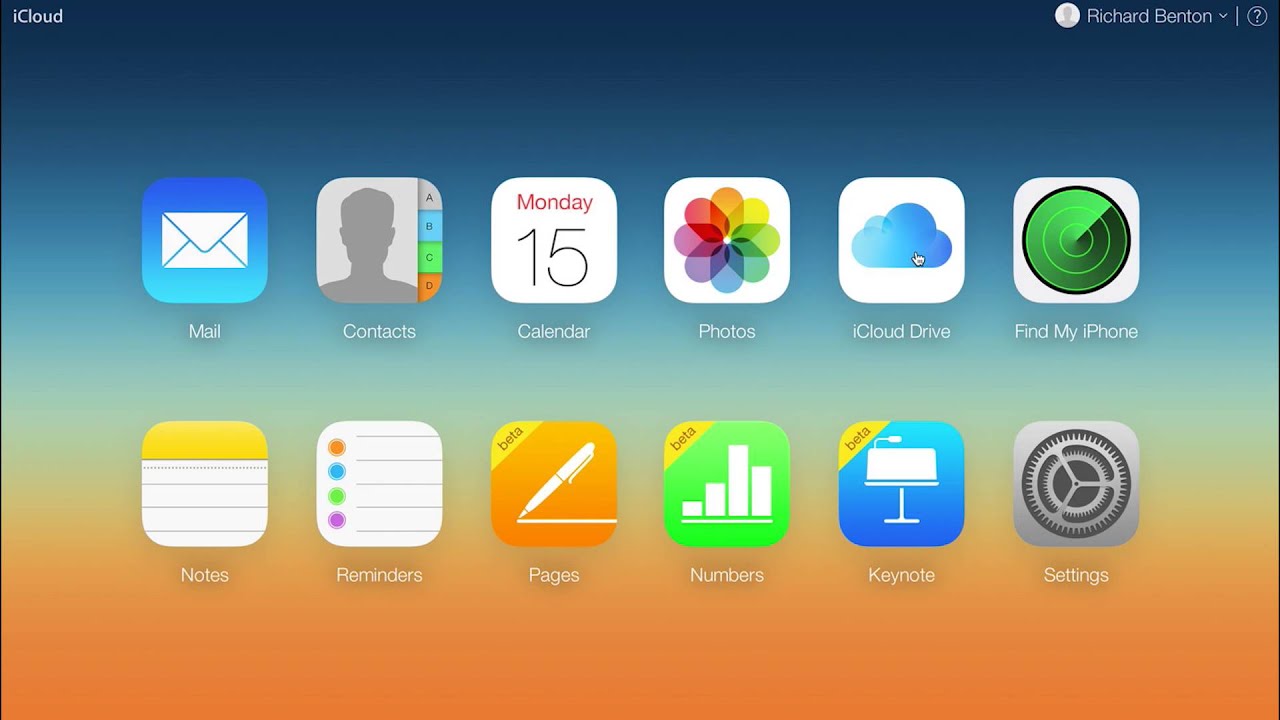
Step 1: Visit icloud.com using your computer’s web browser. Log in using the Apple ID and password used on the disabled iPad.
Step 2: On the main menu after logging in, select Find iPhone.
Step 3: On top of the screen, tap All Devices and then select the disabled iPad from the list that appears.
Step 4: On the popup that appears, select Erase iPad and then confirm your choice. This should unlock your iPad.
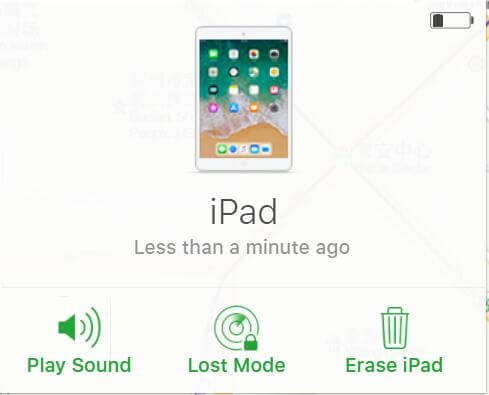
Note: This solution will erase all the data you have on your iPad. Also, the solution will not work if the iPad is not connected to the internet.
Solution 4: Fix iPad Saying Connect to iTunes on iTunes
If you are still wondering what to do when iPad is disabled, chances are that you haven’t found a solution that works for you. Resetting the iPad can help you get rid of the “my iPad is disabled connect to iTunes” problem. Below, we will show you how to connect to iTunes when iPad is disabled and how to unlock disabled iPad:
Step 1: Using a USB cable, connect your iPad to the computer and launch iTunes.
Step 2: Locate your iPad on iTunes and tap on it.
Step 3: If you have not backed up your iPad for a long time, select Back Up Now. This should sync your iPhone with iTunes. If prompted for a password, enter the password to complete the sync process. Now, you can either choose to continue with the backup process or simply cancel it and continue using your iPad. You will have reset your iDevice successfully.
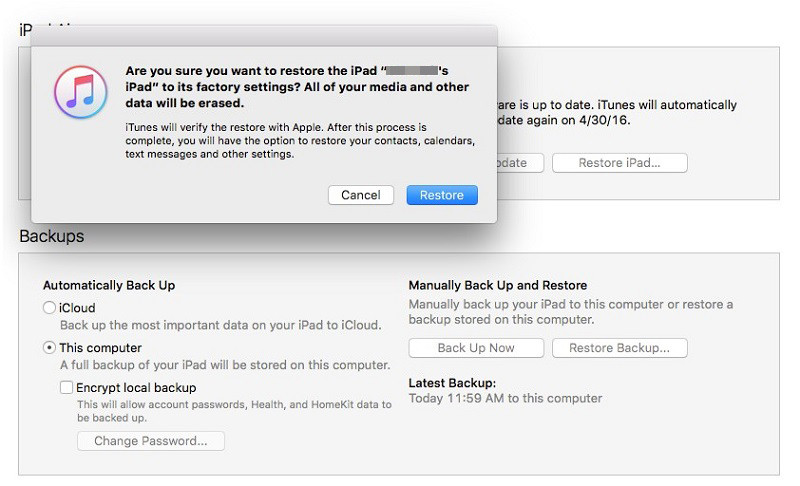
Step 4: If it is impossible to sync your iPad with iTunes, choose Restore Backup instead. This option will work if you had backed up the iPad previously. When selecting the backup to restore the iPad from, select the most recent backup. After the restoration, your iPad should work normally.
Solution 5: Restore Your Disabled Device in Recovery Mode Via iTunes
If you are still not sure what to do when iPad is disabled, you can consider either updating or restoring your iPad in recovery mode. Updating your iDevice can help you keep your data while restoring the device will erase all the data you have on your iPad.
However, it is worth noting that when you are dealing with the “my iPad is disabled connect to iTunes” issue, updating the device may not work. This means that you may have to use the restore option if the update option fails to work. Follow the steps below to unlock disabled iPad using the Recovery Mode:
Step 1: Using a USB cable, connect your iPad to iTunes. Next, launch iTunes.
Step 2: Press and keep holding both the Home and the Sleep/Wake buttons. Stop holding both buttons when the recovery mode screen appears.
Step 3: On iTunes, you should be prompted to either Update or Restore your iPad. Choose Update first. This will give you the opportunity to retain your data. If the Update option does not work, select Restore.
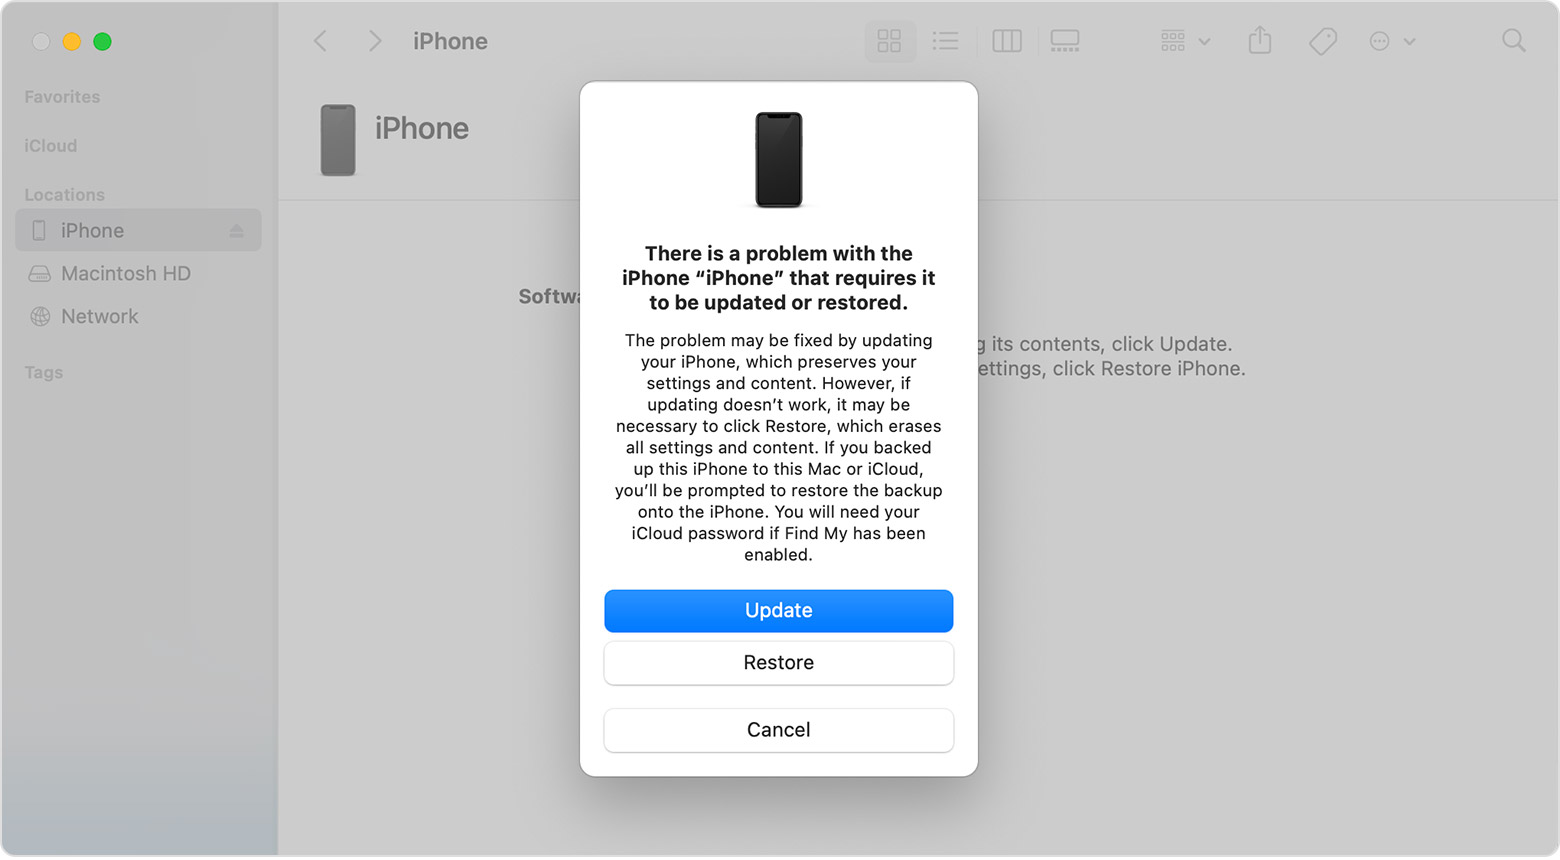
Step 4: Wait for a couple of minutes for the Restore process to finish. Set up your device.
Solution 6: Restore iPad in DFU Mode
If you are still dealing with the “iPad is disabled and won’t connect to iTunes” problem, you can try restoring the iPad in DFU Mode. To implement this solution, follow the steps below:
Step 1: Connect your iPad to your computer and open iTunes.
Step 2: Power off the iDevice.
Step 3: Press and hold the Sleep/Wake button on the iPad for approximately 3 seconds.
Step 4: While still holding the Sleep/Wake button, press and hold the Home button. Hold both buttons for approximately 10 seconds.
Step 5: Release the Sleep/Wake button and keep holding the Home button for 5 extra seconds. This should put the iPad in the DFU mode.
Step 6: Select Restore on iTunes and then wait for the Restore process to finish. Next, set up your iPad.
for those who use iPhone x or later, you can refer to this page to learn how to put iPhone 12/11 into DFU mode.
Solution 7: Take your iPad to a Service Center
If you have already tried all the solutions outlined in this article and you still have the “iPad is disabled connect to iTunes” screen on your iPad, you may have to take your iDevice to a Service Center. While there are numerous unofficial Service Centers, it is always a good idea to take your iDevice to a certified Apple official Service Center. This will guarantee you high-quality service.
Tips on How to Keep Your iPad Secure
1. Disable Siri from the Lock Screen
If someone can access Siri on Lock Screen on an iPad running an older version of iOS, he/she can unlock your device without the device’s passcode. To ensure that no one can use Siri to unlock your device, you may need to disable the feature on Lock Screen. Follow the steps below to disable Siri on your iPad’s Lock screen:
Step 1: Open Settings > Touch ID & Passcode.
Step 2: Locate “Allow access when locked” section. In this section, disable Siri.
2. Enable Find My iPhone
As noted earlier on, the Find My iPhone feature can help you unlock disabled iPad. On top of this, the feature can be useful if you happen to lose your iPad or iPhone. To enable Find My iPhone feature on your iPad, follow the steps below:
Step 1: Open Settings > iCloud > Find My iPhone.
Step 2: Toggle the feature on. Additionally, toggle on “Send the last location”.
Summary
If you are dealing with the iPad is disabled connect to iTunes problem, you won’t have the ability to use your iPad before fixing this issue. In this article, we have shown you what to do when iPad is disabled and won’t connect to iTunes. In order to help you avoid the issue in the future, we have also shown you the answers to the question “why is my iPad disabled?”. Some of the solutions in this article may not work for you. However, trying more than one solution is an ideal way to increase your chances of unlocking your iPad without taking the device to a service center.