Simply defined, a watermark is an image or a text that appears either behind or in front of the content. To give you an example, on pages featuring sensitive information, you could add a “Confidential” watermark. If you have been trying to add watermark to PDF, you have come to the right place. We will show you the various solutions you can use.
Method 1: Use Microsoft Word to Add Watermark to PDF
Most computer users do have the Microsoft Word application installed on their computers. On top of helping you create and edit Word documents; Microsoft Word can help you add watermark to PDF.
Below, we have the steps you will need to follow:
Step 1: Locate the PDF document to which you would like to add the watermark. Right-click on the document > choose Open with… and then select Microsoft Word.
You will get a warning that tells you the document will be converted into a format that is more compatible with Word. Hit the Ok button and wait for a couple of seconds for the conversion to complete.
Step 2: Once the document opens, select the Page Layout option from the upper Menu Bar. You should see a panel featuring numerous sub-panels.
Step 3: Under the Page Background sub-panel in the Page Layout tab, choose the Watermark option. A box featuring various patterns of watermarks should appear.
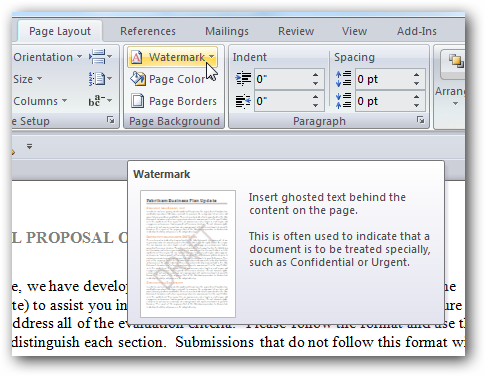
Step 4: You can choose from the existing patterns or create a custom watermark format. To customize the watermark, select Customize Watermark.
Step 5: After hitting the Customize Watermark option, choose Printed Watermark. This will give you access to three options:
- Option 1: No Watermark – This option is ideal if you would like to remove the watermark from the document. The option comes in handy if the document already had a watermark on it.
- Option 2: Image Watermark – This allows you to add an image, say, a logo, as your watermark. To add the image as the watermark, you will just need to hit Select Image in the option.
- Option 3: Text Watermark – This will allow you to add specific text as a watermark to your document. You can customize the font, size, and color as per your preferences.
Step 6: Once you are done with choosing the Watermark option you would like to use, hit the Apply button. The watermark will appear on the PDF document as a transparent pattern.
Method 2: Use Finder on Mac
With the release of their macOS Mojave, Apple introduced the Quick Actions feature. This feature makes it possible for the Finder tool to access common tasks, including compiling numerous images into one PDF document, rotating an image, etc. Quick Actions makes use of the Automator workflows to process your files.
The option to add watermark to PDF is not available by default in the Quick Actions. However, using a couple of Automator customizations, you should be able to add the option. The result will be having the ability to add watermark to PDF without investing in third-party tools.
Below, we will show you the steps you will need to follow. The first part will help you set up the Quick Action while the second section will let you watermark your documents.
Part 1: Setting Up Quick Action
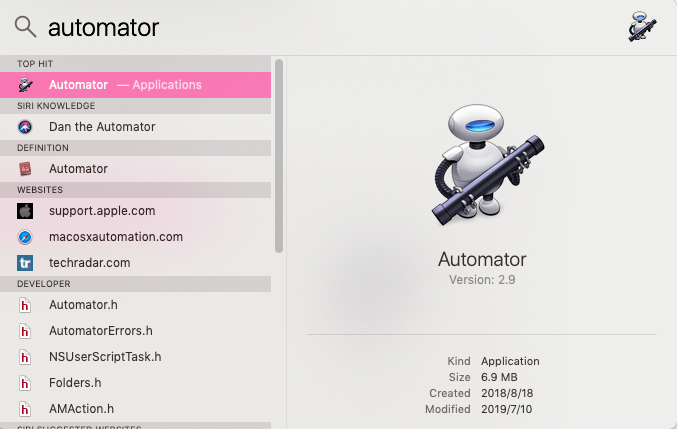
Step 1: On your Mac, open Automator. This can be achieved by searching “Automator” in the Spotlight.
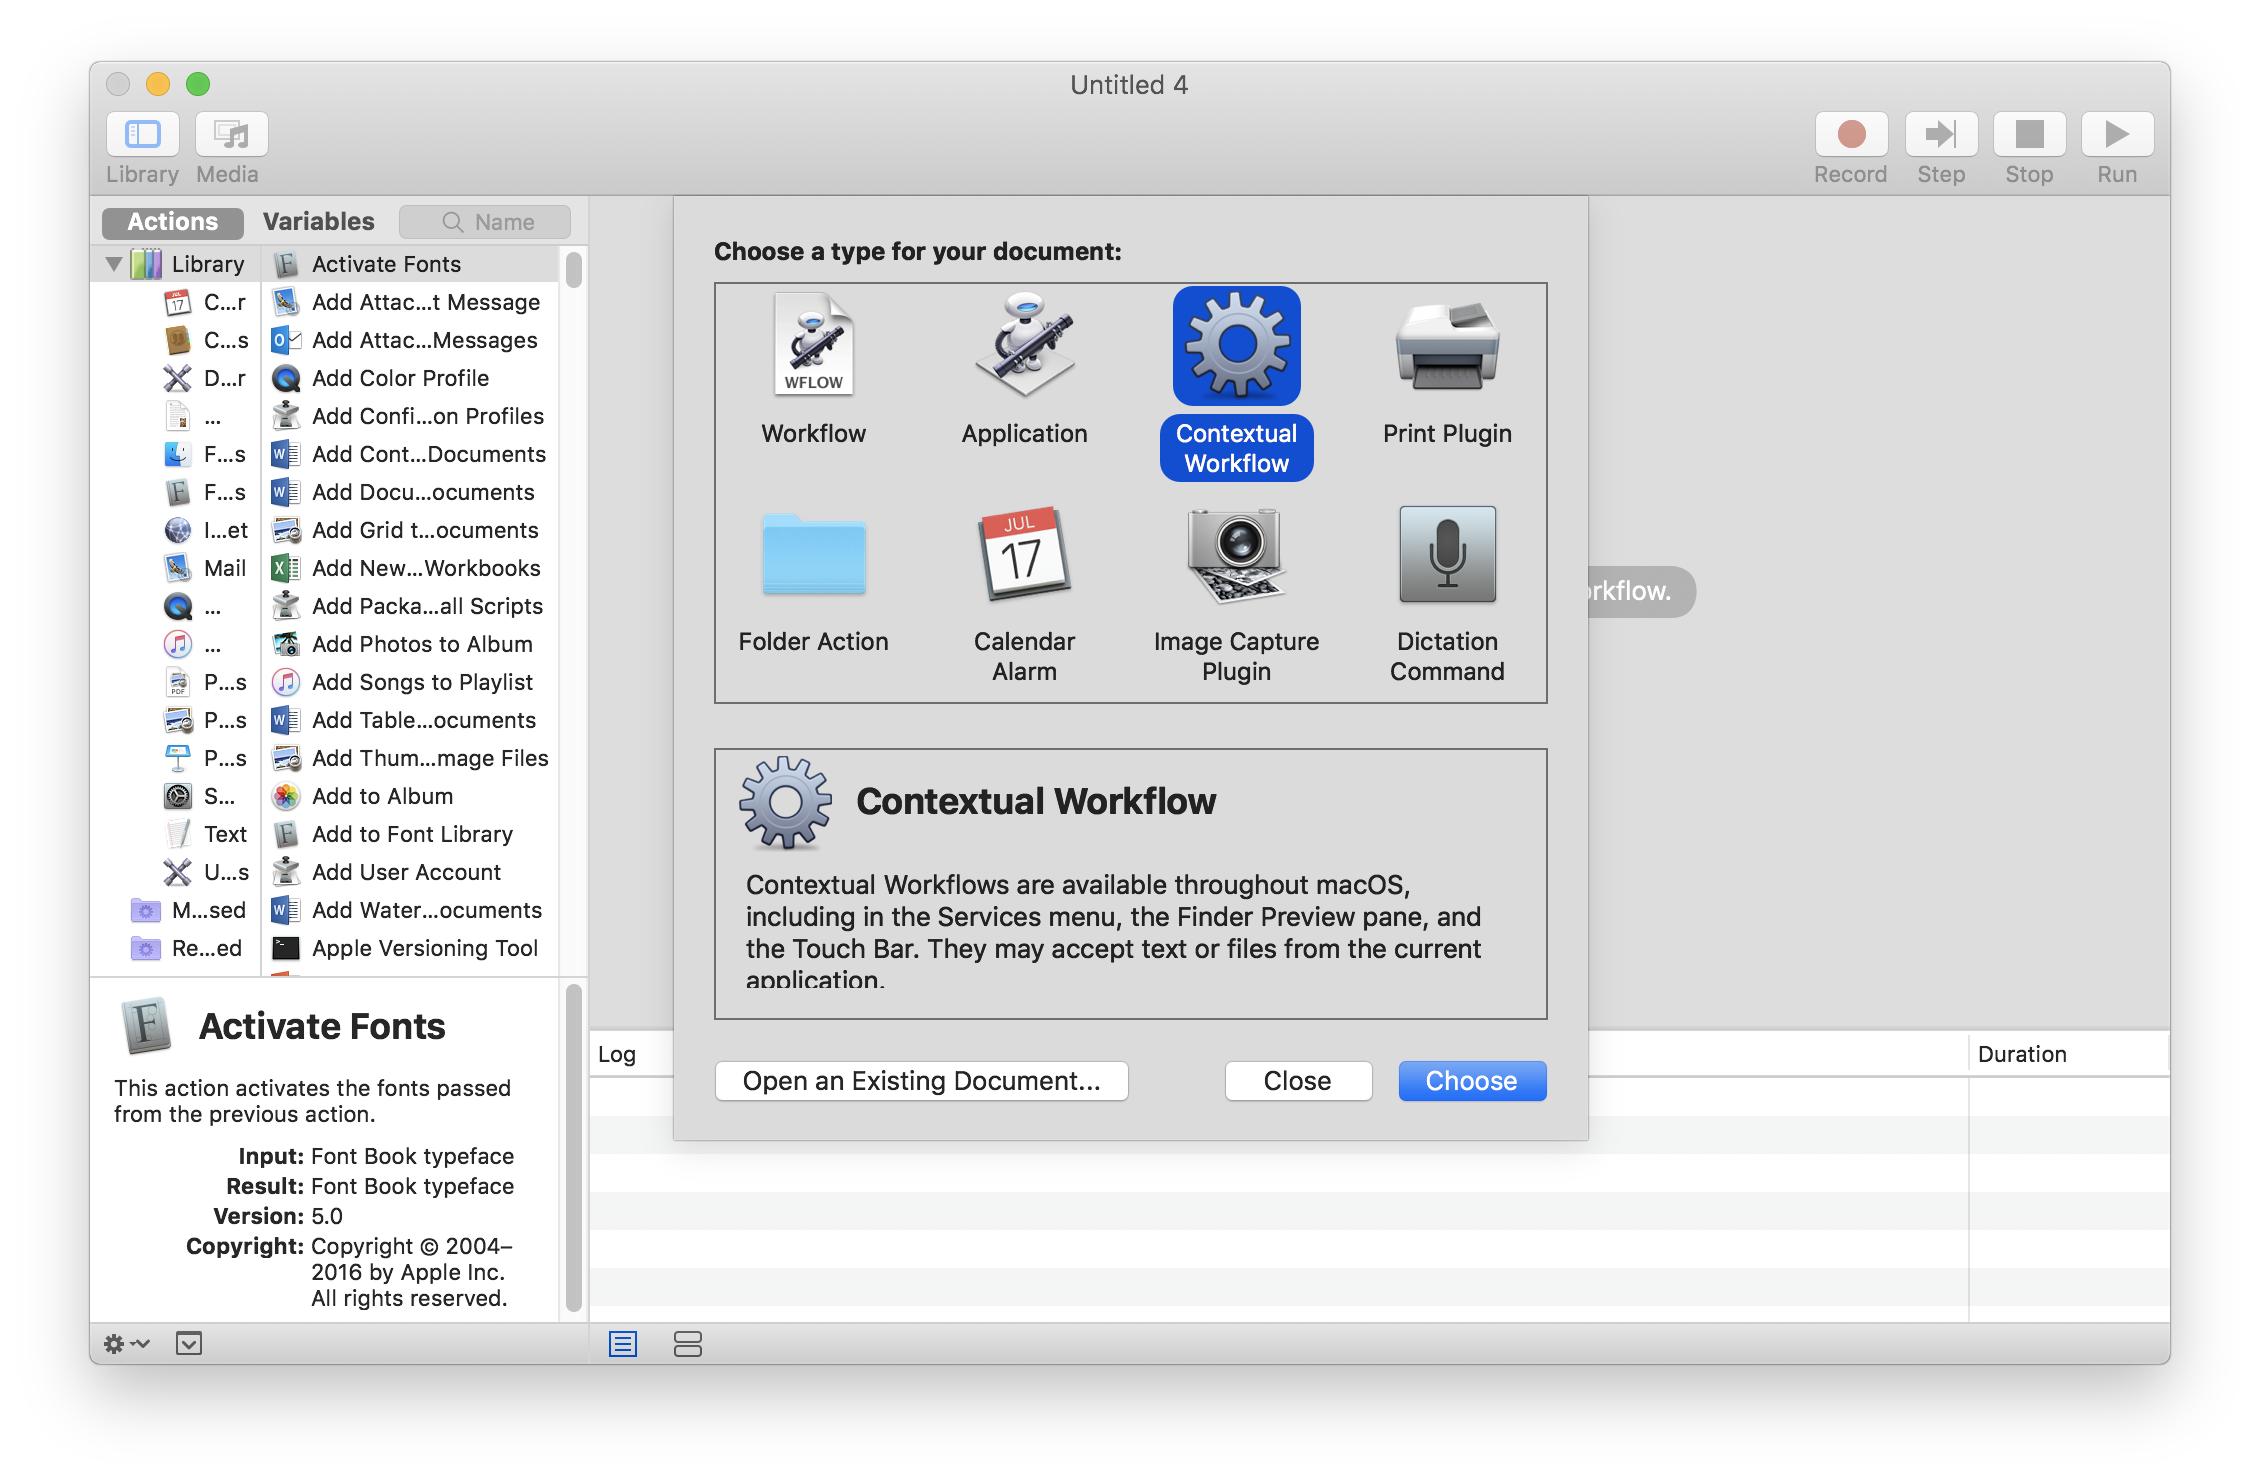
Step 2: In the bottom left, hit the New Document option. Select Quick Action and then hit Choose.
Step 3: Select PDF files from the dropdown list available at the top of the Automator window in the “Workflow receives current” field.
Step 4: On the sidebar, select PDFs. From the 2nd sidebar, double-click Watermark PDF Documents.
Step 5: In the top-right corner, choose Add and then select the image you would like to use as the watermark.
Note
Step 6: Once the file gets added, you should see it listed under the Watermarks section. Use the available options to adjust the watermark, including the opacity, angle, scale (size), and offset (position).
To adjust the offset, enter the X and Y values in the respective boxes. The entered values will displace the image along the X or Y axes respectively.
Note
Step 7: On the first sidebar, choose Files and Folders. From the second sidebar, choose Move Finder items.
Step 8: In the Move Finder Items, you can go ahead and specify the location where you would like the watermarked documents to be saved. To choose another location other than the default, choose Other.
Step 9: Once you are done, hit File > Save and then save the workflow with a name that you can easily identify in Quick Actions, for example, Watermark PDF.
Part 2: Add Watermark to PDF Using the Finder on Your MacOS
Now that we have already set up Quick Actions, watermarking the PDF documents should be easy. You will simply need to follow the steps below:
Step 1: Open Finder and choose the PDF file you would like to watermark.
Step 2: Right-click on the PDF document and choose Quick Actions.
Step 3: From the list that appears, select the name you gave your Quick Action in Step 9 above (in part 1). For our case, we will choose Watermark PDF.
Step 4: Finder will watermark the PDF document automatically and save it in the location you specified in step 8 above (in part 1).
Method 3: Use Adobe Acrobat to Add Watermark to PDF
If you work with PDF documents regularly, chances are, you have already invested in Adobe Acrobat. If you are yet to invest in the Adobe Acrobat and your goal is to add watermark to PDF only once, you can take advantage of the 7-day trial period offered by Adobe.
In this section, we will show you the steps you will need to follow to watermark your PDF file using Adobe Acrobat.
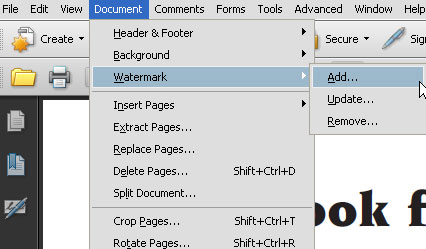
Step 1: Open the document in Adobe Acrobat. To do this, you will need to select the document > right-click the document > choose Open with > and then tap Adobe Acrobat.
Step 2: Once the document opens in Acrobat, select Tools > Edit PDF > Watermark > Add.
Step 3: (Optional) If your goal is to add the watermark to a range of pages selectively, choose Page Range Options. Specify a page range and then select the Subset option, as per your preferences.
Step 4: Specify the watermark: reuse saved watermarks; create a new text watermark; use an image as the watermark.
Step 5: Adjust the position and appearance of the watermark, as per your preference.
Method 4: Add Watermarks to PDF Online
If the document to which you would like to add a watermark is not sensitive, you can use online tools. When using the online tools, you will have to upload the file to a third-party server. This means that you cannot control who sees or does not see the document. If your document is sensitive, stick with the methods described above.
Below, we have a couple of online tools you can use to add watermark to PDF.
Sejda.com
This tool allows you to watermark a document featuring a maximum of 50 MB and 200 pages. 3 tasks are allowed per hour.
Step 1: Visit https://www.sejda.com/watermark-pdf using a computer web browser.
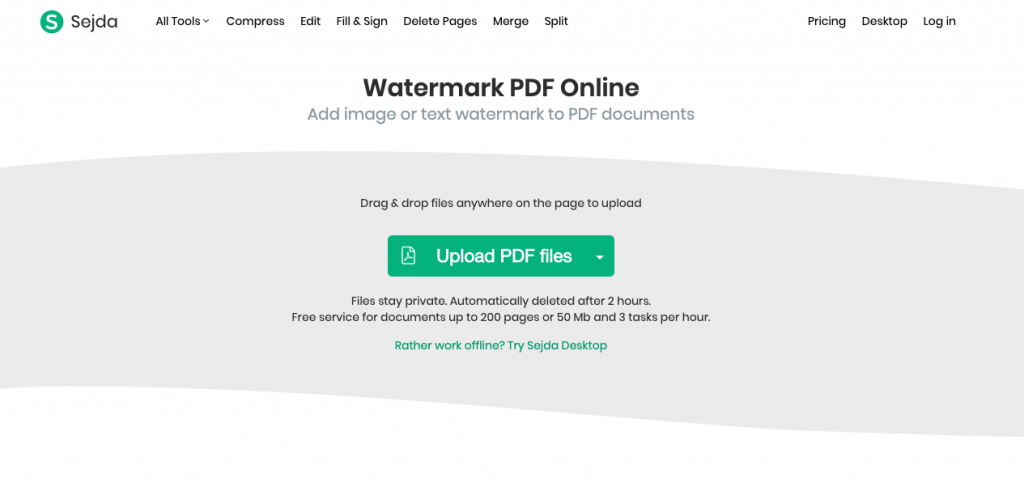
Step 2: Select the Upload PDF Files button. If your document is online, hit the Drop-Down allow to access the Dropbox, Google Drive, OneDrive, and Web Address (URL) options.
Step 3: After the upload, you can either hit the Add Text button or the Add Image button. This will depend on the type of watermark you are planning to add to your document.
If you choose the Add Text option, Sejda.com will allow you to change the color, rotation, font family, etc.
If you choose the Add Image option, you will be allowed to use a JPG, JPEG, GIF, PNG, and SVG formats. You can also adjust the image as per your preferences.
Step 4: Finally, hit the Watermark PDF button and then download the document once the process is complete.
SodaPDF.com
This is another online tool that lets you watermark your PDF files quickly, easily, and for free. The tool can work with the documents you have stored on your local hard disk and the documents on Dropbox and Google Drive.
Step 1: Visit https://www.sodapdf.com/add-watermark-to-pdf/
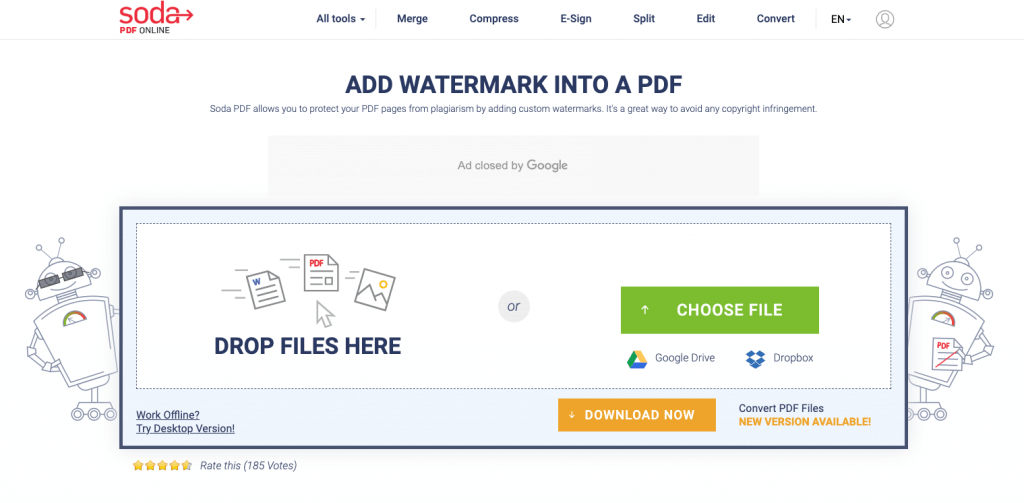
Step 2: Select the file you would like to watermark.
Step 3: Add the text or image you would like to use as a watermark. You can always adjust the text and image to fit your preferences. The tool does allow you to select the pages where you would like the watermark to appear.
Step 4: After adding the watermark to your document, you can go ahead and download the document. The tool can also email you a link to the document. The link will be valid for 24 hours.
Performing a simple search on the internet using the keywords “add watermark to PDF Online” should help you pull up numerous online tools you can use. All the tools will follow basic steps: they will require you to upload the PDF file > add the watermark and then adjust it > download the document.
Summary
Adding watermarks to PDF documents is not complicated. All you will need is the right tool and the right steps to use the tool – this article has both of these. If your goal is to save your money, you should find free desktop tools in this article. Also, most of the online tools are 100% free. When privacy is a concern, use desktop tools.